Step 1
Go to the “Workflows” tab and click “Create New Workflow”. Note: You can’t create more than 10 Workflows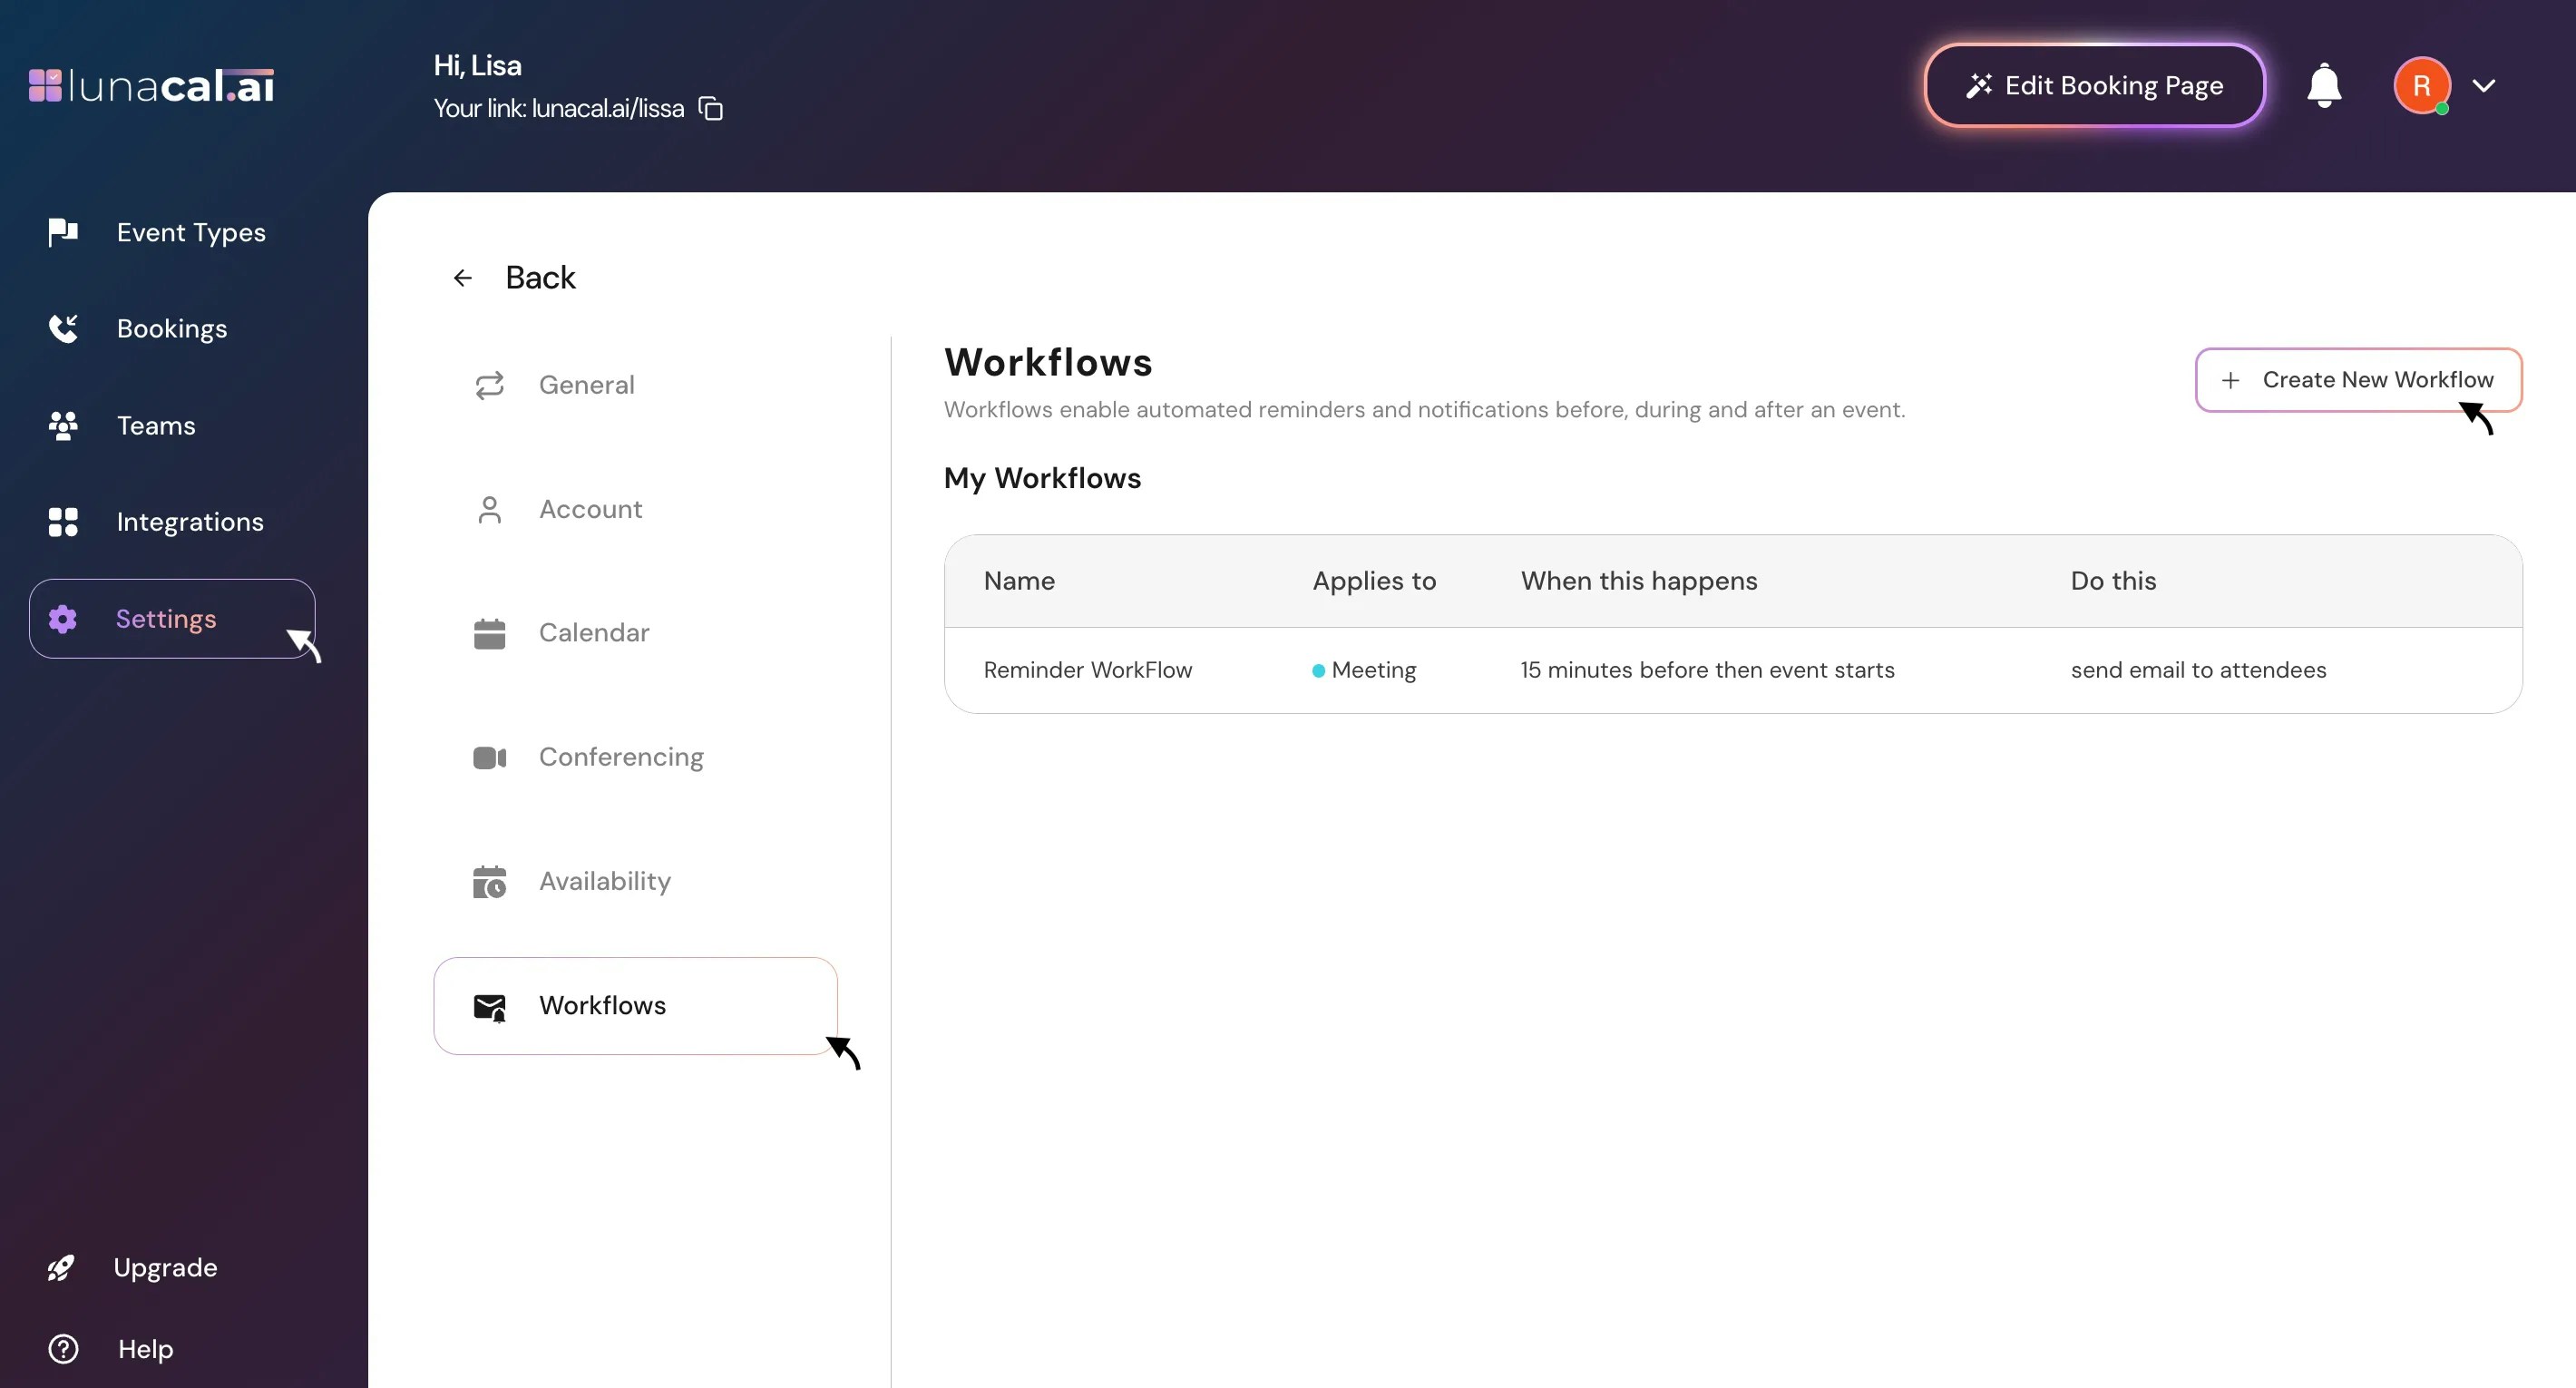
Step 2
Provide a unique name for your workflow in the designated field.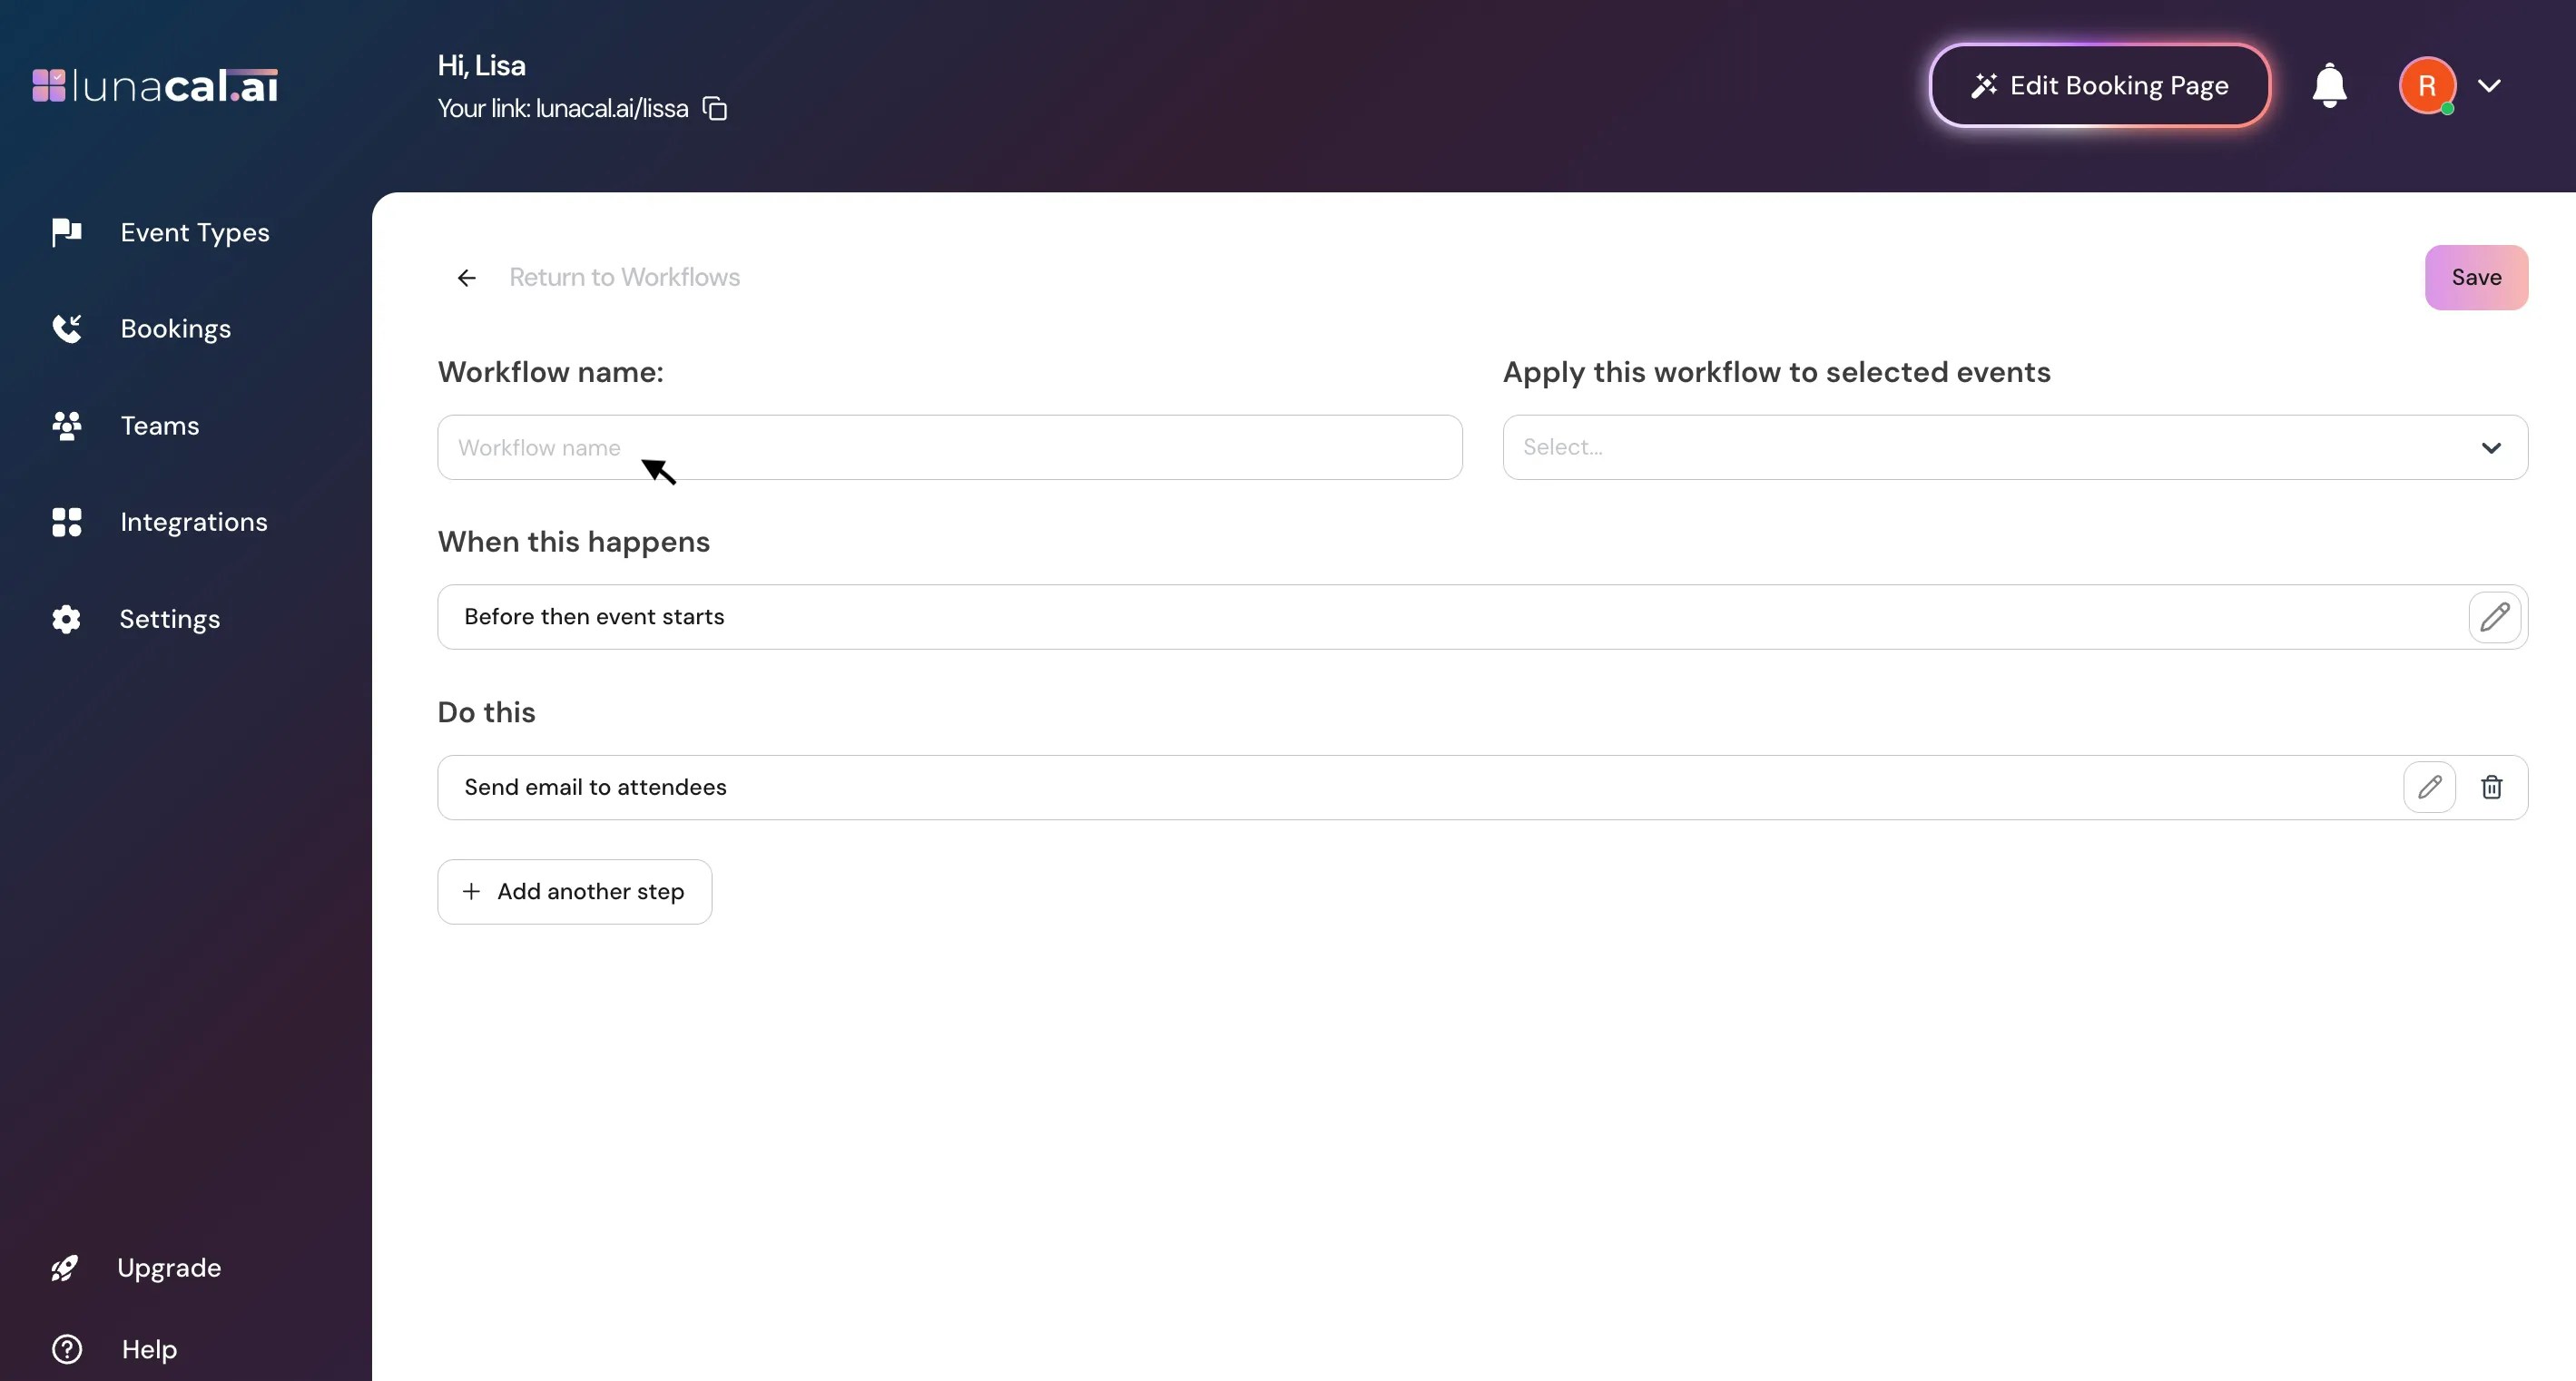
Step 3
Determine the event type to which the workflow will apply. For instance i’m selecting “Meeting”, You can also select multiple events.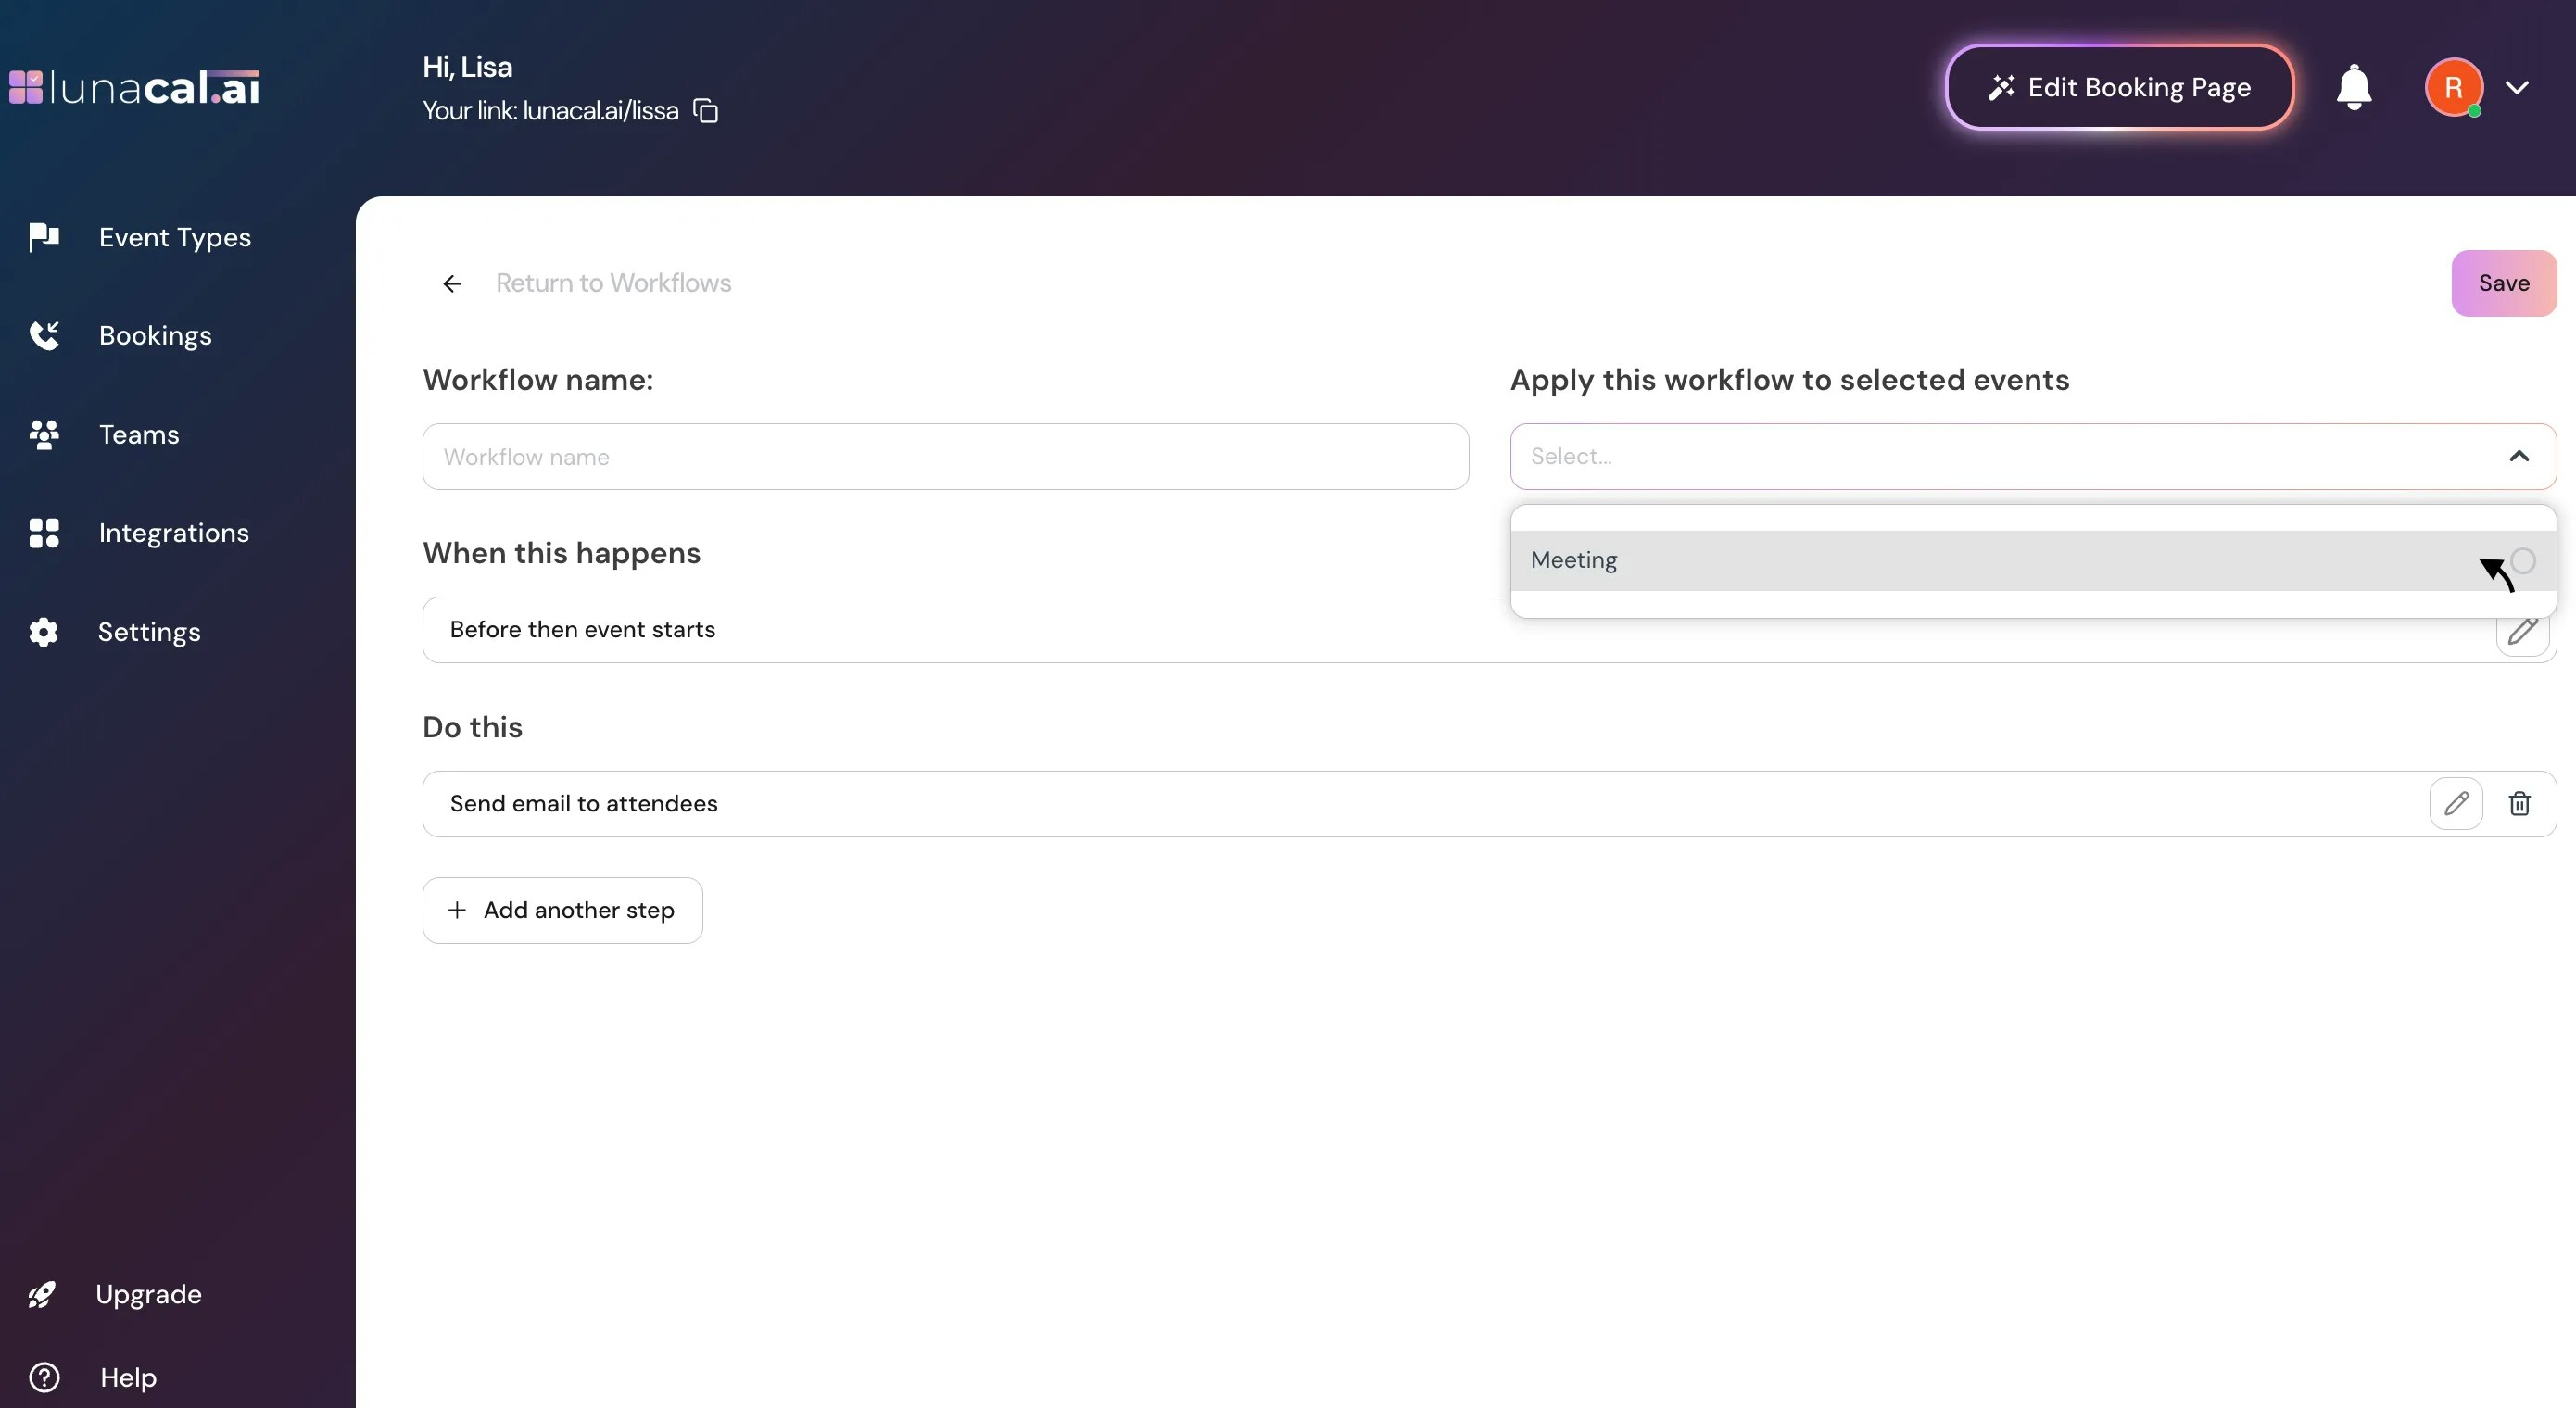
Step 4
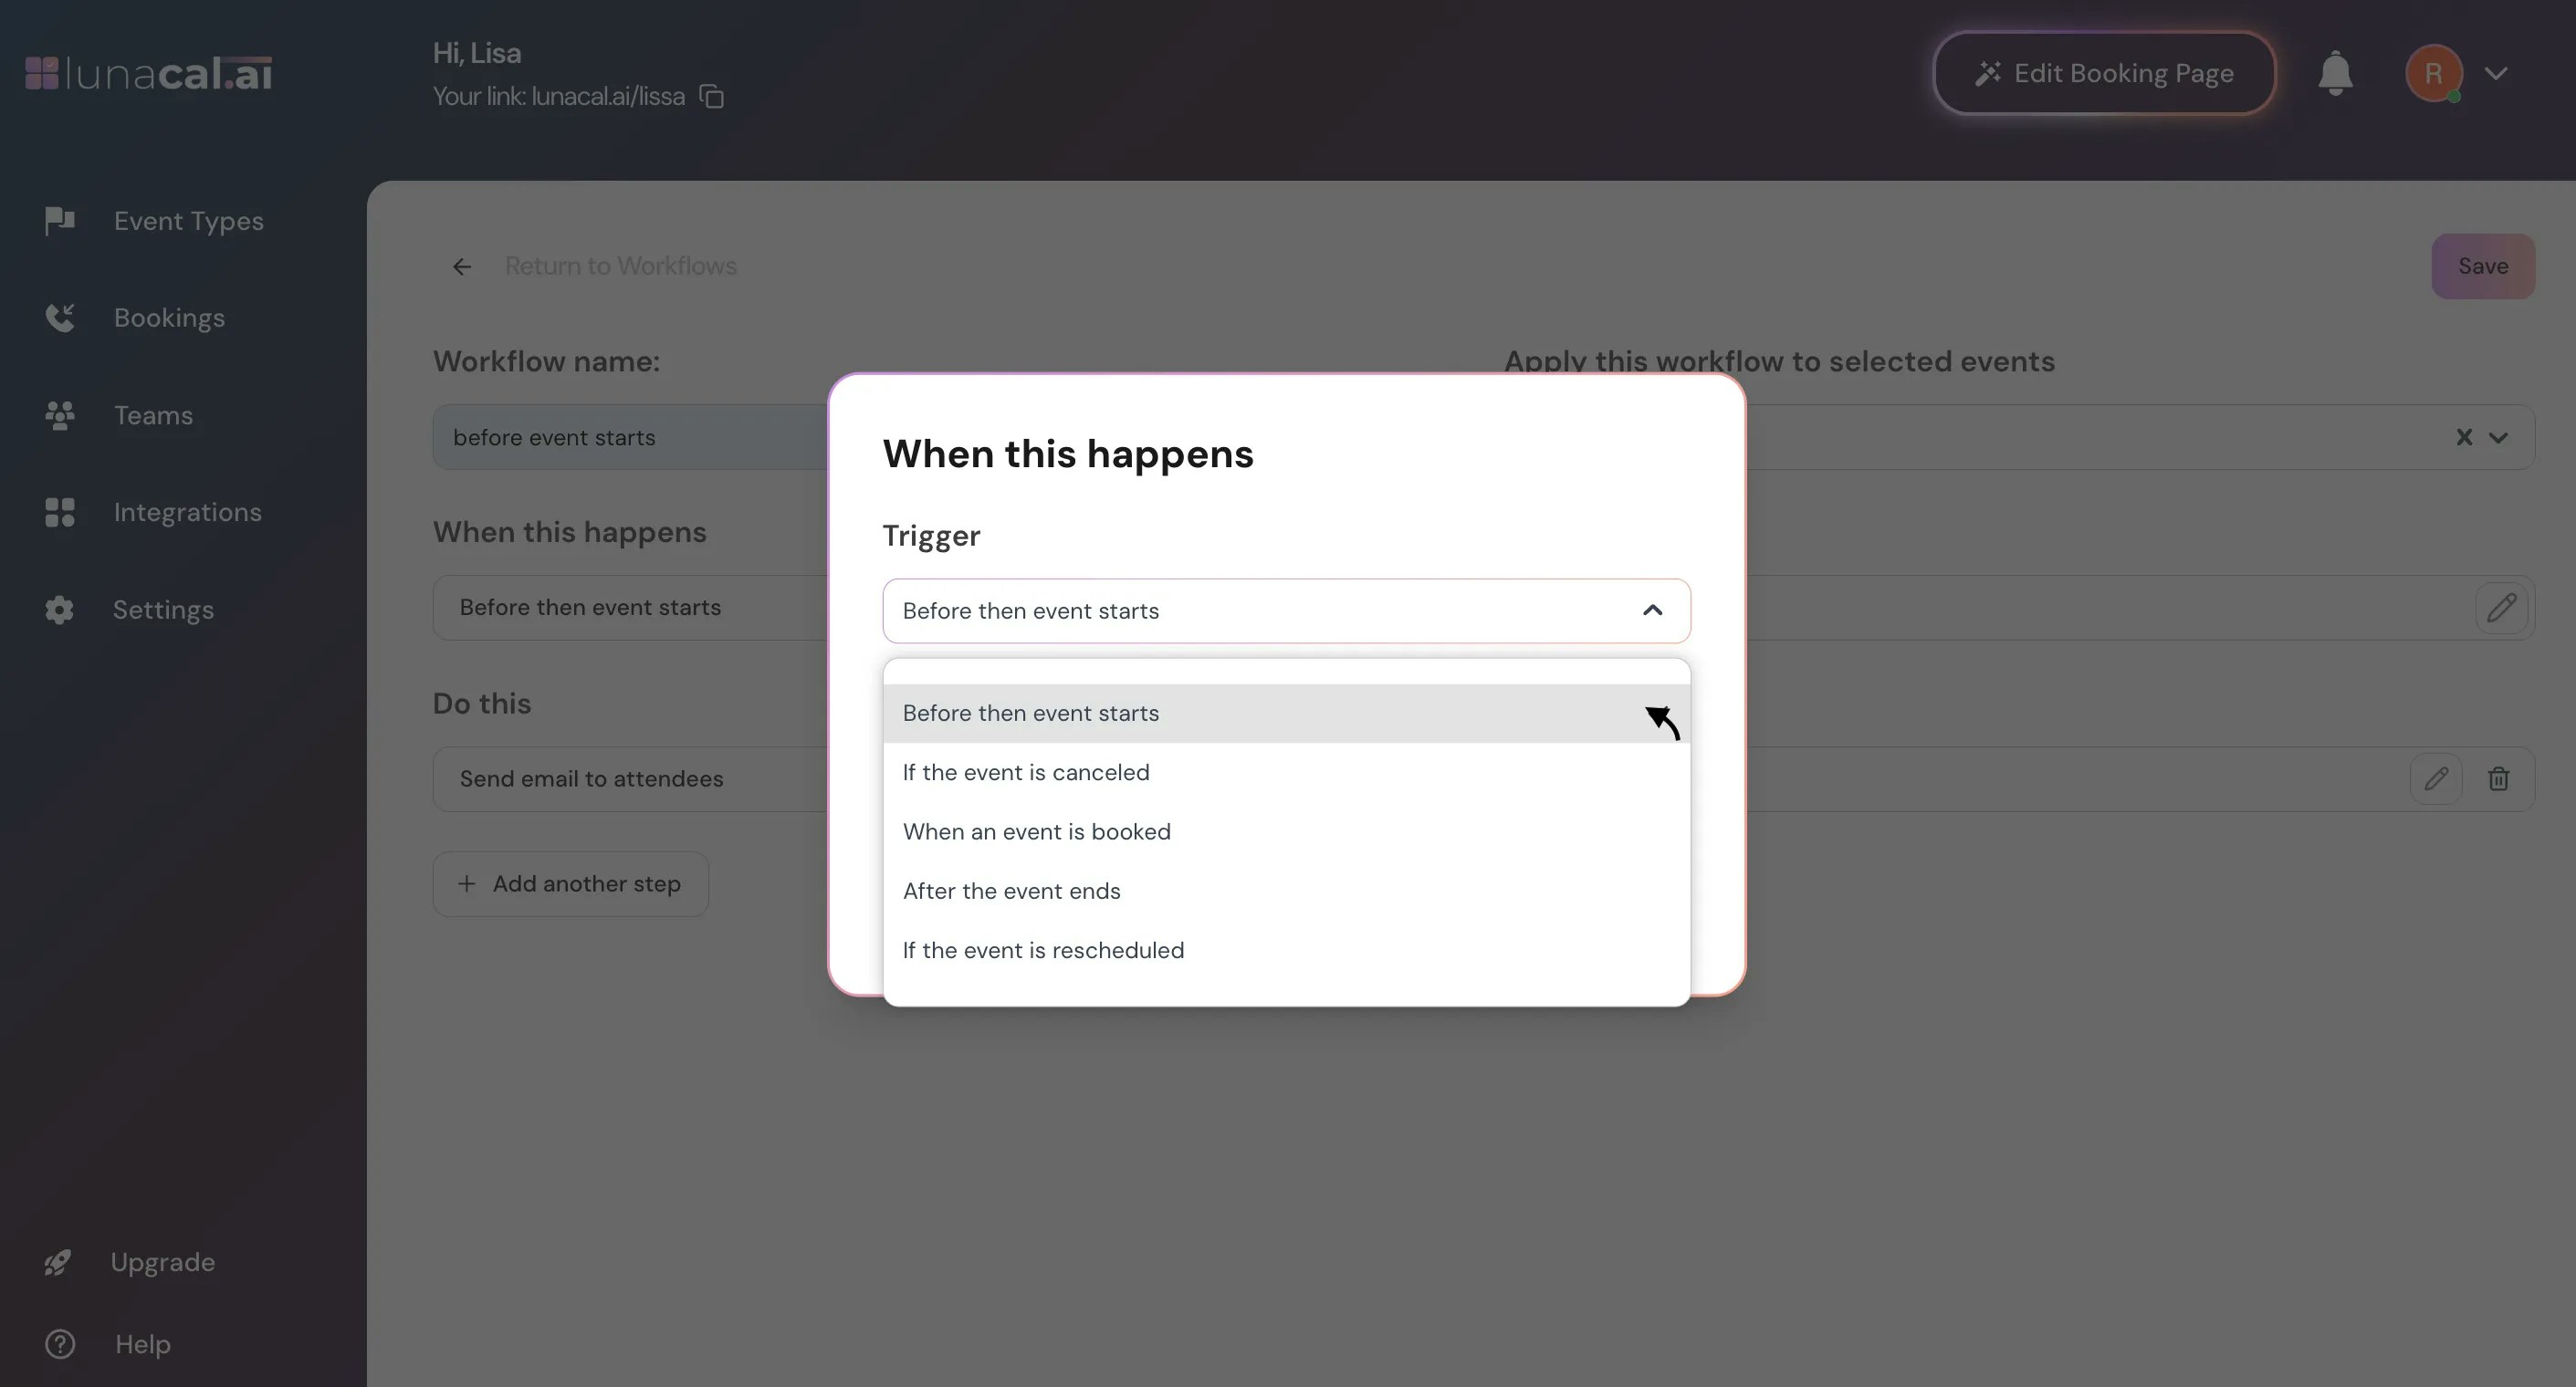
Choose when the workflow should be triggered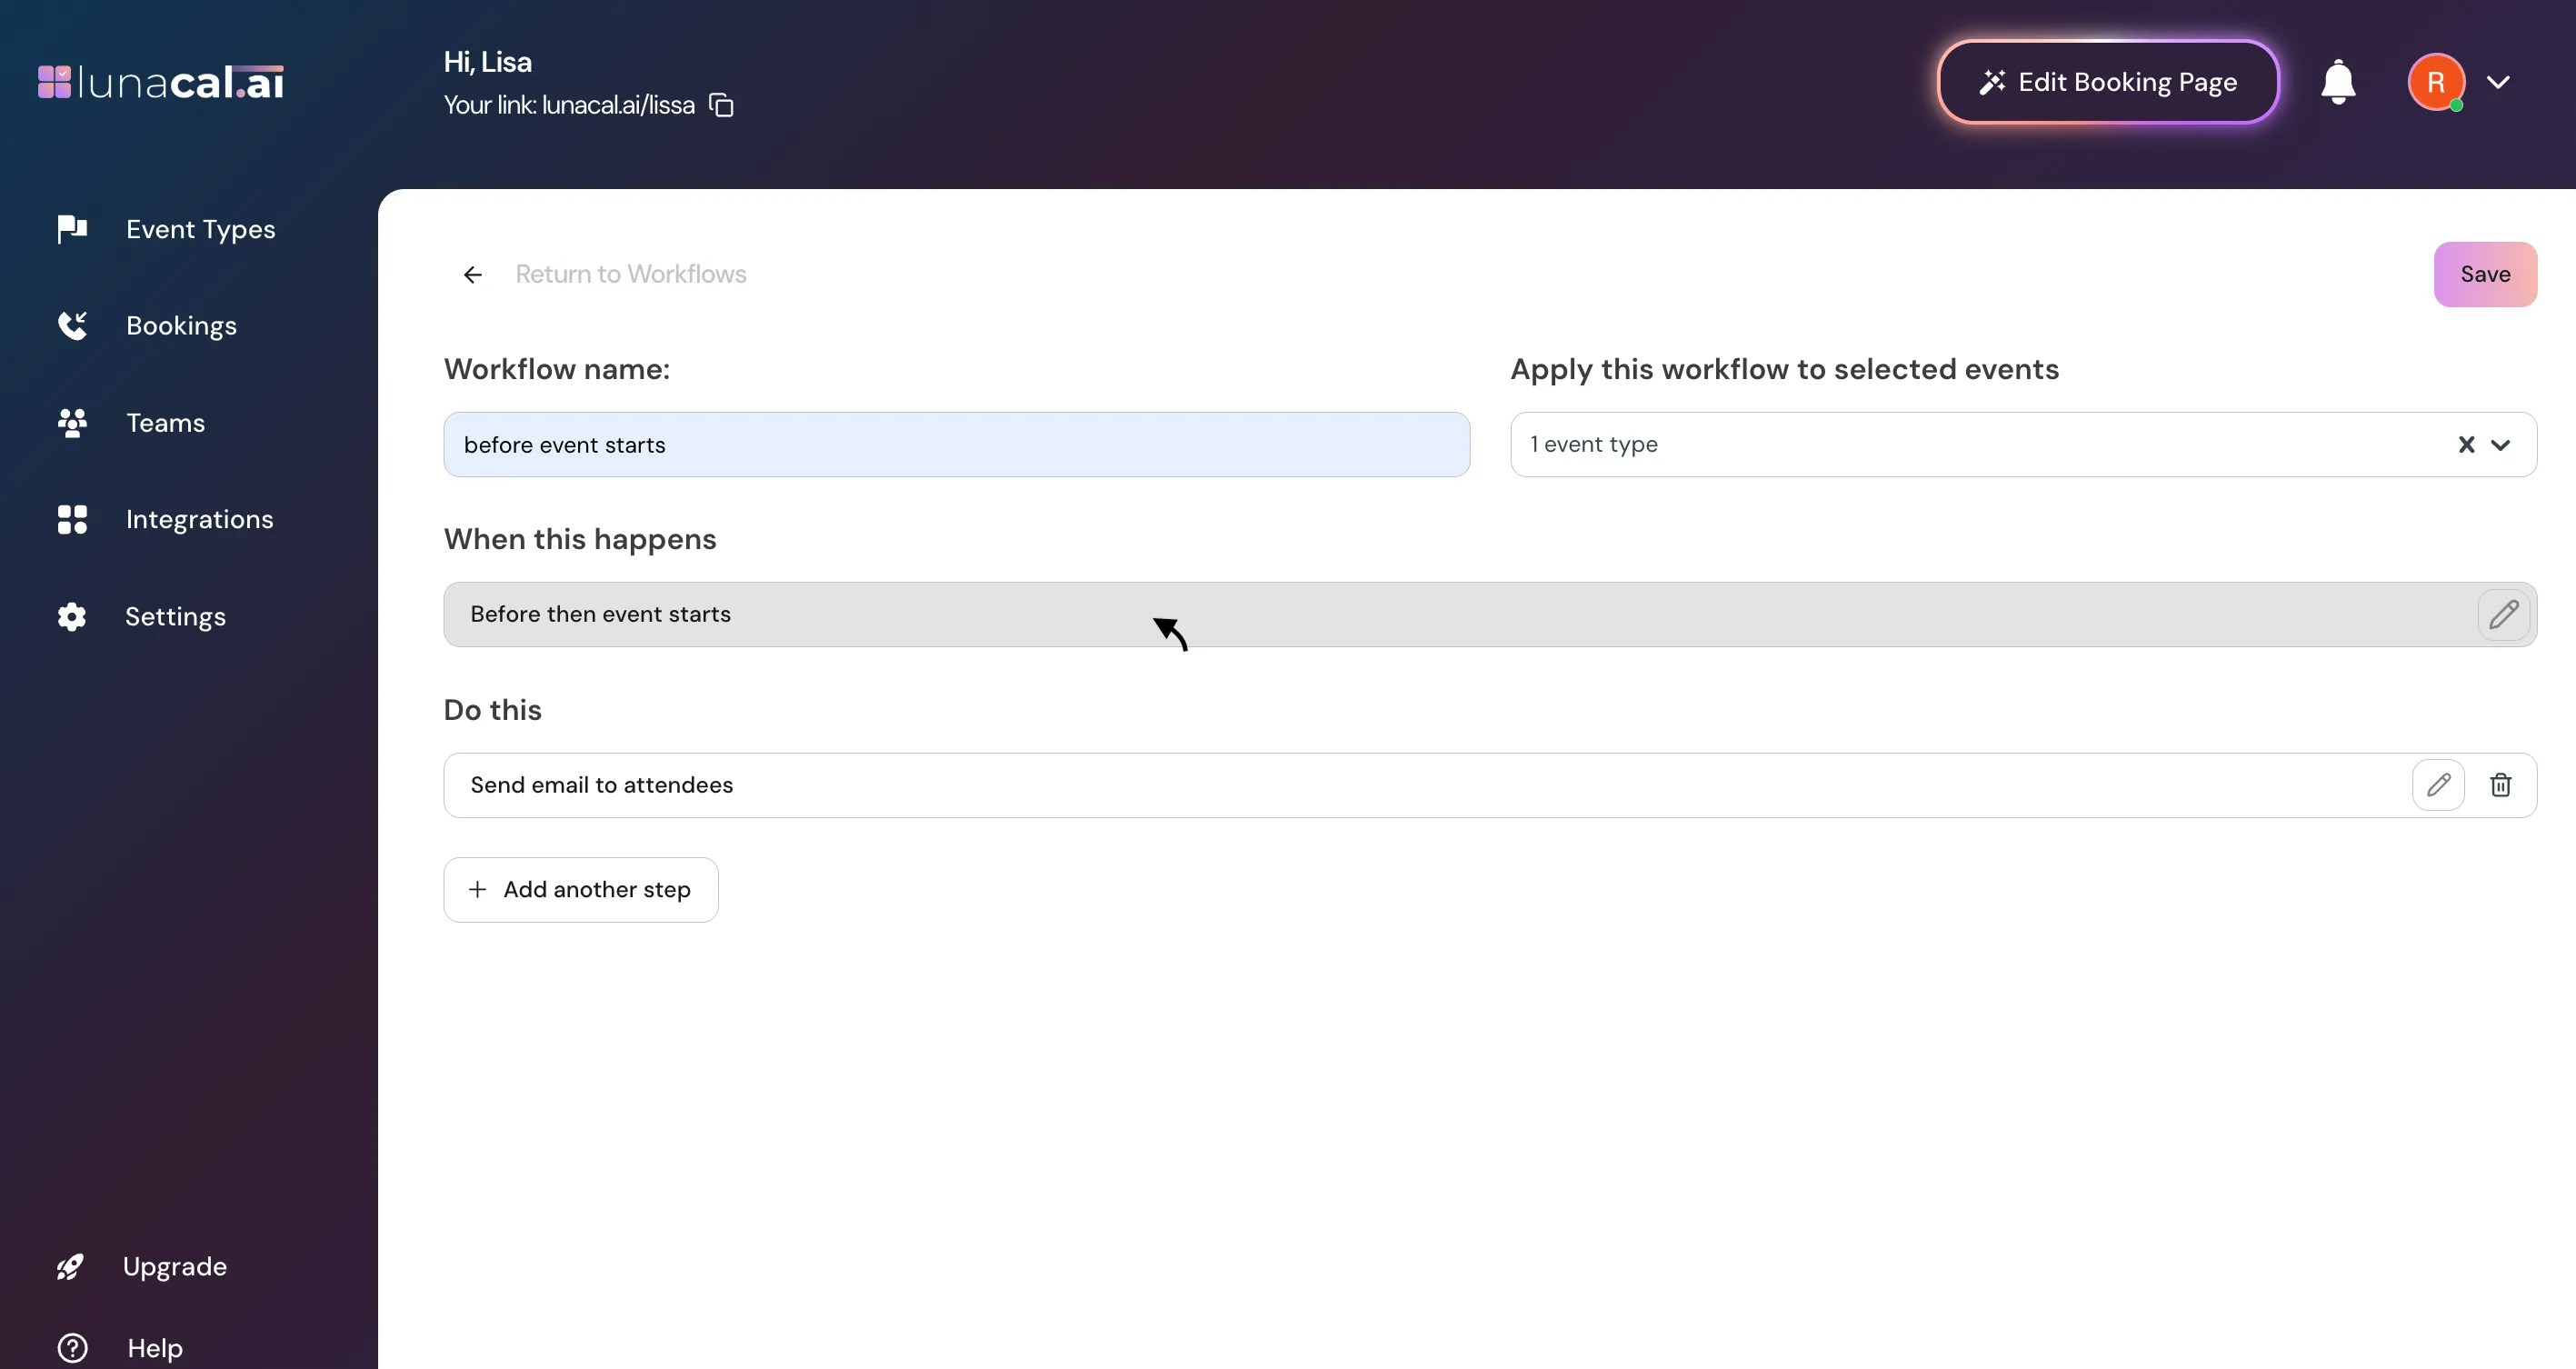
Step 5
Pick a trigger: “Before an event starts”, “When event is canceled”, “When new event is booked”, “After event ends”, or “When event is rescheduled”.Example: Send a reminder “Before an event starts” so attendees don’t miss the call.
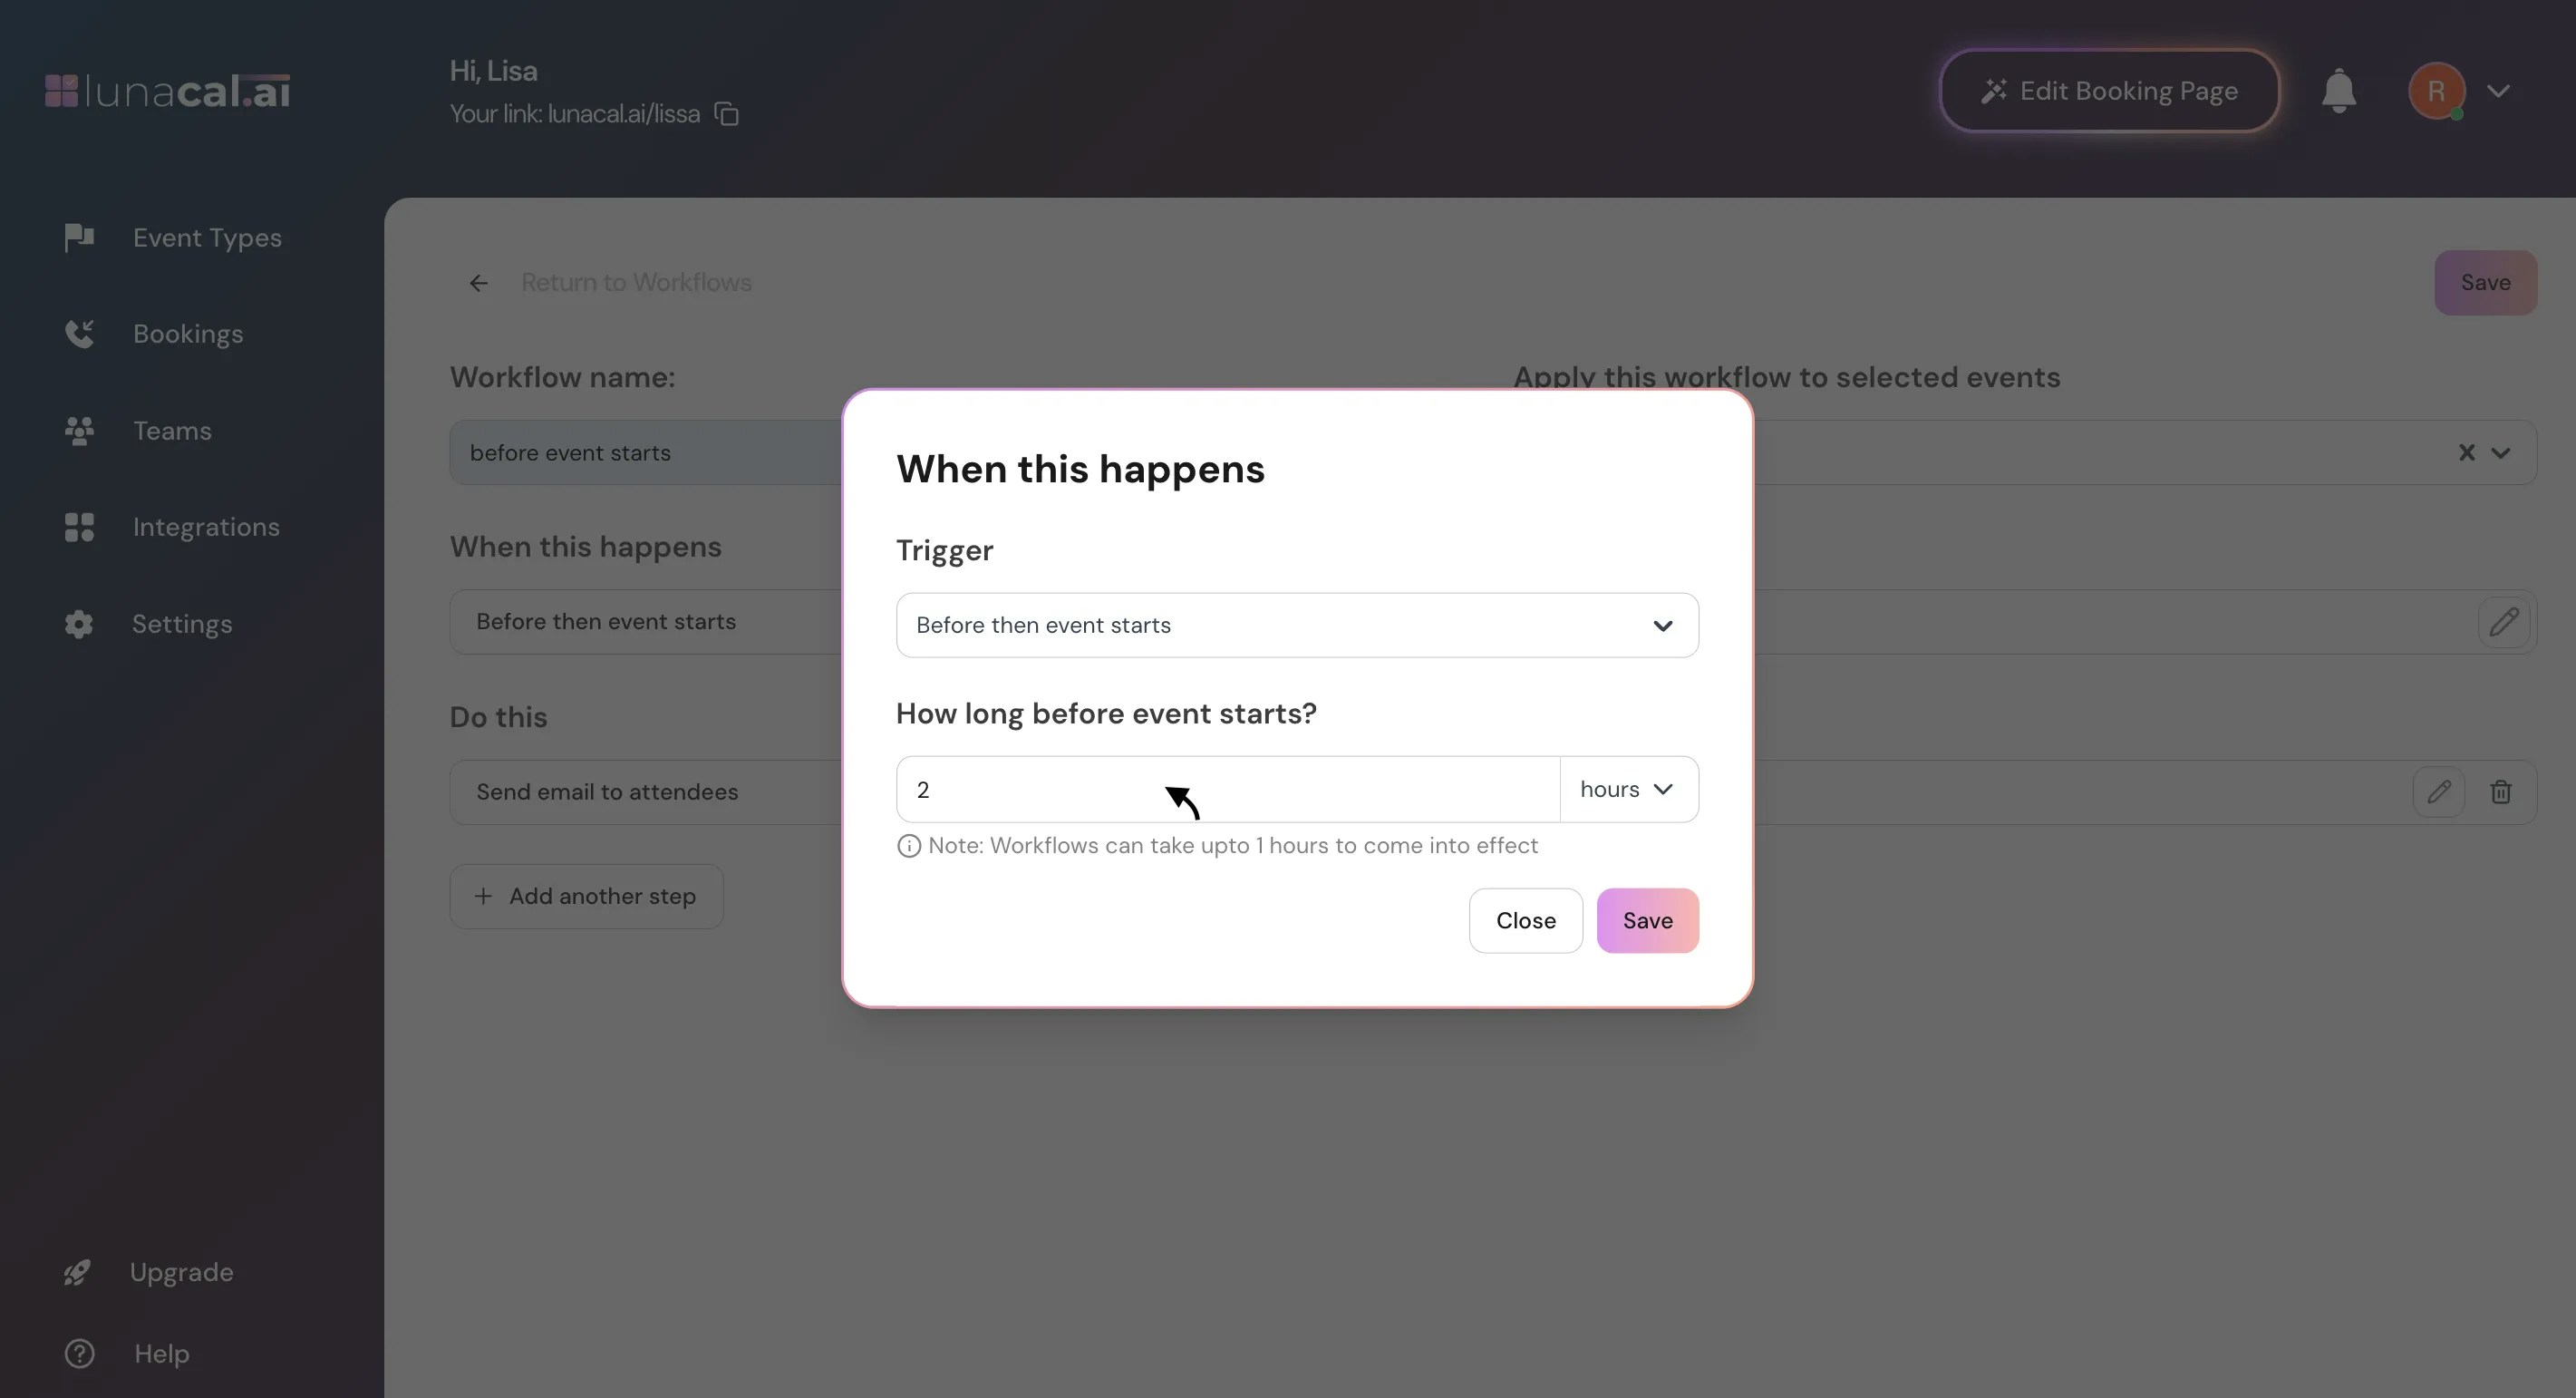
Step 6
If using a “Before an event starts” trigger, you have to set the time (e.g., 2 Hours).Example: For first-time “Meeting” calls, set 24 Hours so people prep earlier.
Step 7
Specify the recipients of the workflow trigger.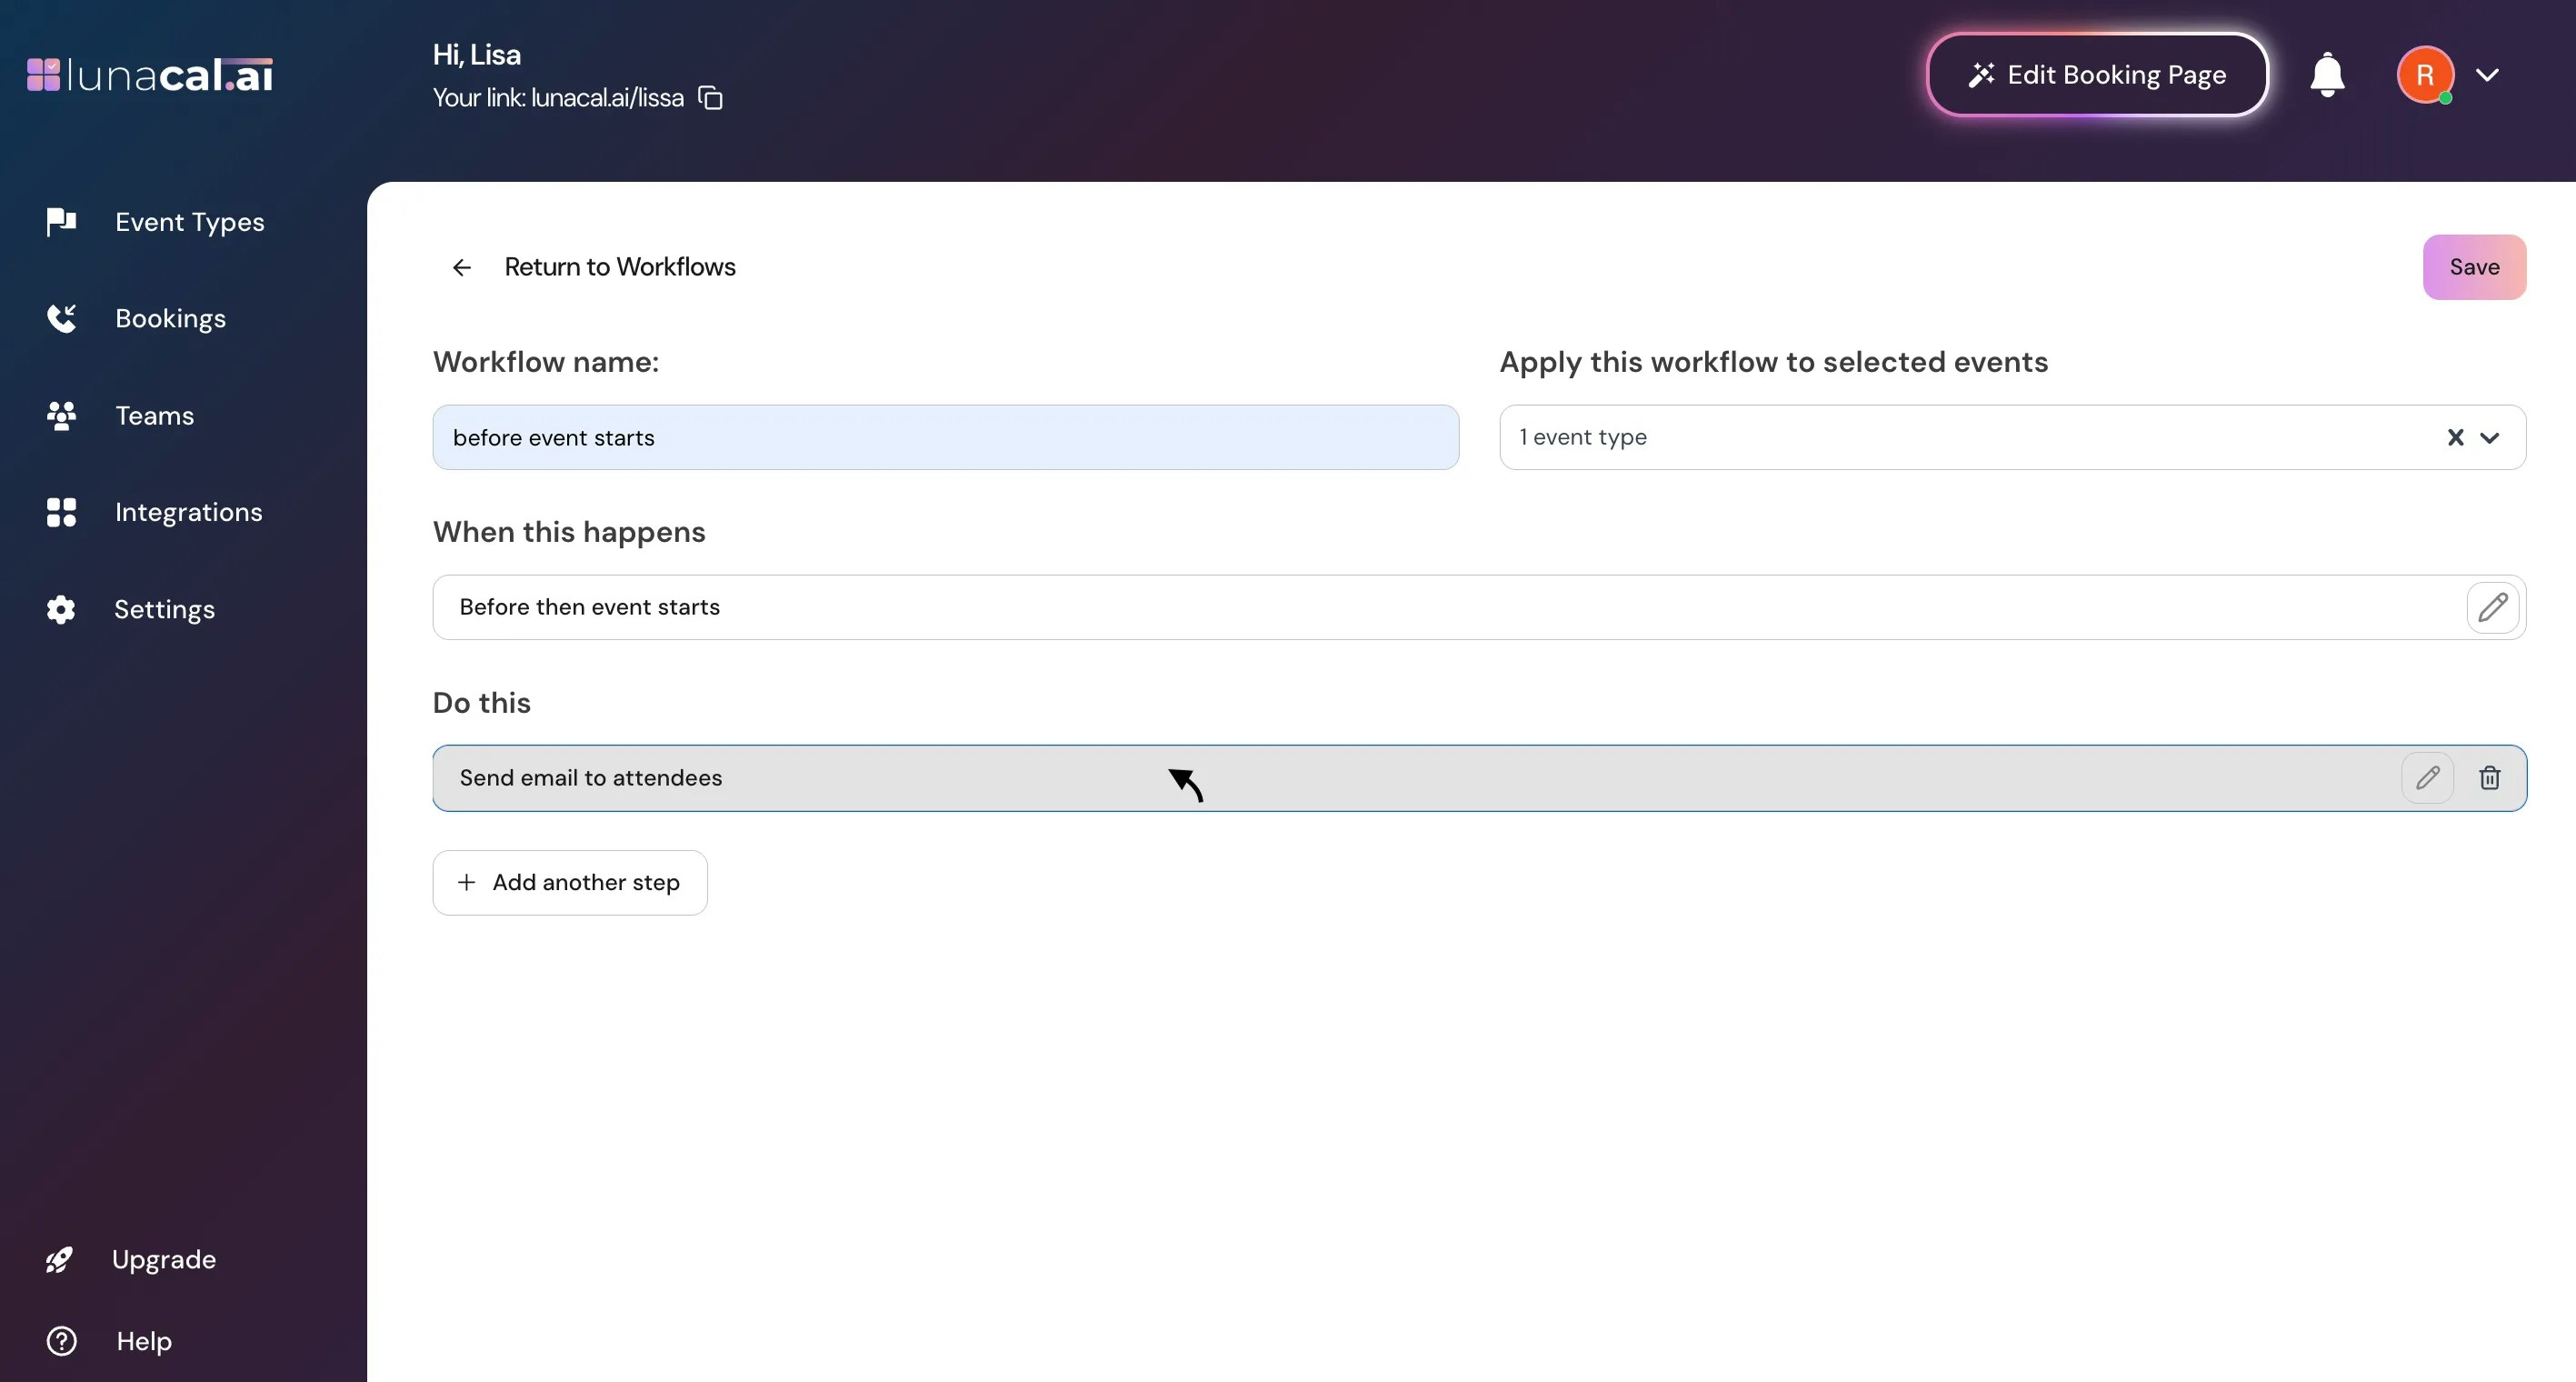
Step 8
Select “attendees”, “host”, or add a specific email.Example: Add your coordinator’s email so they get alerts for last-minute changes.
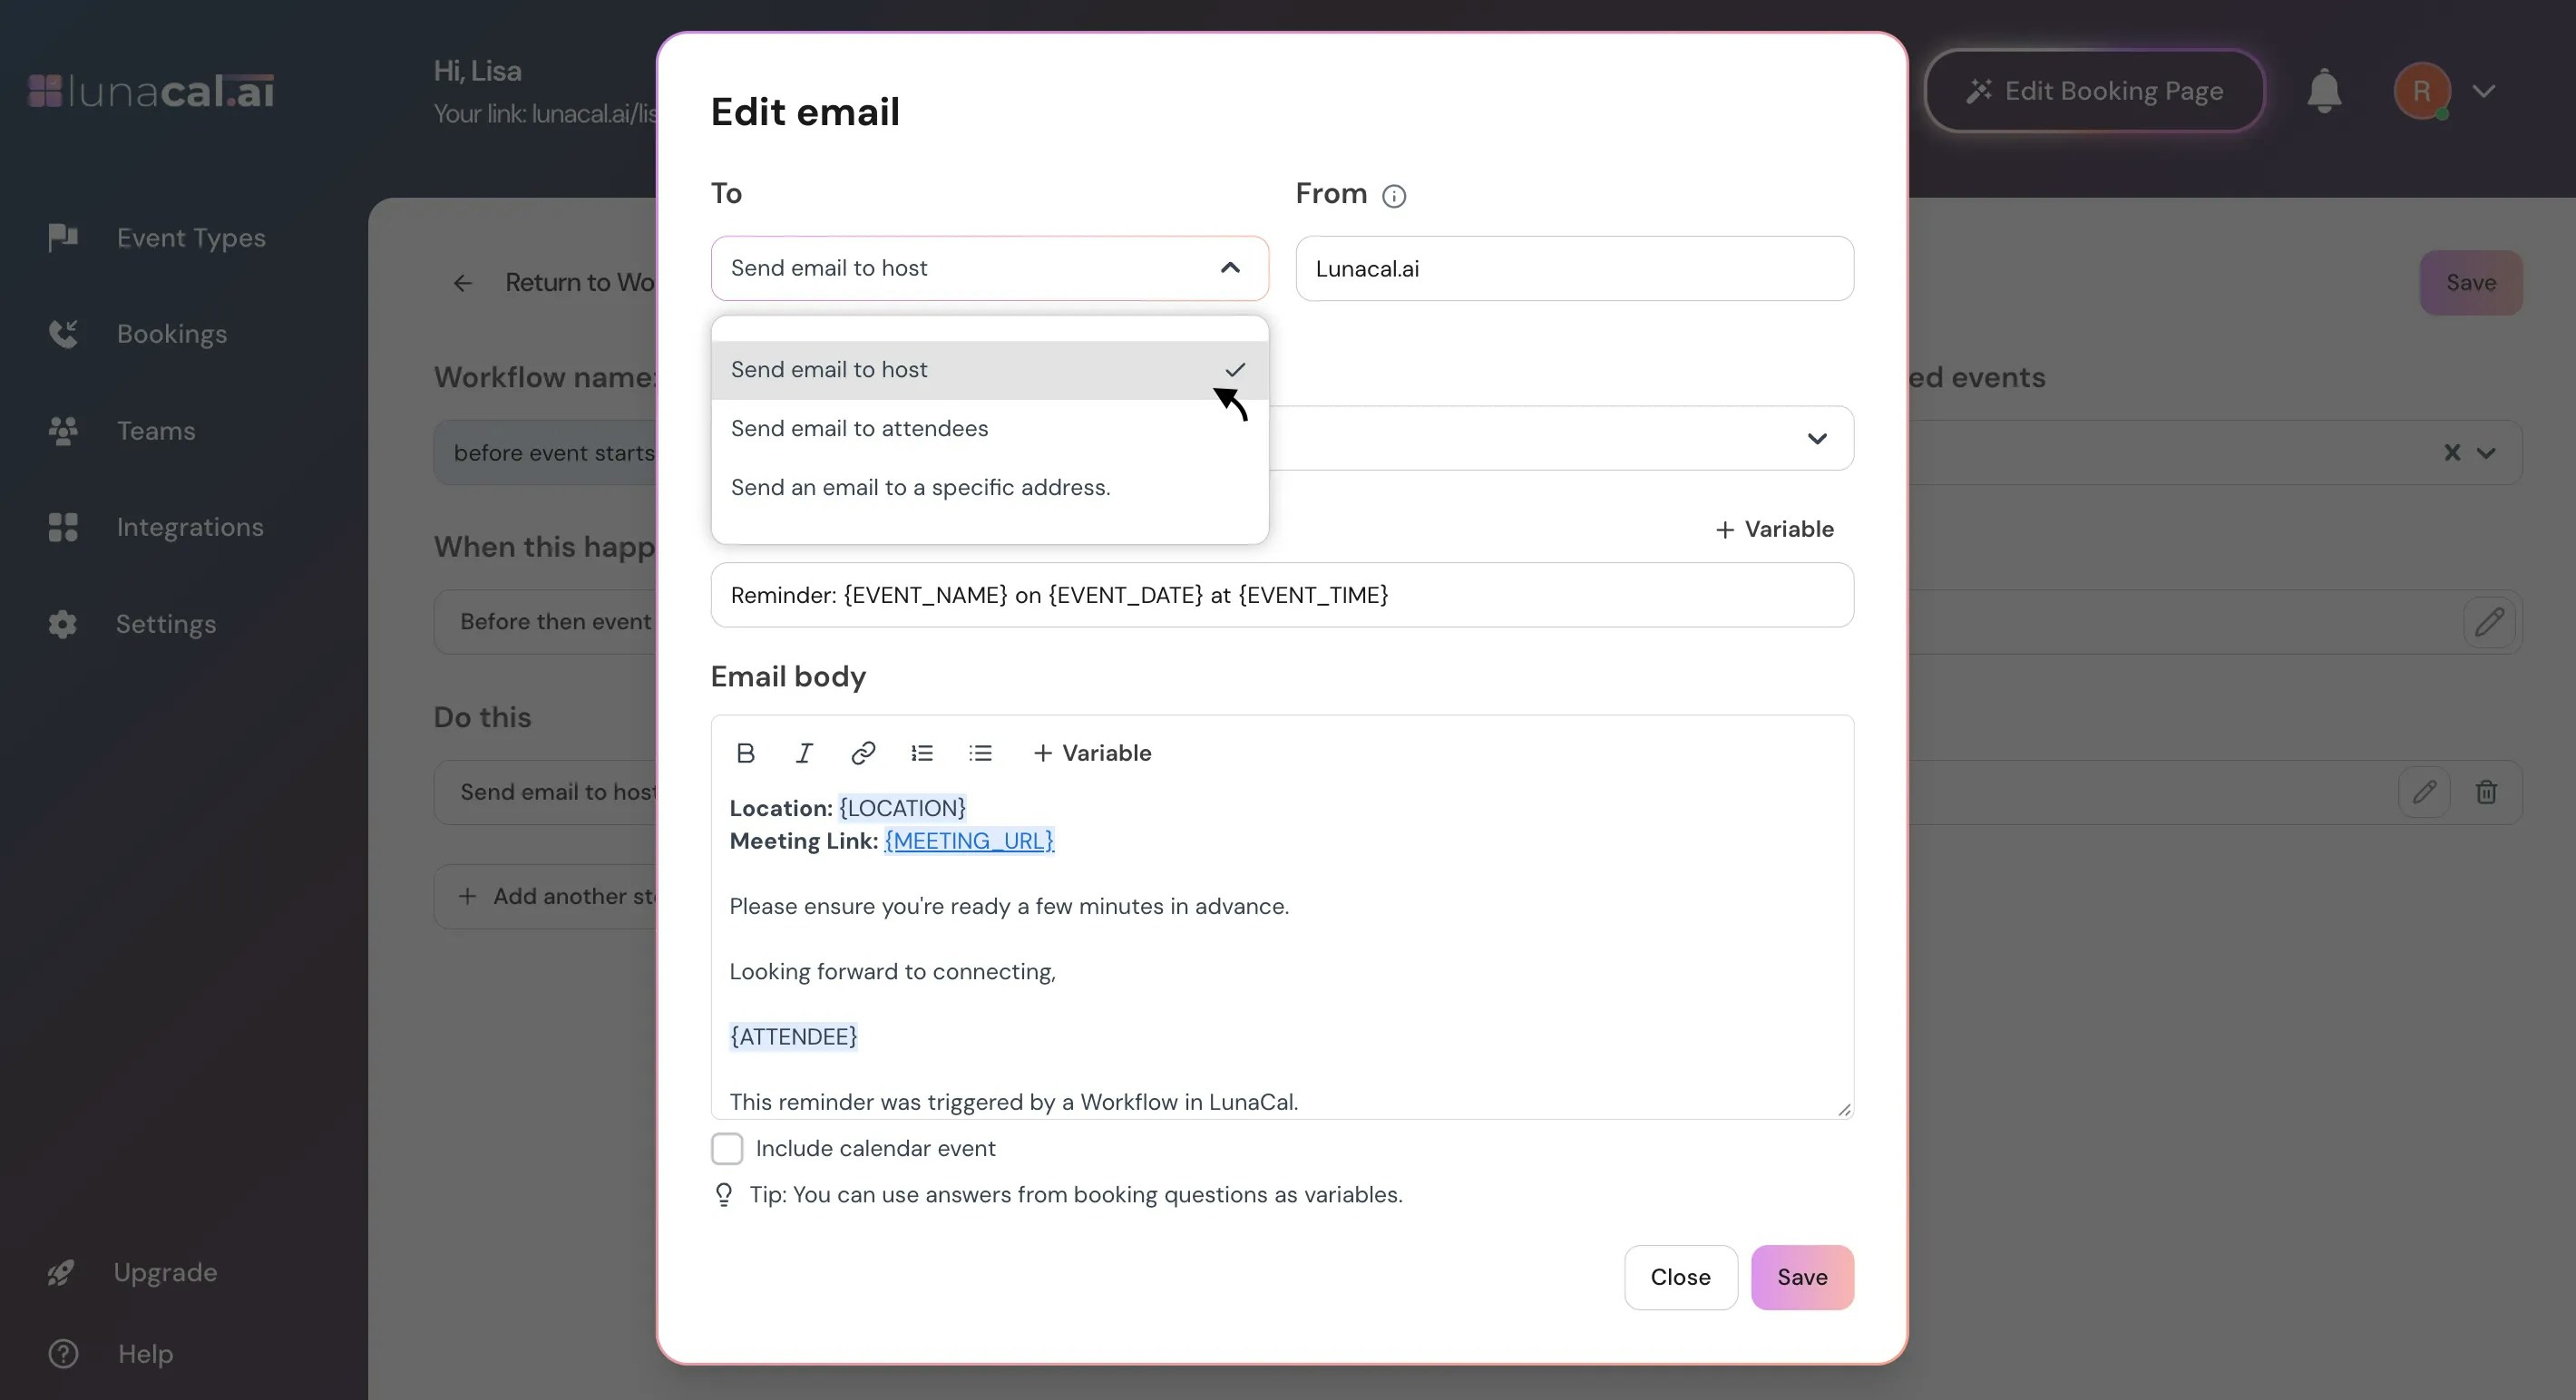
Step 9
There are multiple template options to set for attendee workflows,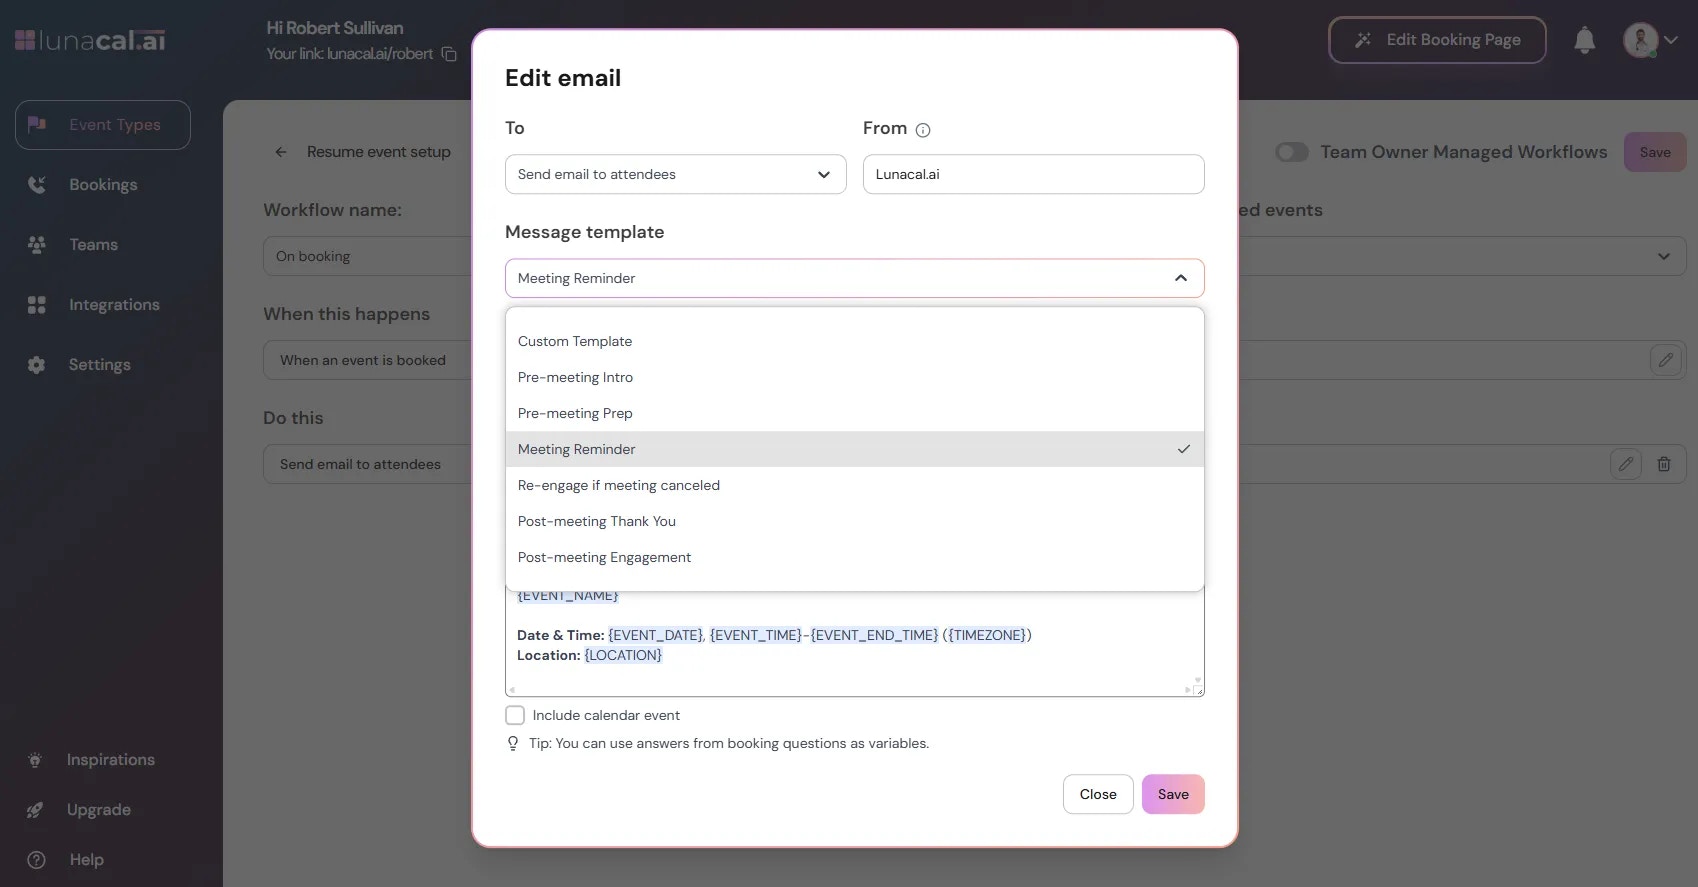
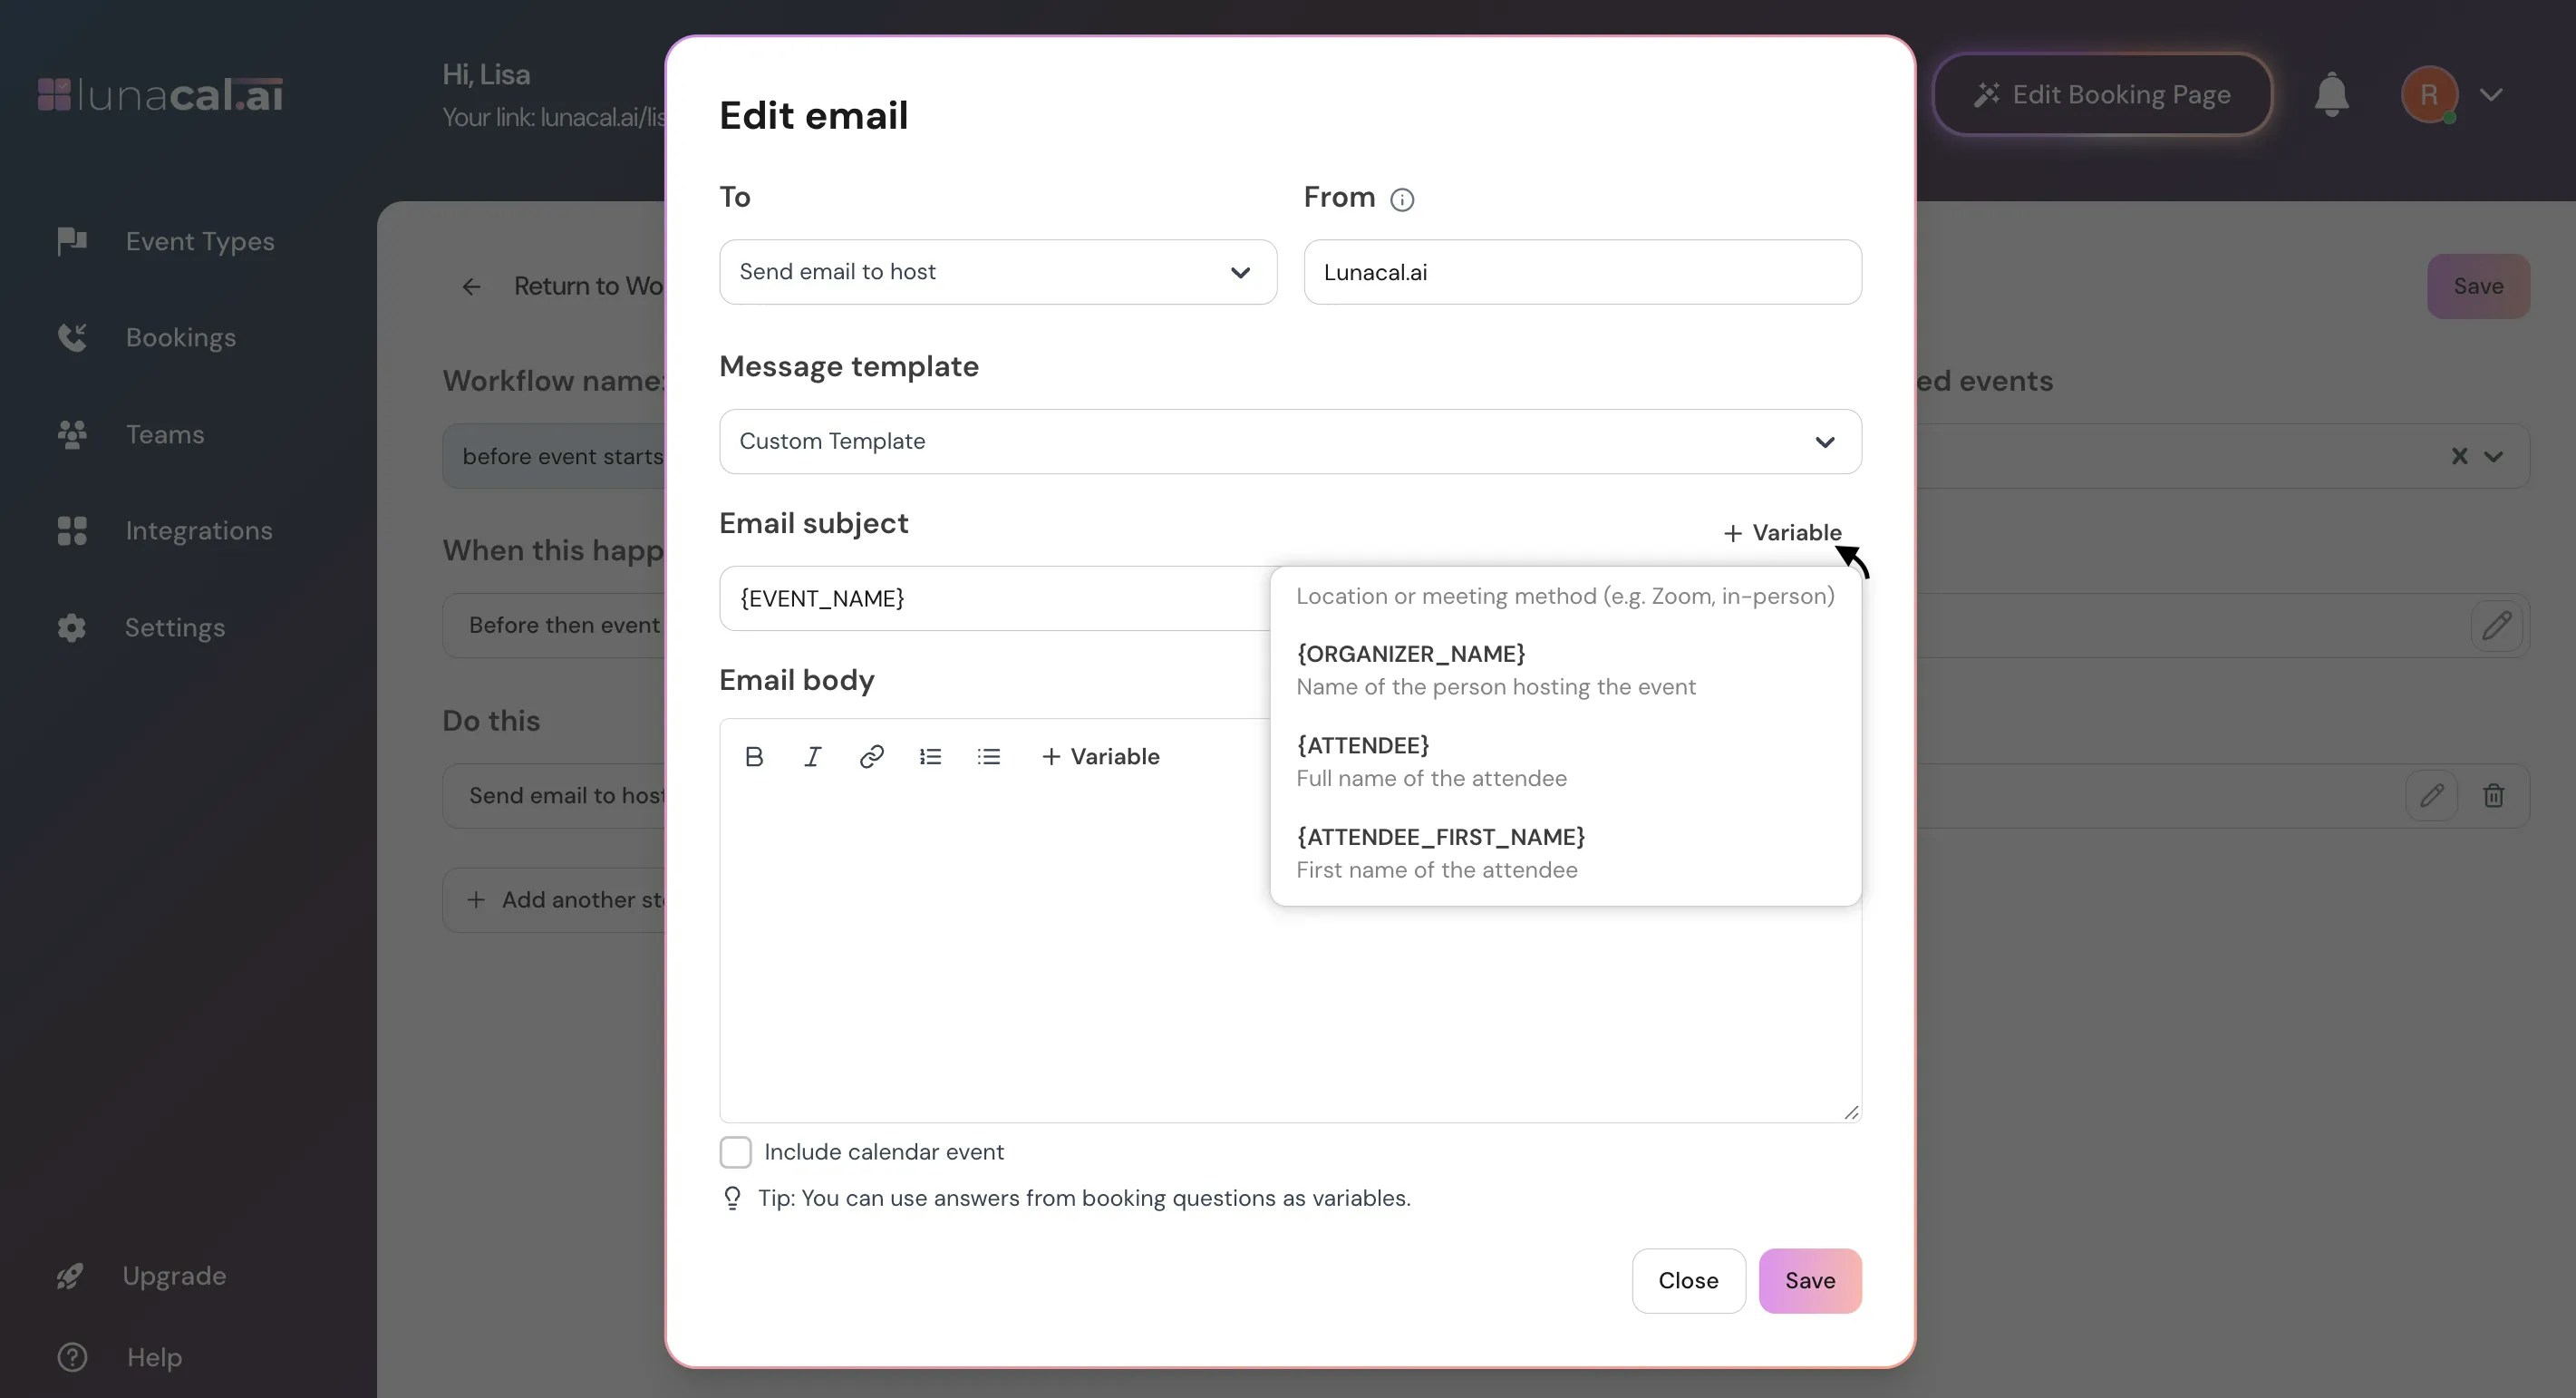
Step 10
Insert variables as needed (e.g., ATTENDEE_NAME, EVENT_TIME, LOCATION_LINK).Example: Include LOCATION_LINK so Zoom/Meet joins are one click
Step 11
Click “Save” to activate the workflow.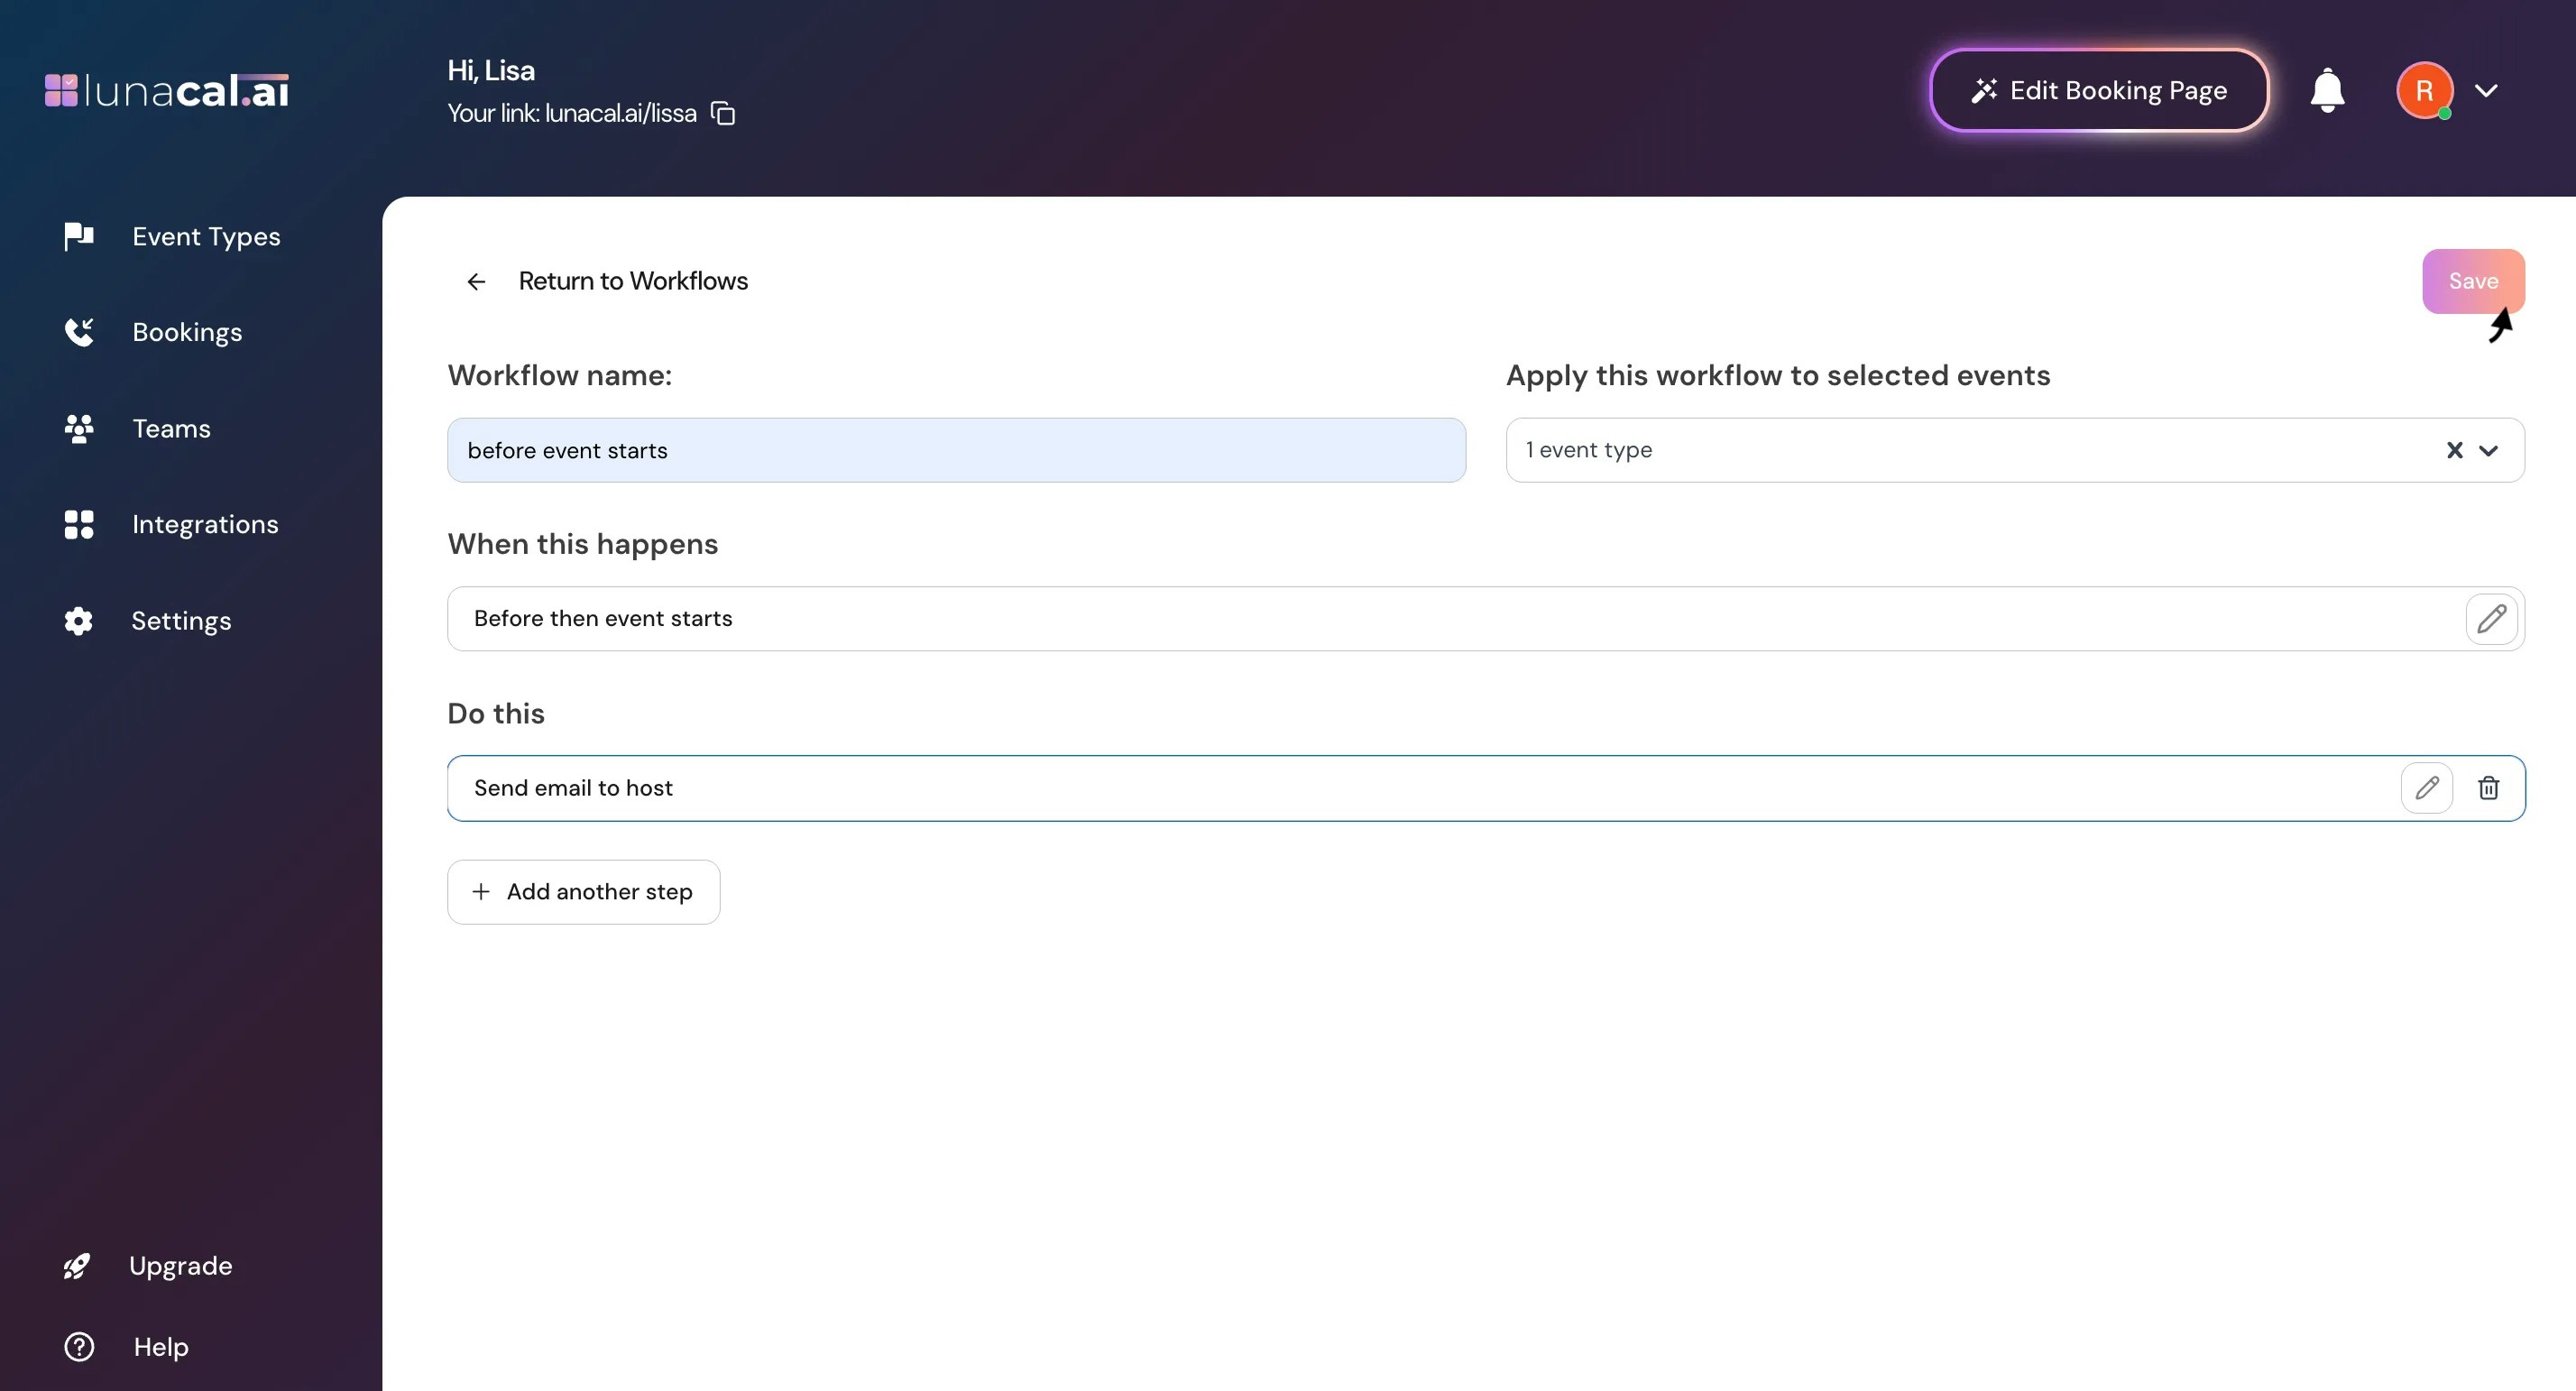
• Picking a trigger but forgetting to set time for “Before an event starts”, which sends nothing.
• Selecting “host” only when you meant to notify “attendees” as well.
• Leaving variables blank (for example, missing LOCATION_LINK) so emails are unclear.
• Creating overlapping reminders (for example, two reminders at 1 Hour) and spamming recipients. Good defaults to start with
• Triggers: “When new event is booked” (instant confirmation) and “Before an event starts” at 24 Hours + 1 Hour.
• Recipients: “attendees” for reminders, “host” for reschedule/cancel alerts.
• Variables: always include ATTENDEE_NAME, EVENT_TIME, LOCATION_LINK.
• Naming: include event and timing in the name (for example, “Meeting — Reminder 24h”).