Step 1
Open “Settings”, scroll to “Out of Office”, and click “Add”.
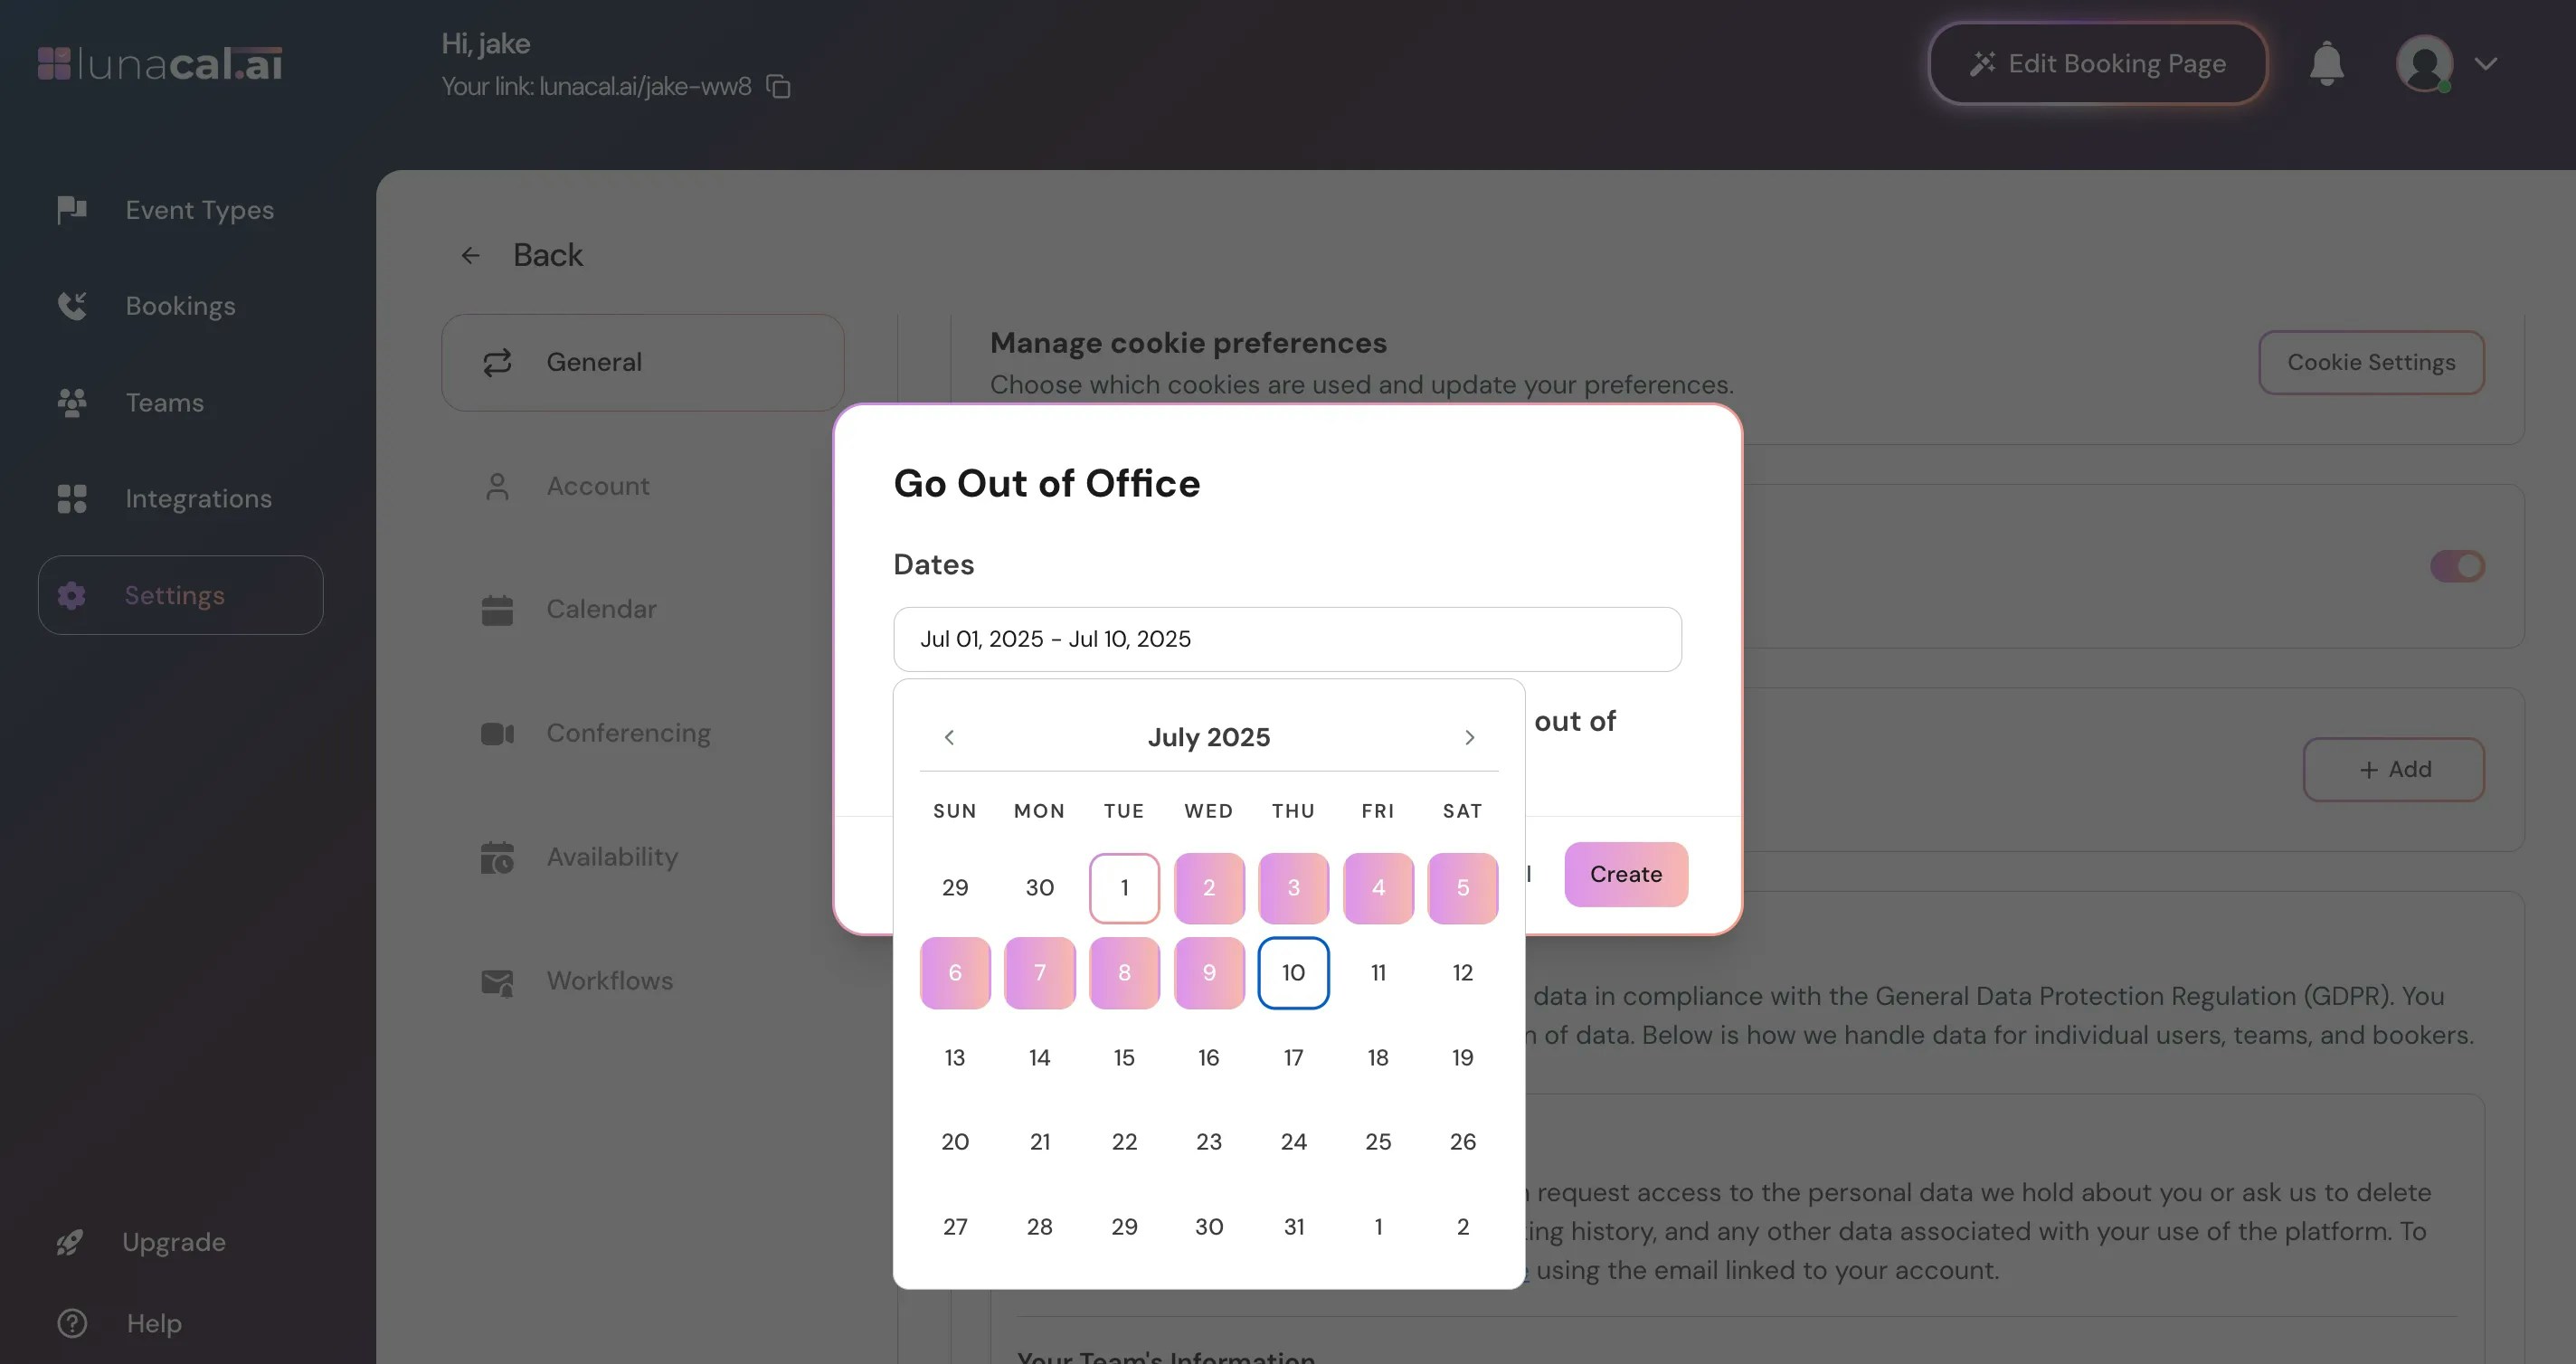
Step 2
Select your away dates (start and end).Example: You’re off from 1 July to 10 July—set those dates so no one books you during that period.
Step 3
If you’re in a team, choose a member to receive your bookings while you’re away.Example: Forward sales calls to your teammate who covers your region to keep deals moving.
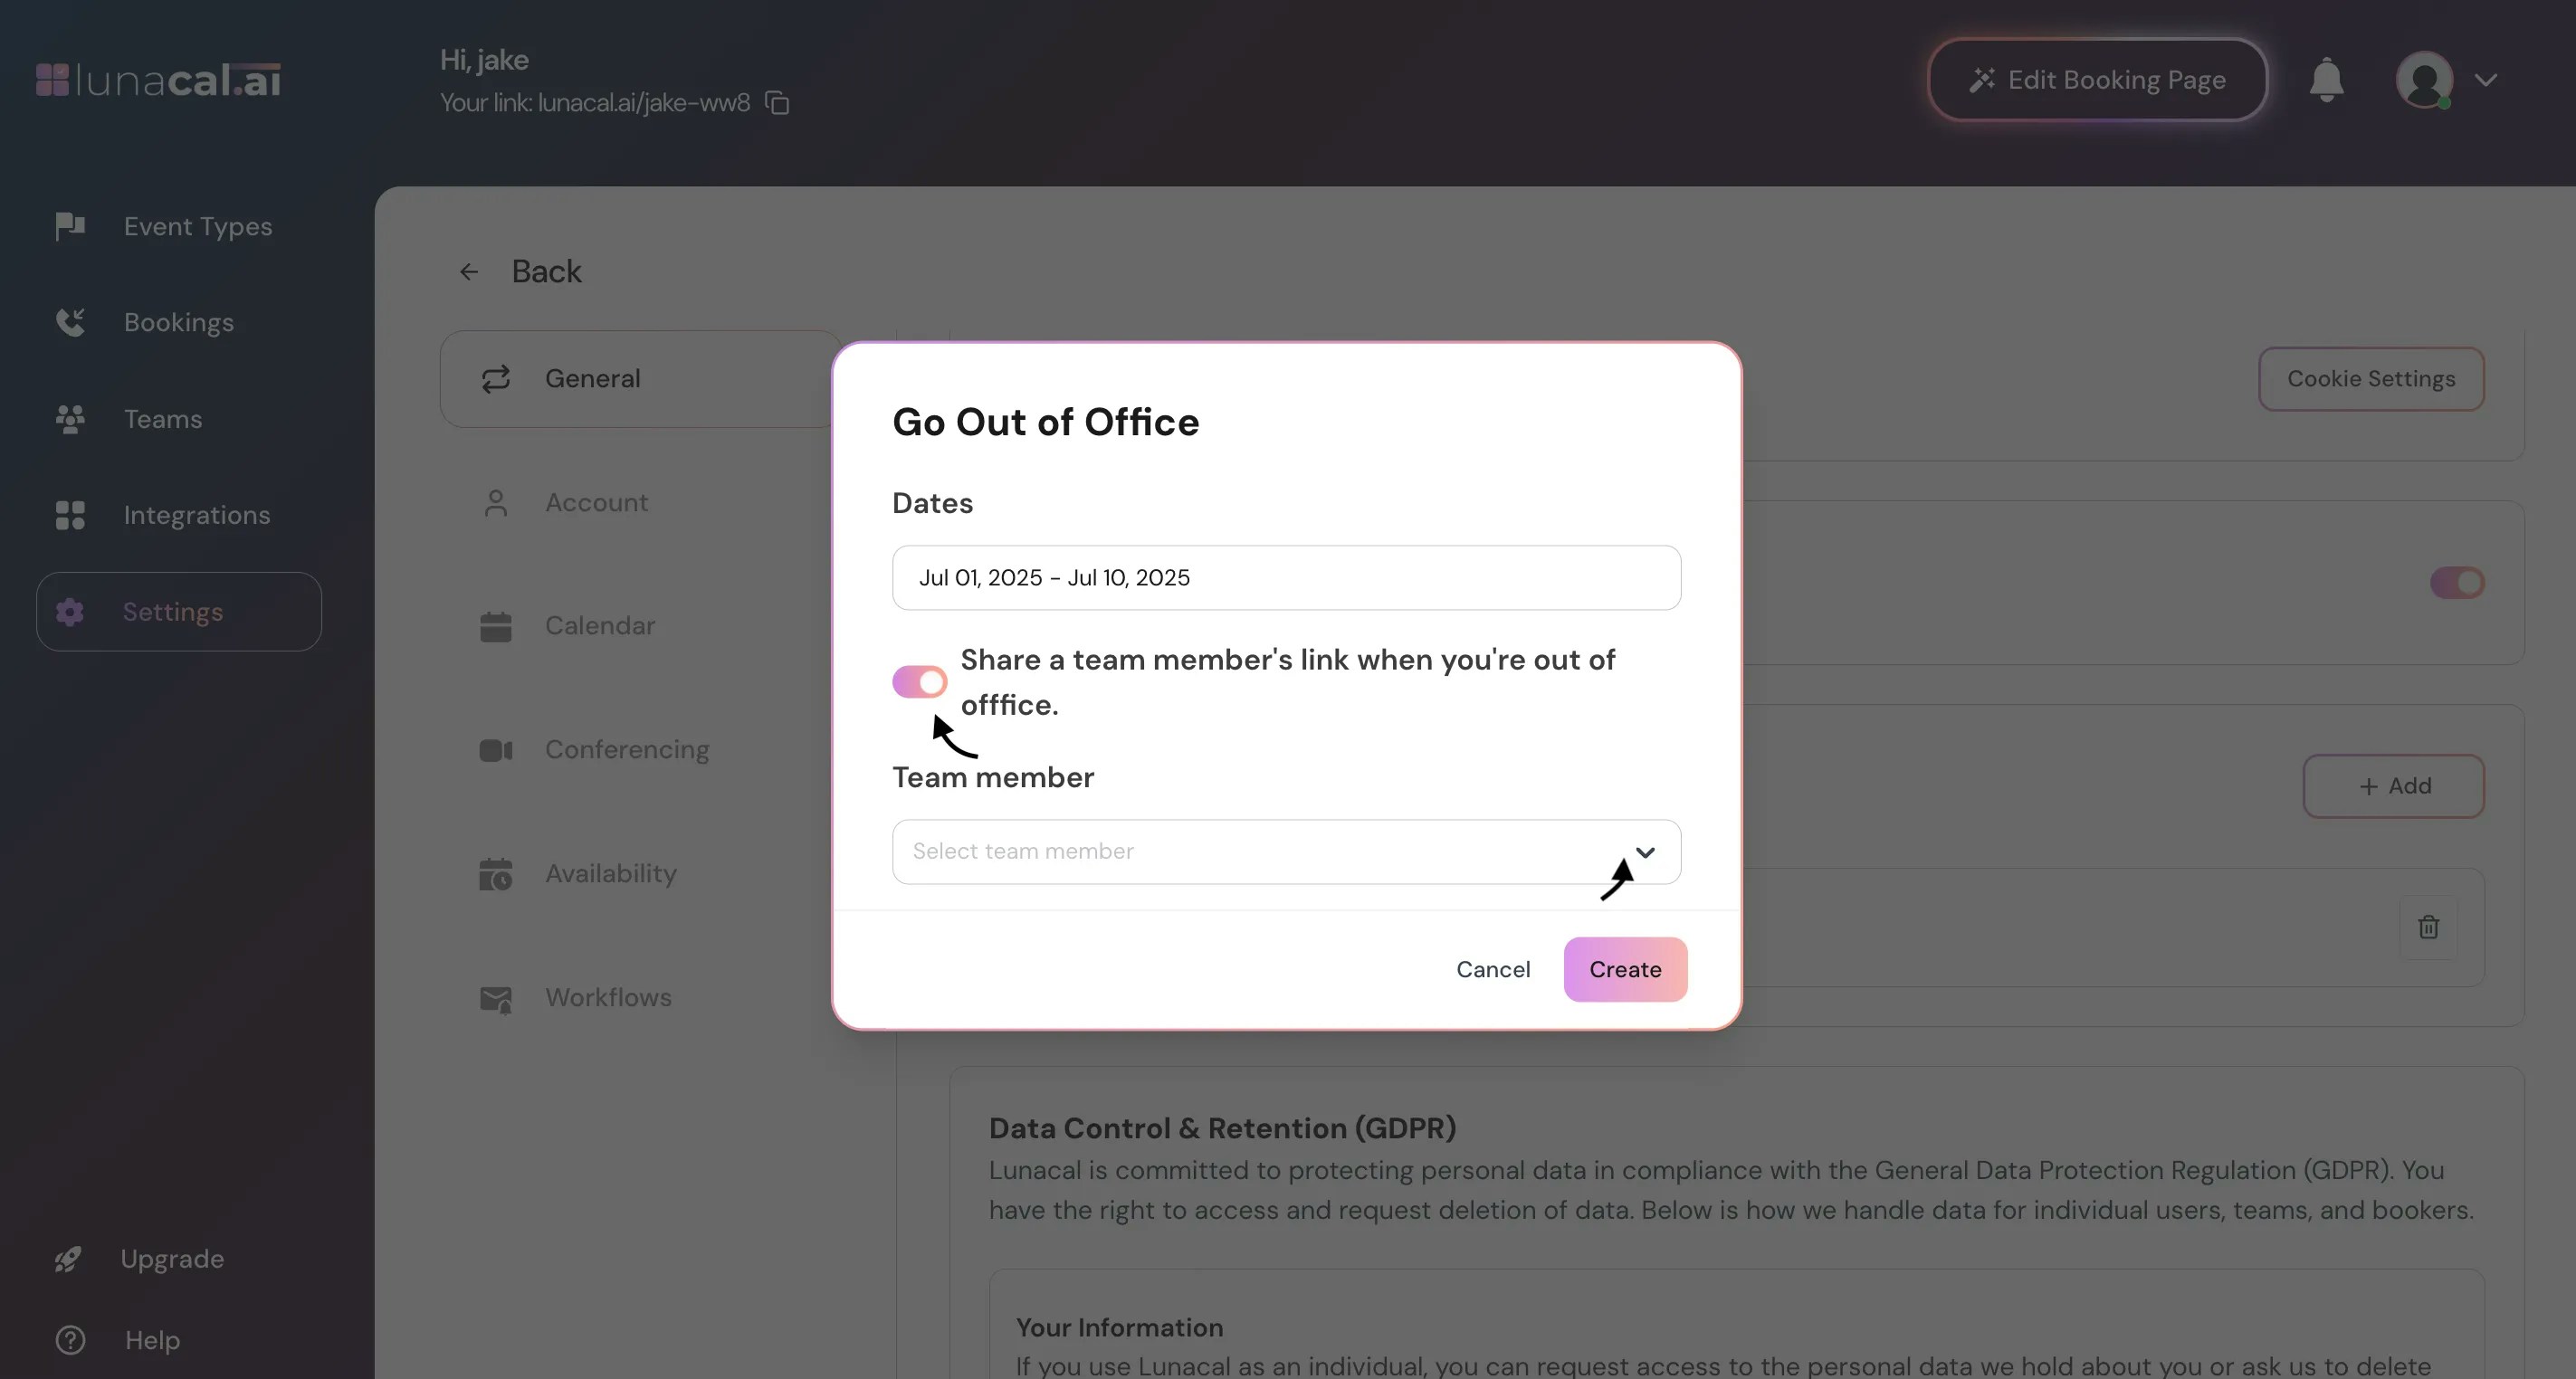
Note: Only the team owner or admins can set or edit out-of-office settings for other team members. If you don’t have the right permissions, you may need to ask a team admin to configure this for you.
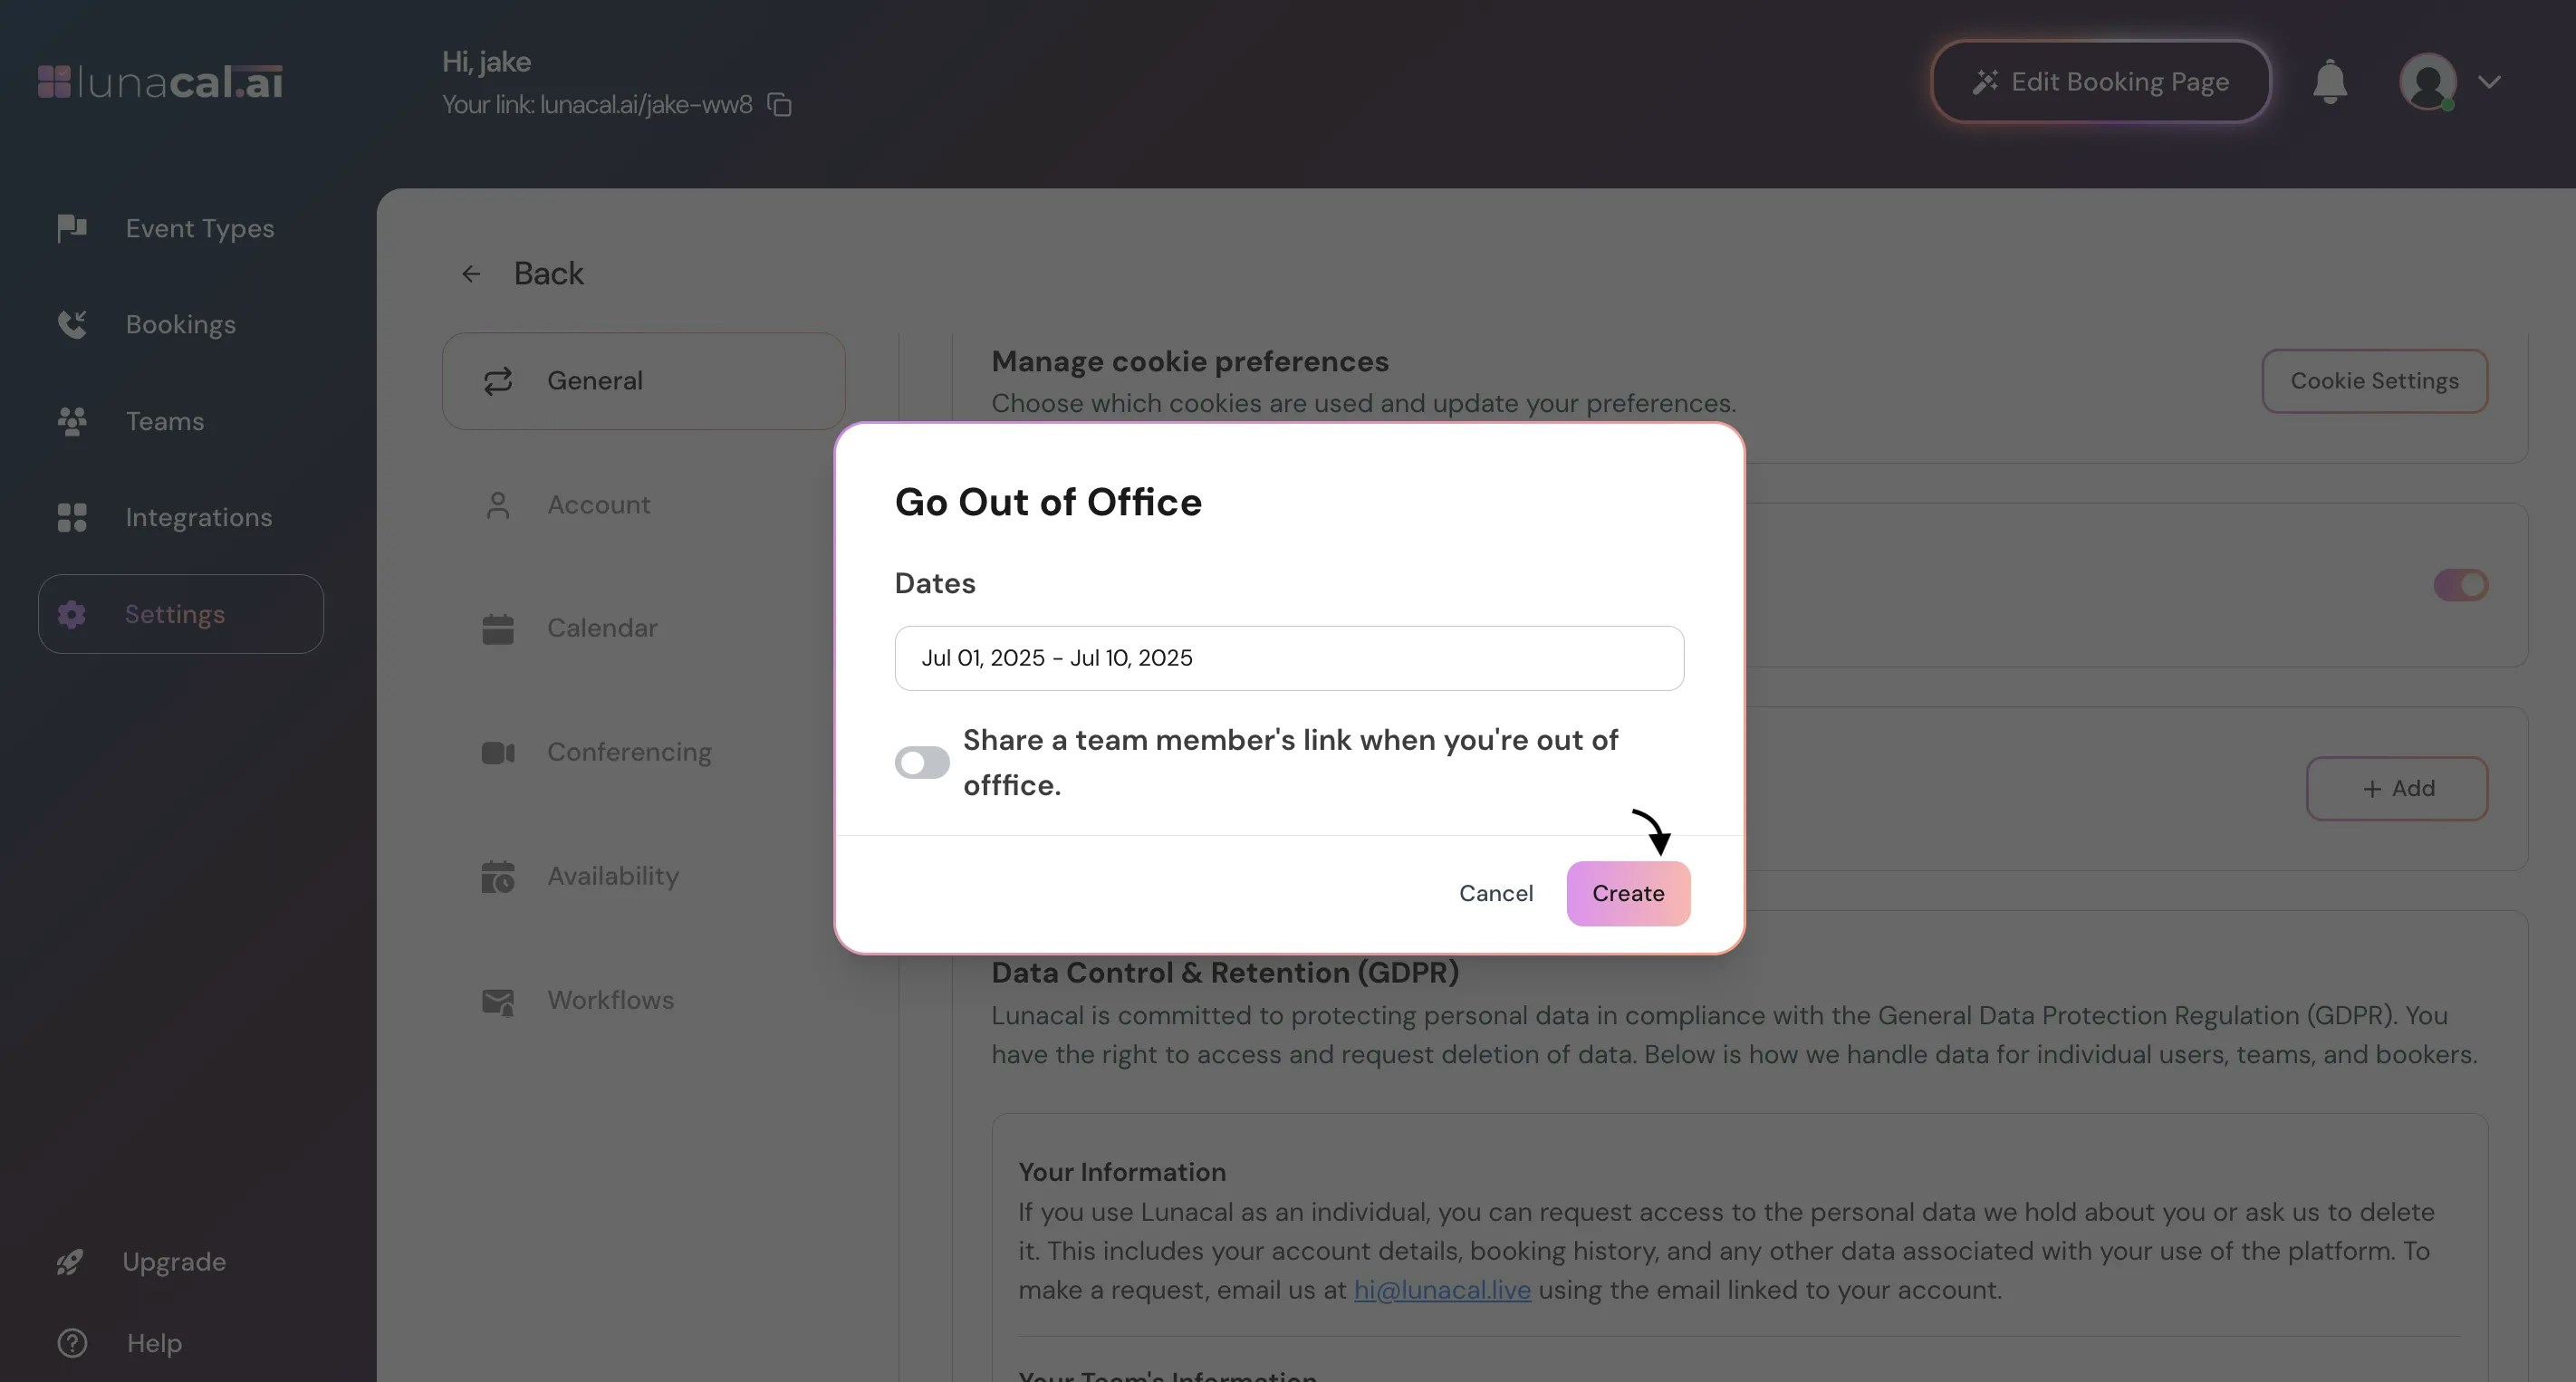
Step 4
Click “Create” to confirm.Example: Traveling without reliable internet? Create the out-of-office now so reminders and invites route correctly.
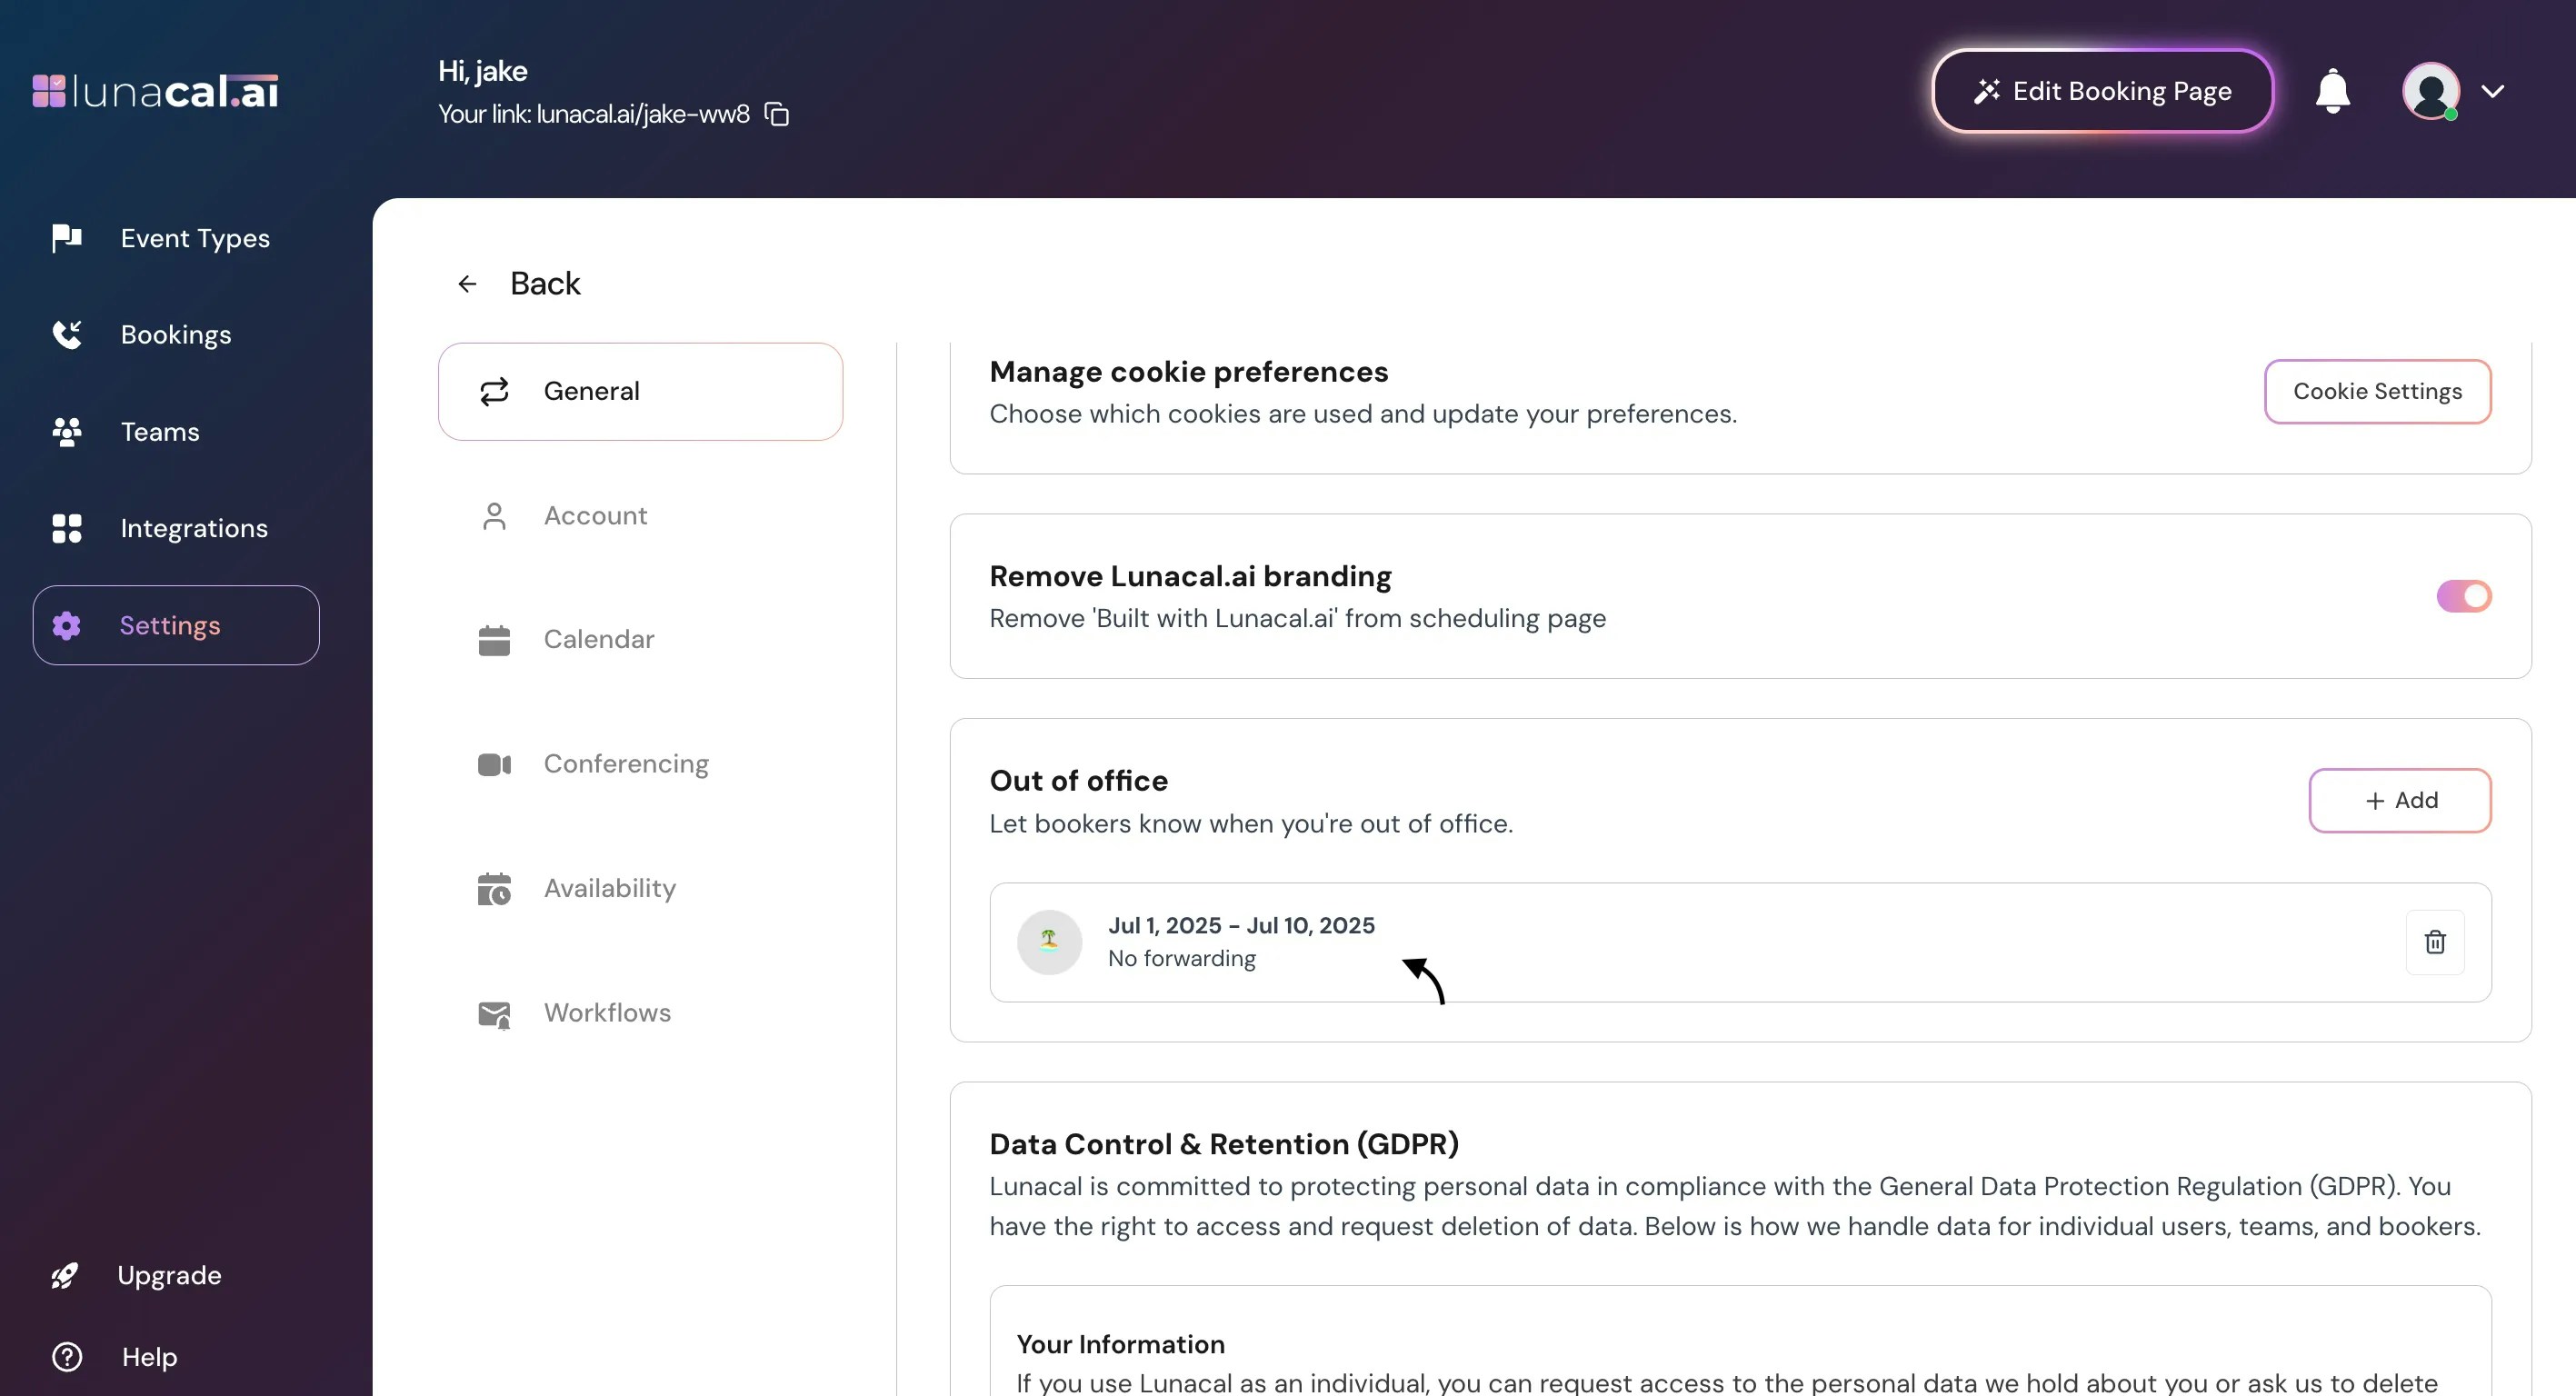
Step 5
Your out of office is active.Example: Midweek return? Set the end date to Wednesday so Thursday and Friday reopen automatically. When Out of Office is active:
- Your booking page will block new bookings for the selected dates.
- If you selected a team member for coverage, booking requests will be routed to them instead.
- Calendar integrations and reminders remain active — only scheduling availability is paused.
Edit or Remove Out of Office
If your plans change:- Open Settings → Out of Office.
- Click on the active out of office period.
- Update the start/end dates or remove it entirely. This immediately re-opens your availability if the dates are changed or removed.
Troubleshooting
- Still seeing availability on your booking page? Make sure the start/end dates are correct and that the Out of Office was saved.
- Coverage not forwarding bookings? Confirm the teammate you selected is active and has availability.
- Bookings still go through for certain slots? Check if minimum notice settings or booking limits override the out-of-office block.
Common mistakes to avoid
- Leaving the end date blank or incorrect, which keeps your calendar blocked longer than intended.
- Forgetting to pick a teammate when coverage is needed, causing missed calls or delays.
- Setting dates in the wrong order (end before start), which prevents activation.
Good defaults to start with
- Start date = first full day you’re unavailable; End date = last day you’re away.
- If you handle time-sensitive leads, select a teammate for coverage by default.
- Create the out-of-office a day before travel to catch last-minute bookings.