Step 1
To create a new availability, go to Availability.
Step 2
You’ll see a default schedule. Click “Create New Availability”.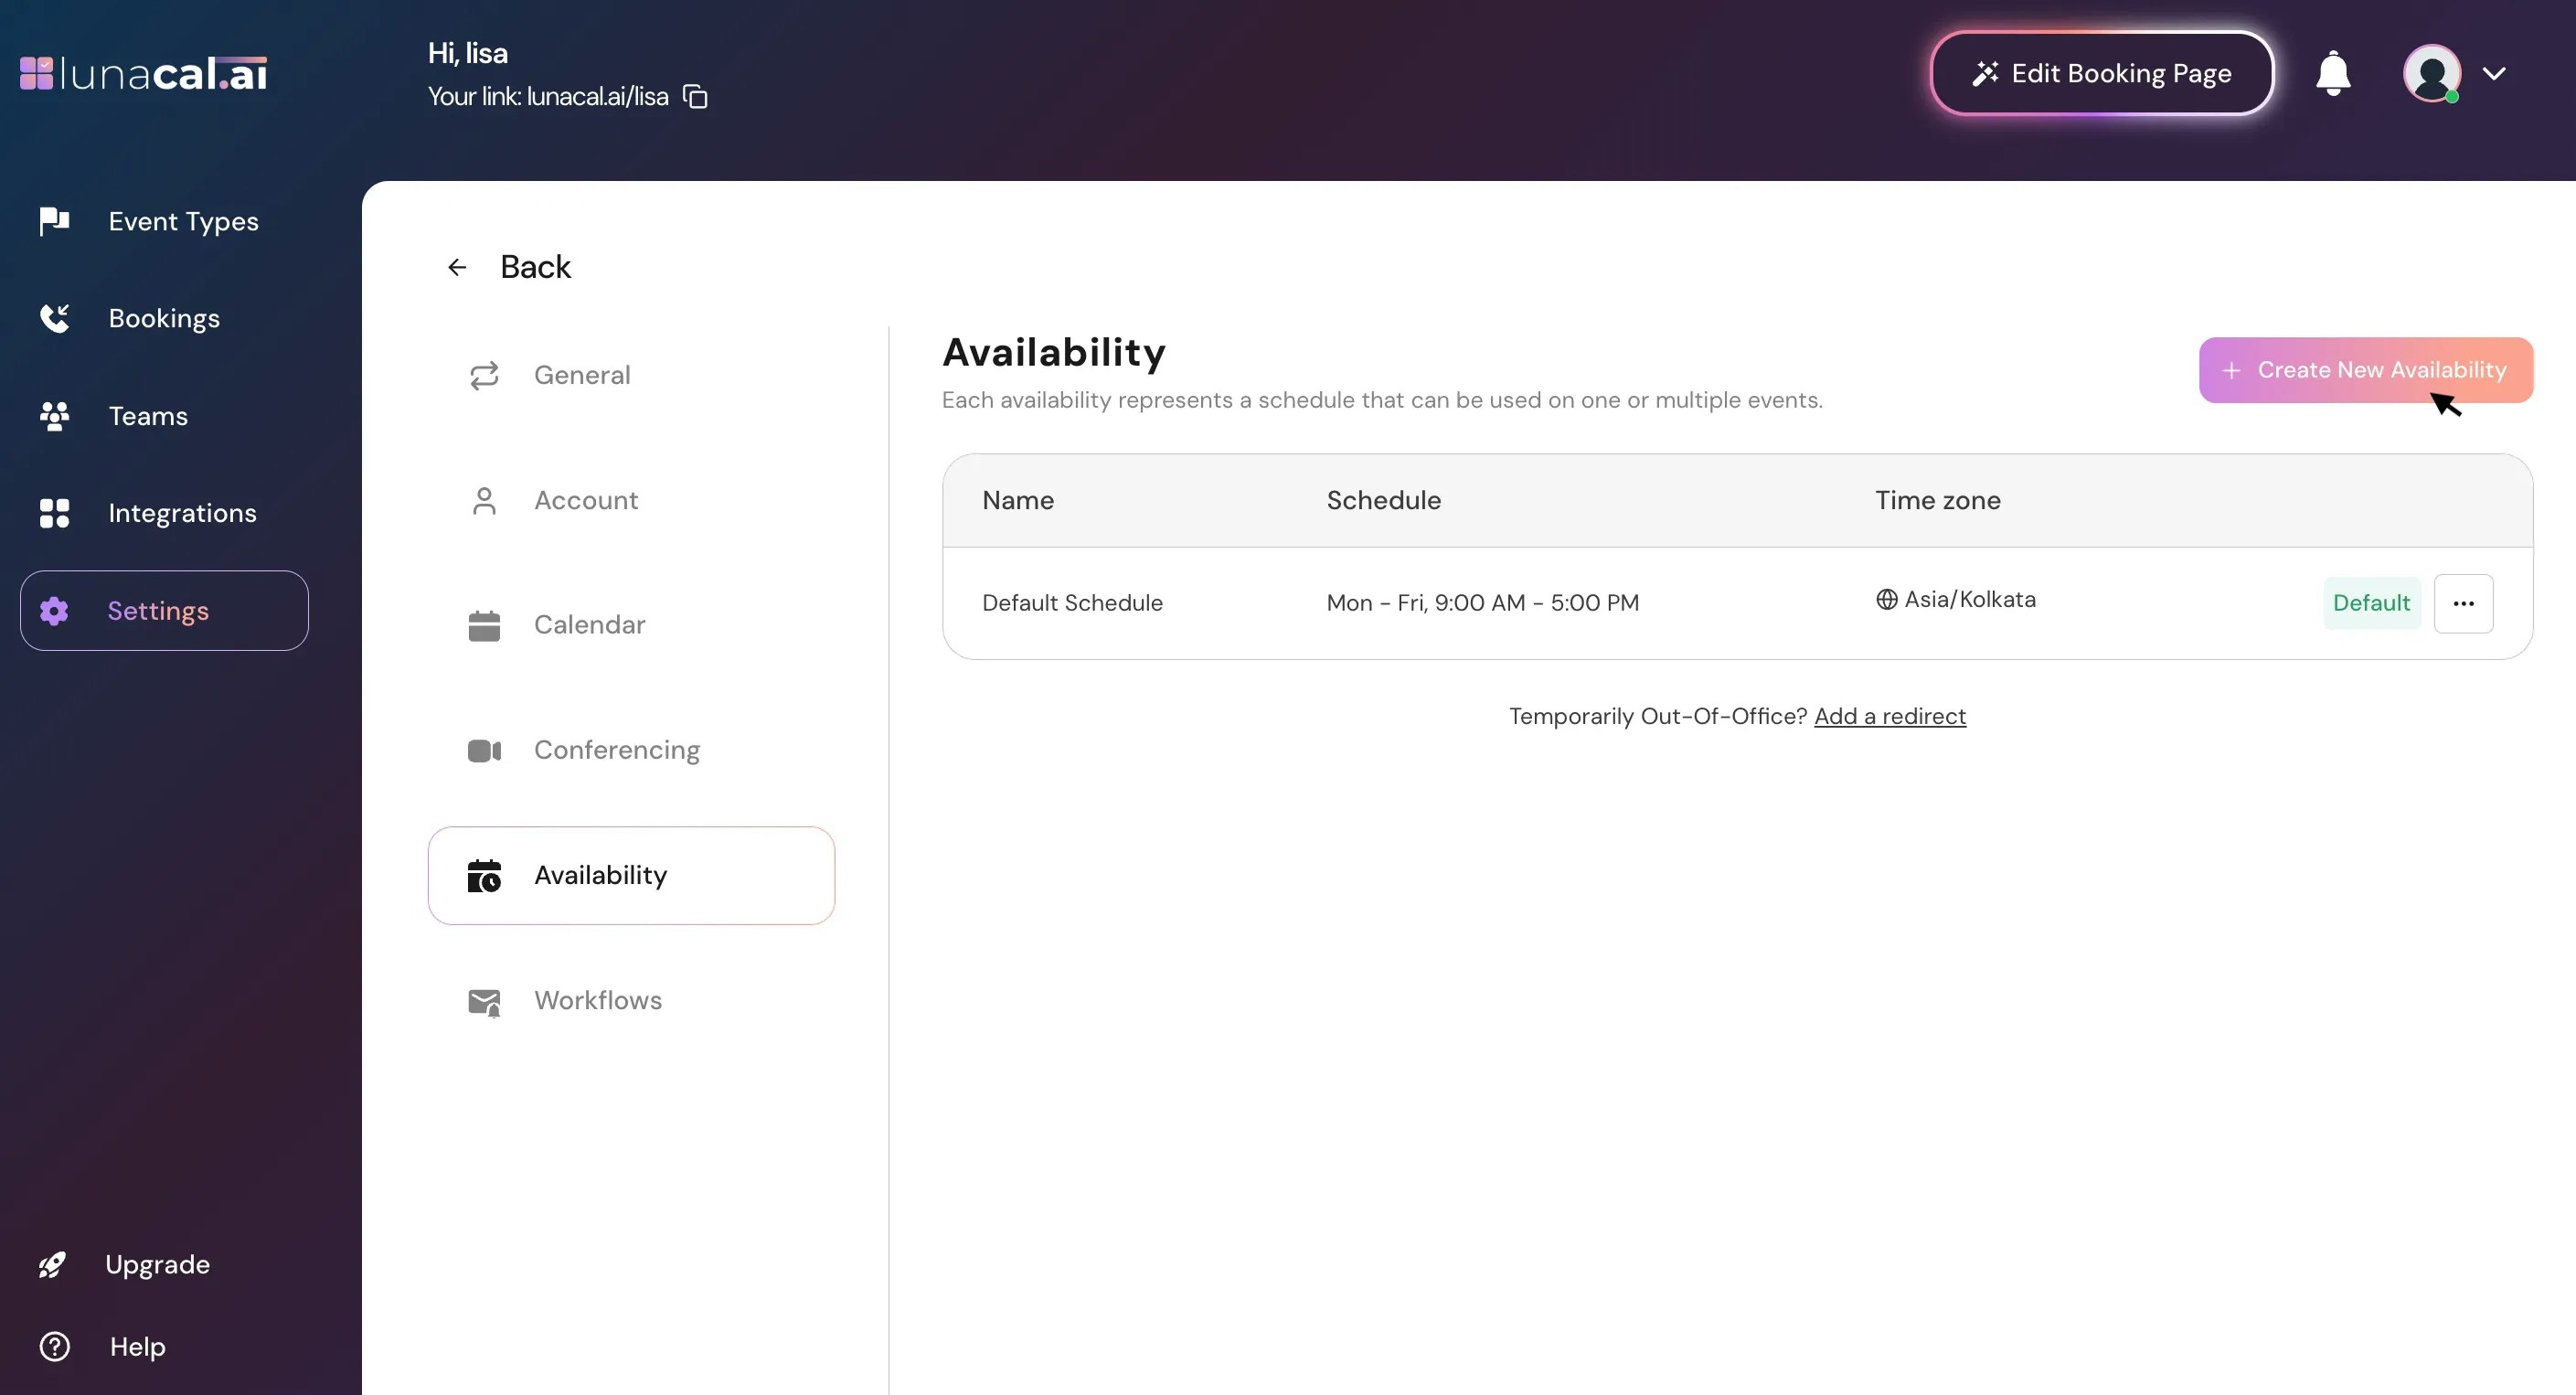
Step 3
Enter a name (for example, “Introduction”) and click “Continue”.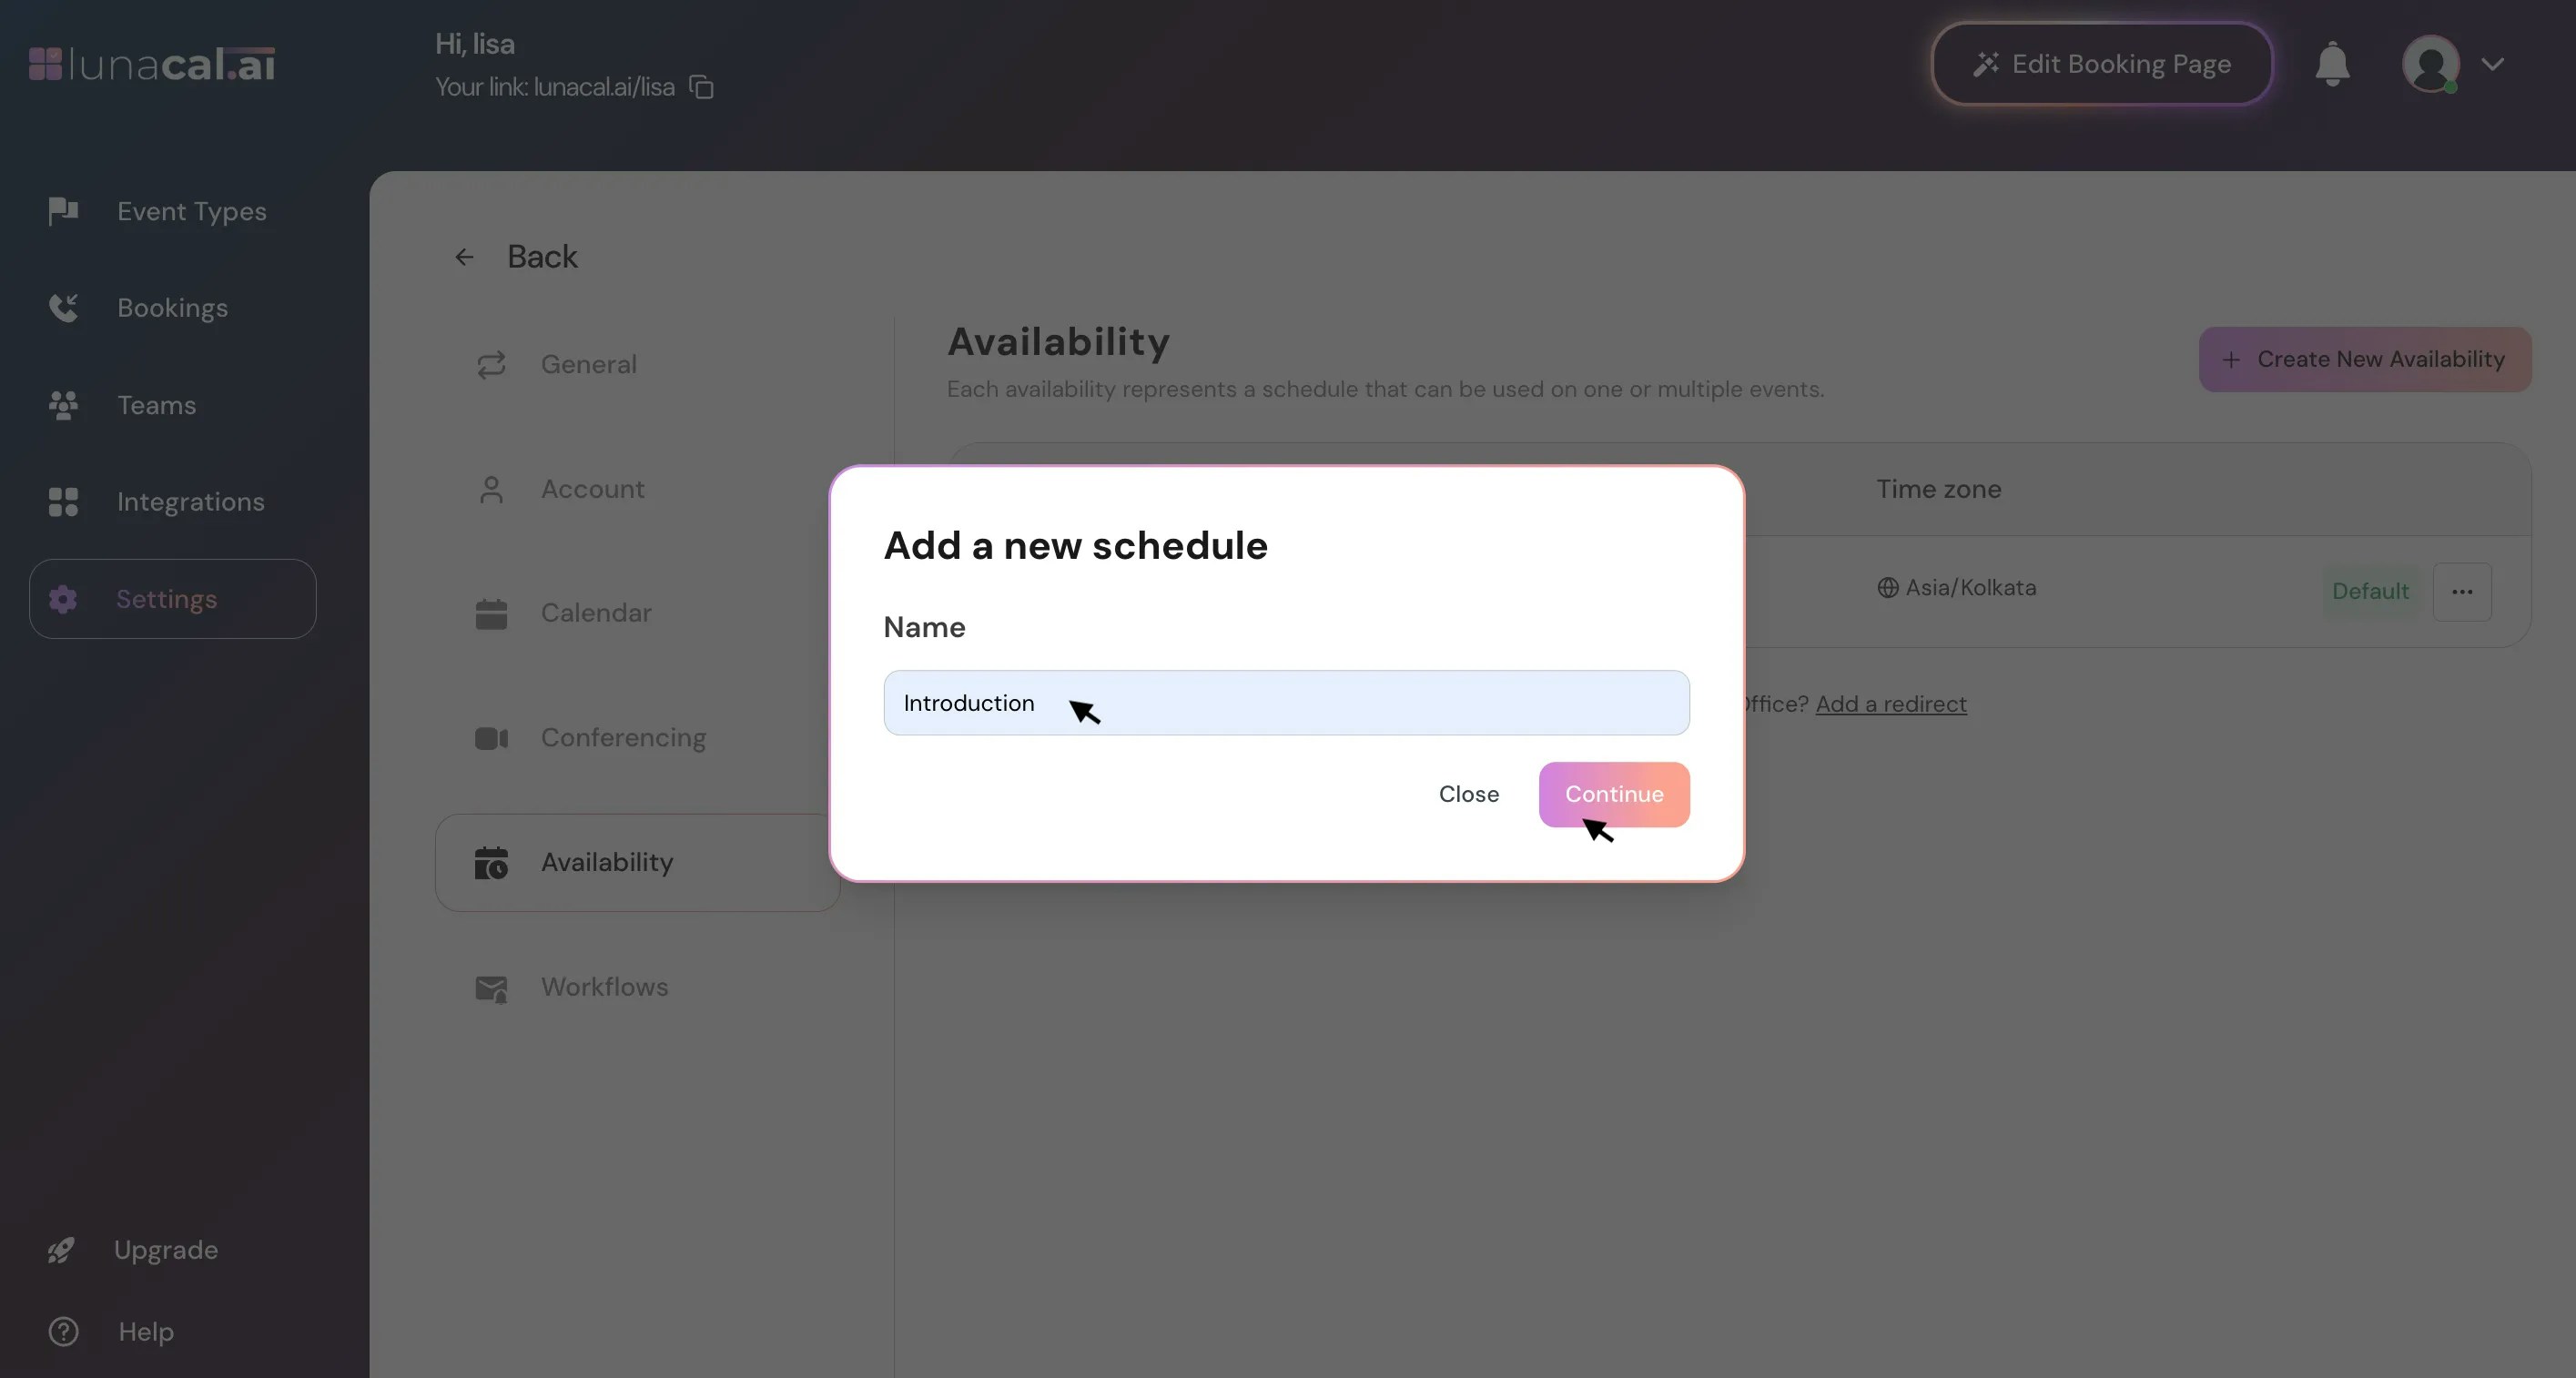
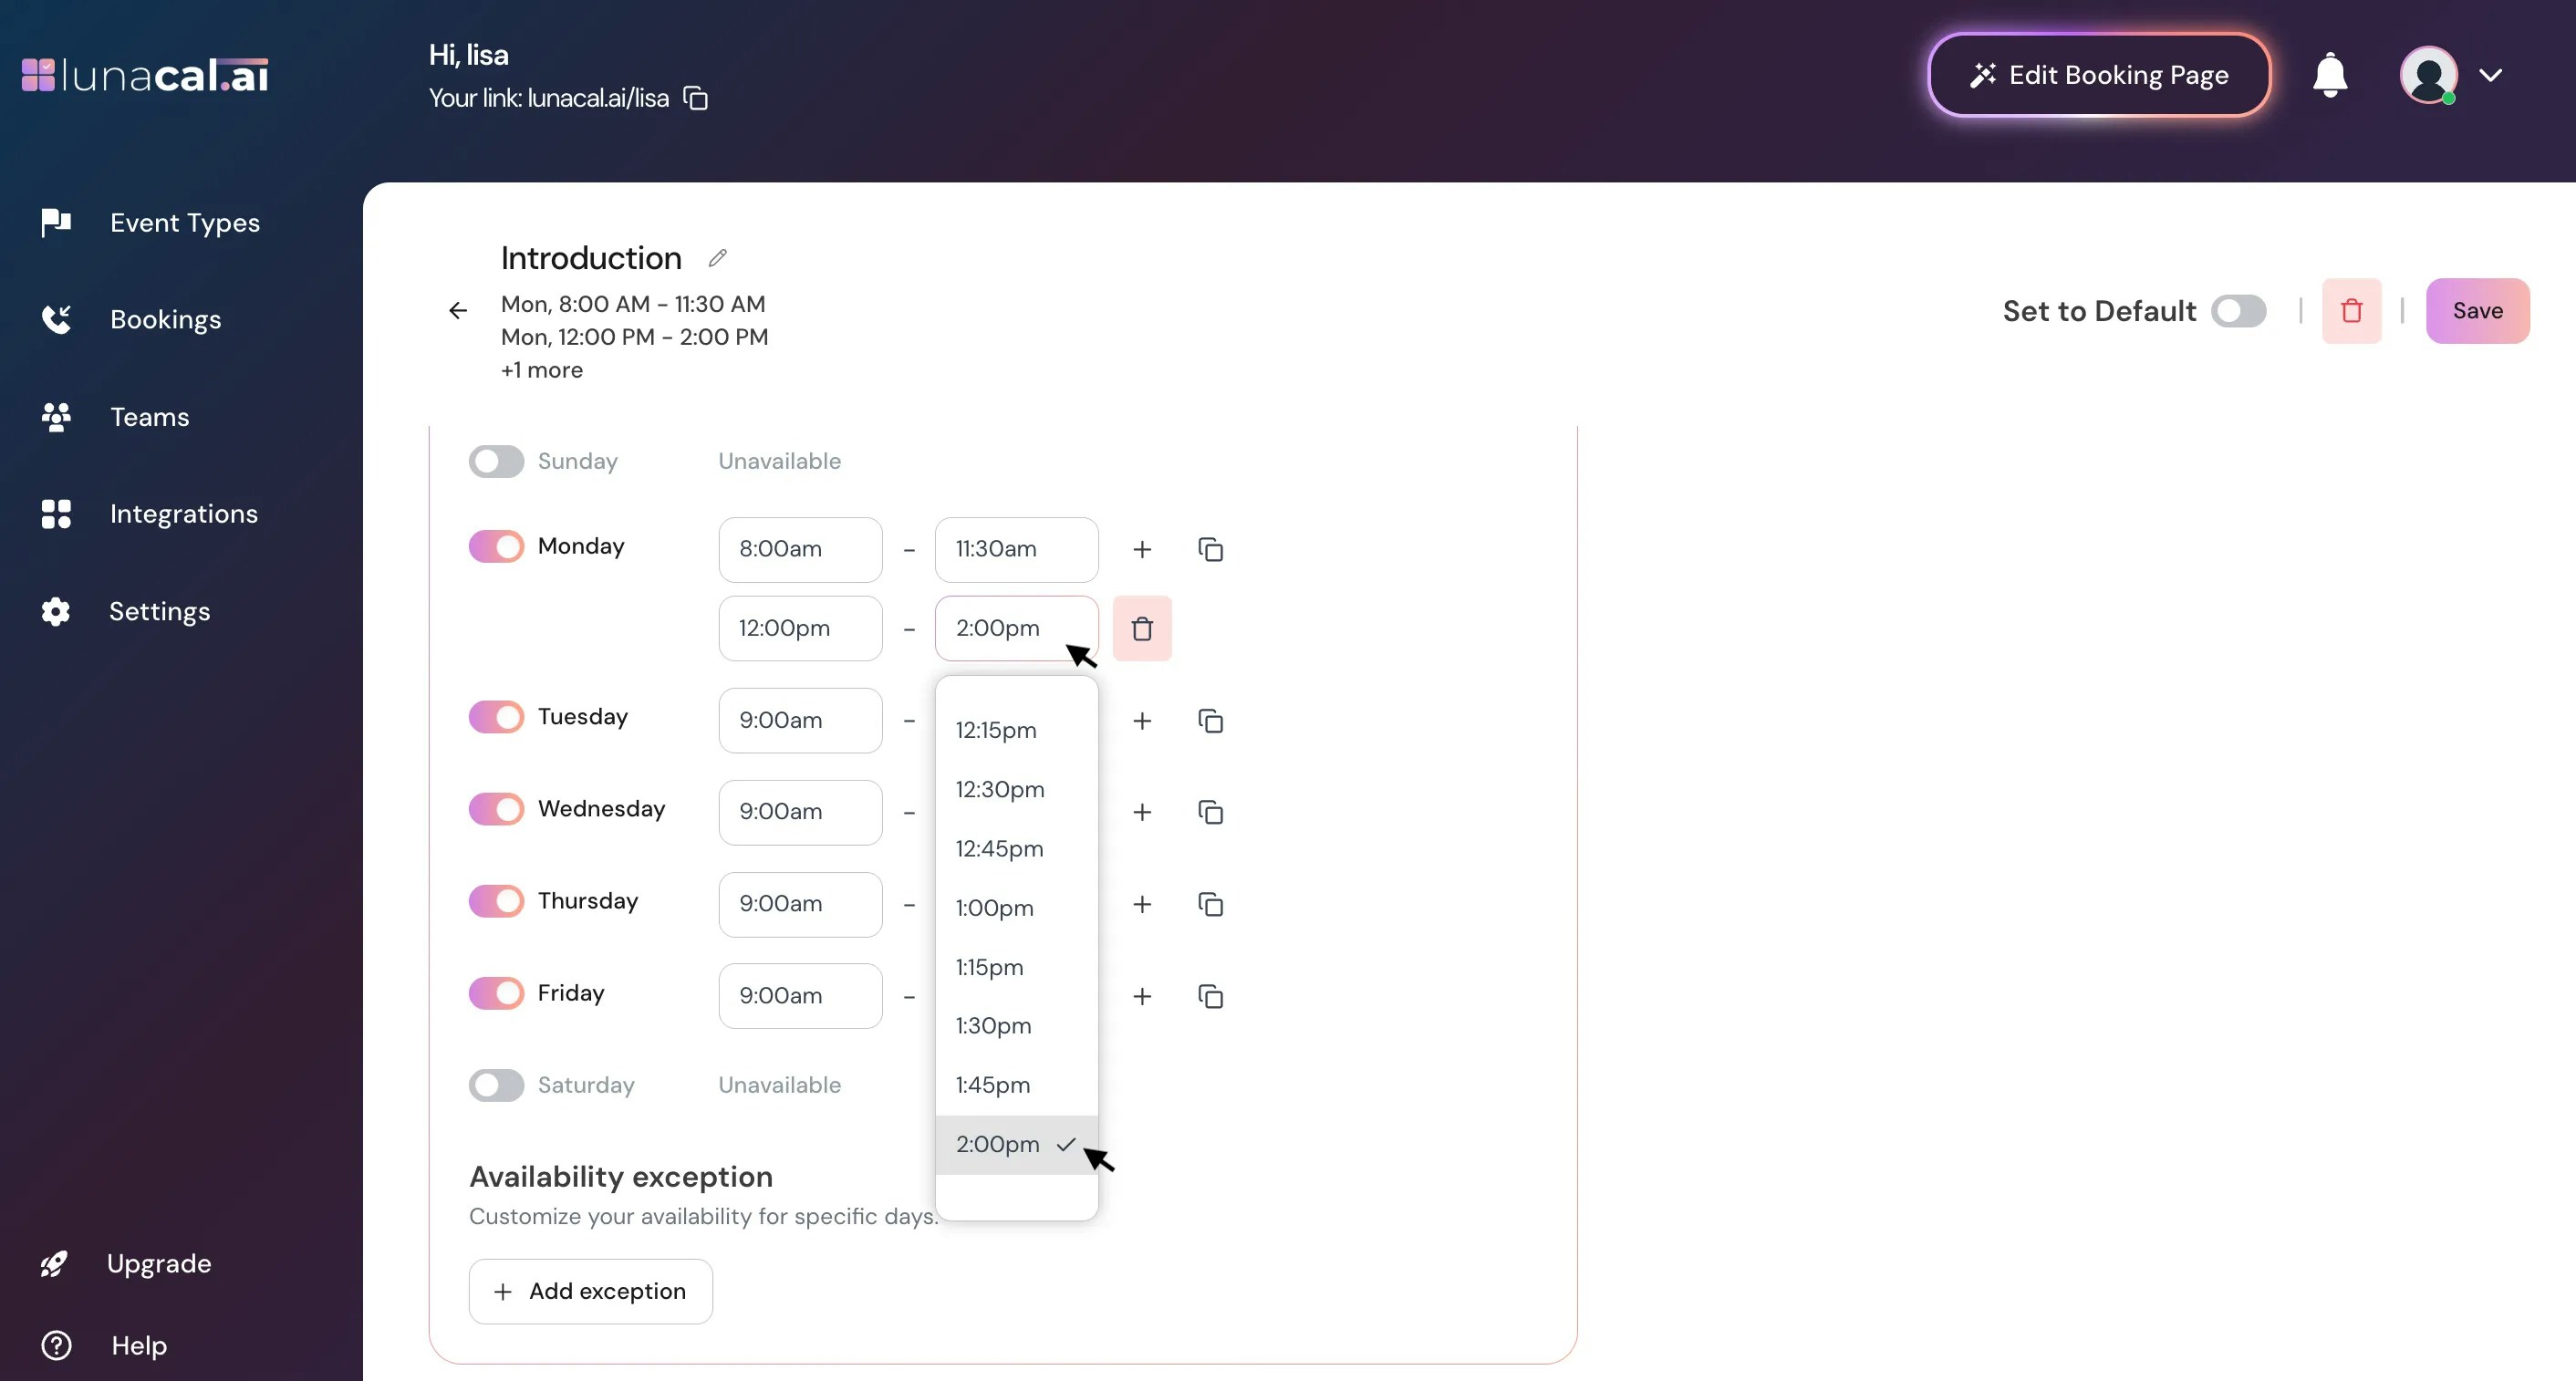
Step 4
Adjust your default working hours (for example, 9:00 AM–5:00 PM) and turn specific days on or off.Any day you disable won’t appear on your booking page.
Example: If you work Monday to Thursday, disable Friday to Sunday so no one can book on those days.

Step 5
If you work in multiple shifts, click the plus (+) icon to add separate time slots.For example, if your schedule is 8:00 AM–11:30 AM and 12:00 PM–2:00 PM, add both time slots to define your availability clearly. Attendees will then be able to book during those time slots only.
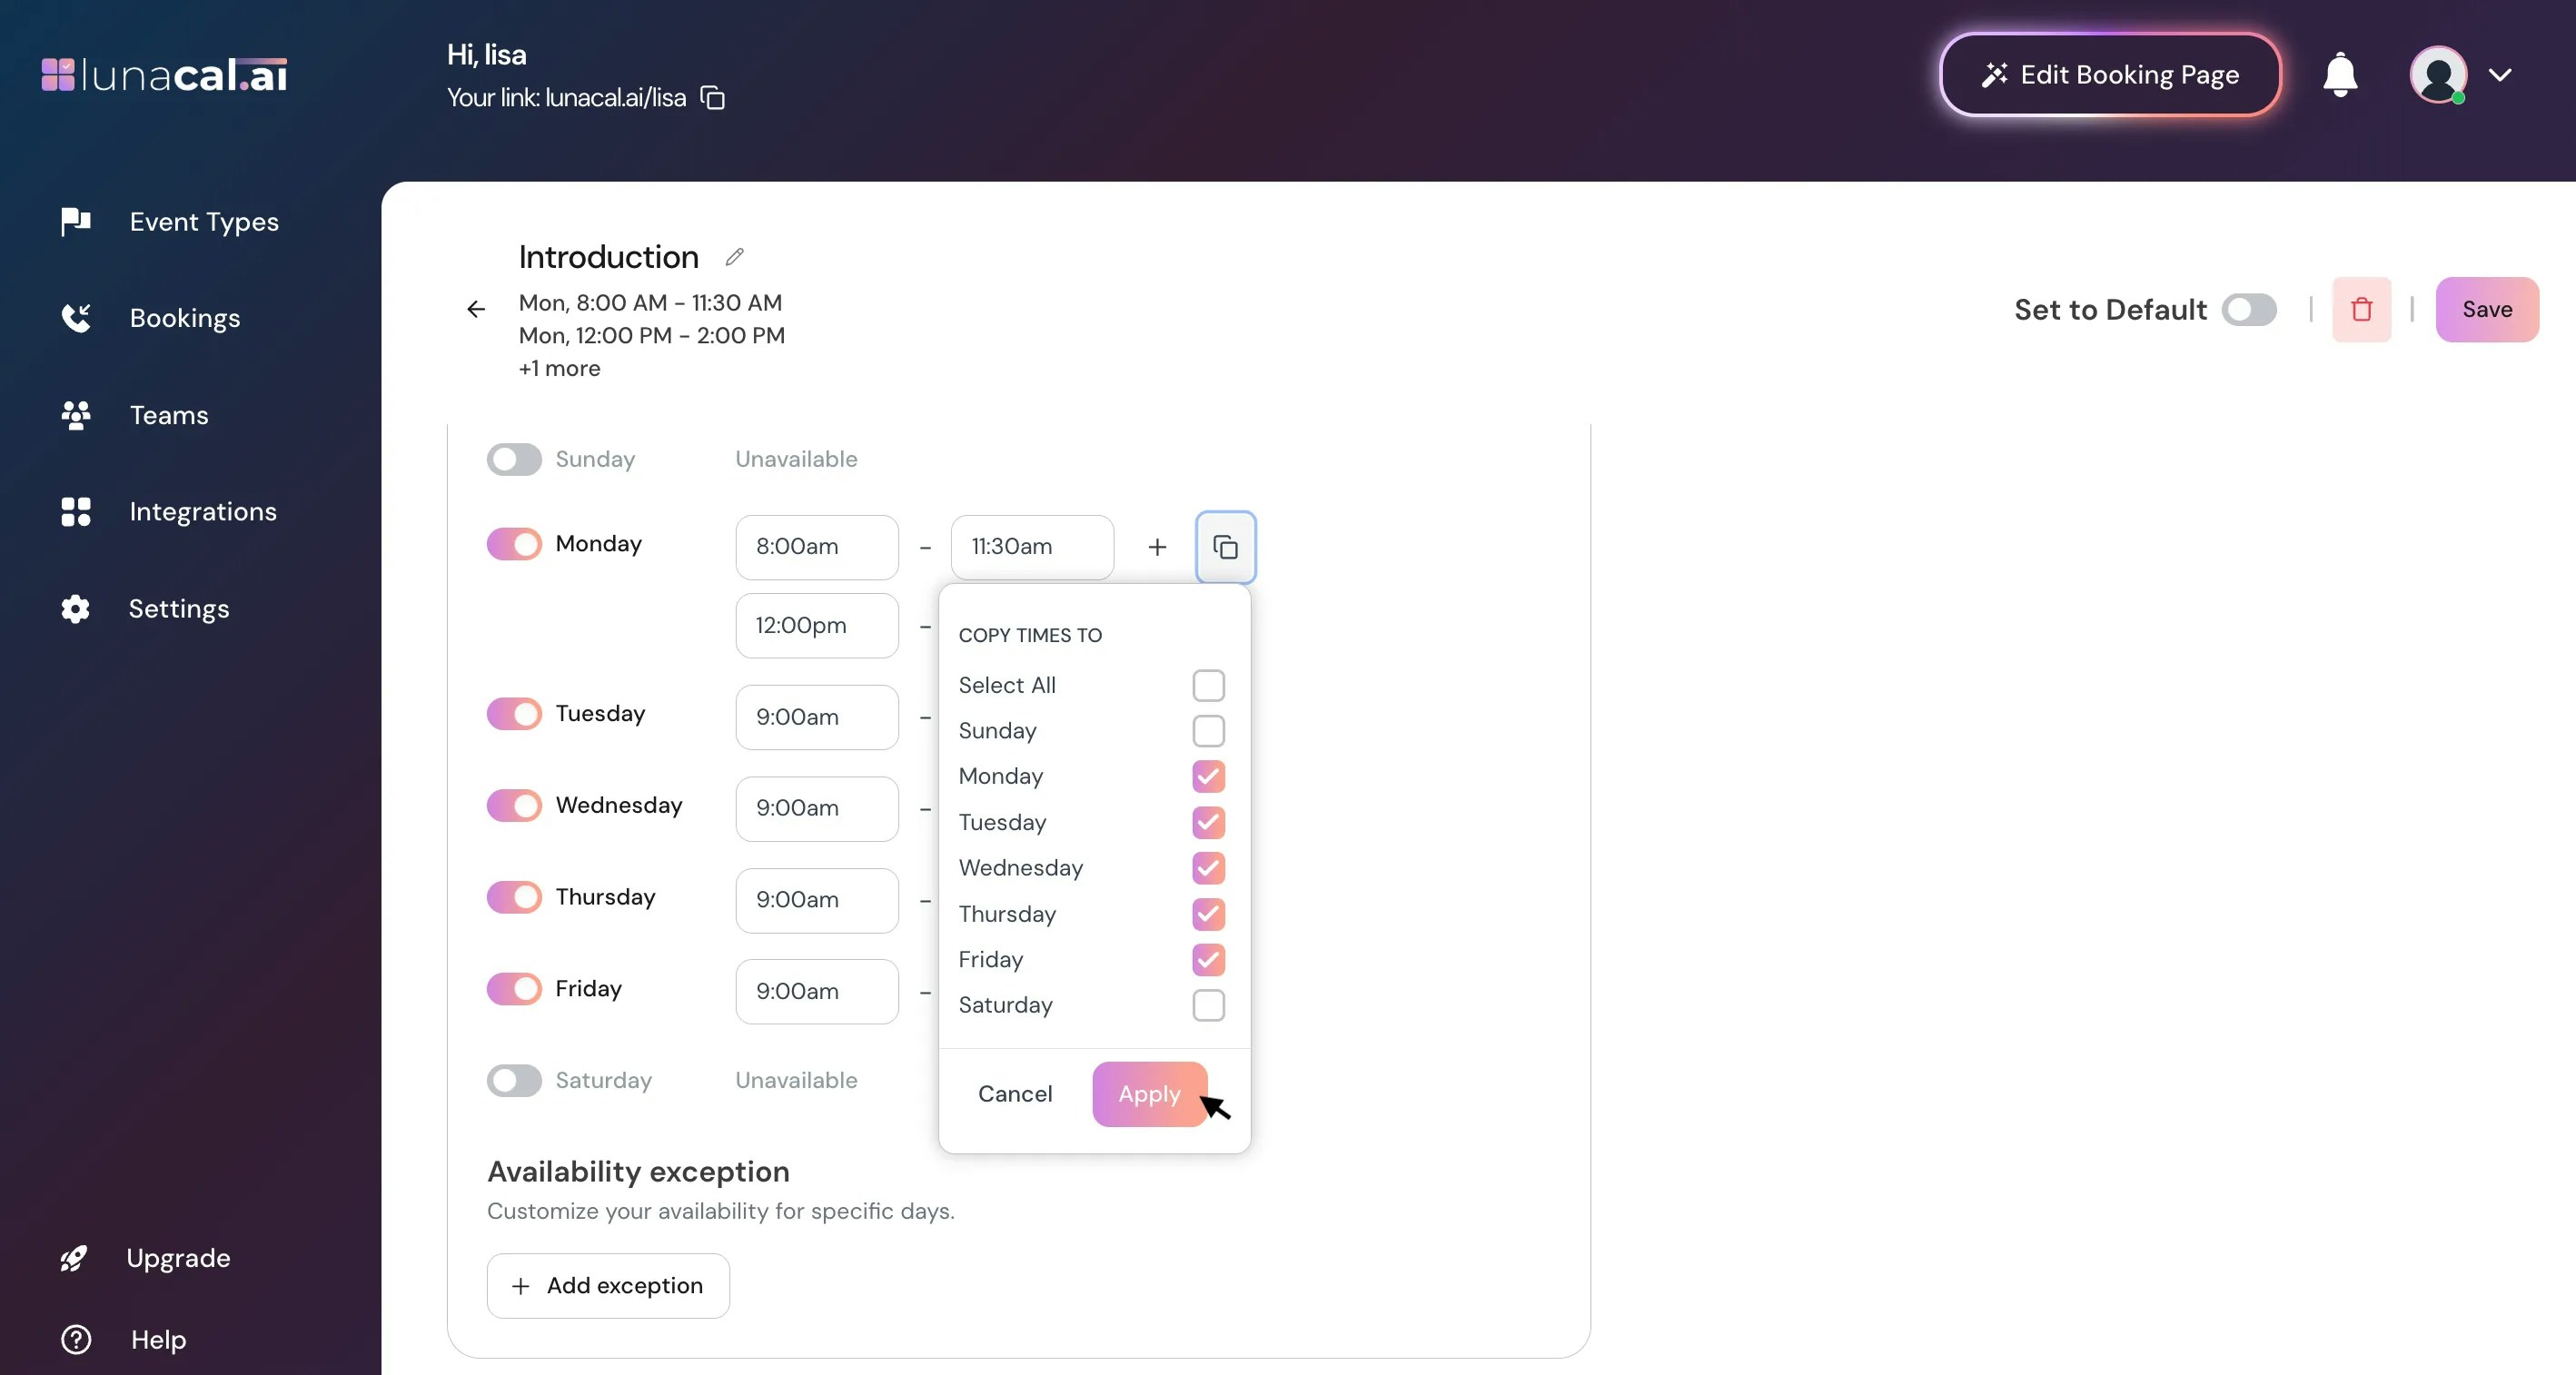
Step 6
You can copy your working hours to other days if the schedule is the same.Click the copy icon, select the days you want to apply the same hours, and click Apply. Example:
If your Monday schedule is 9:00 AM–5:00 PM, and you work the same hours Tuesday to Thursday, copy Monday’s timings to those days instead of adding them manually.
Step 7
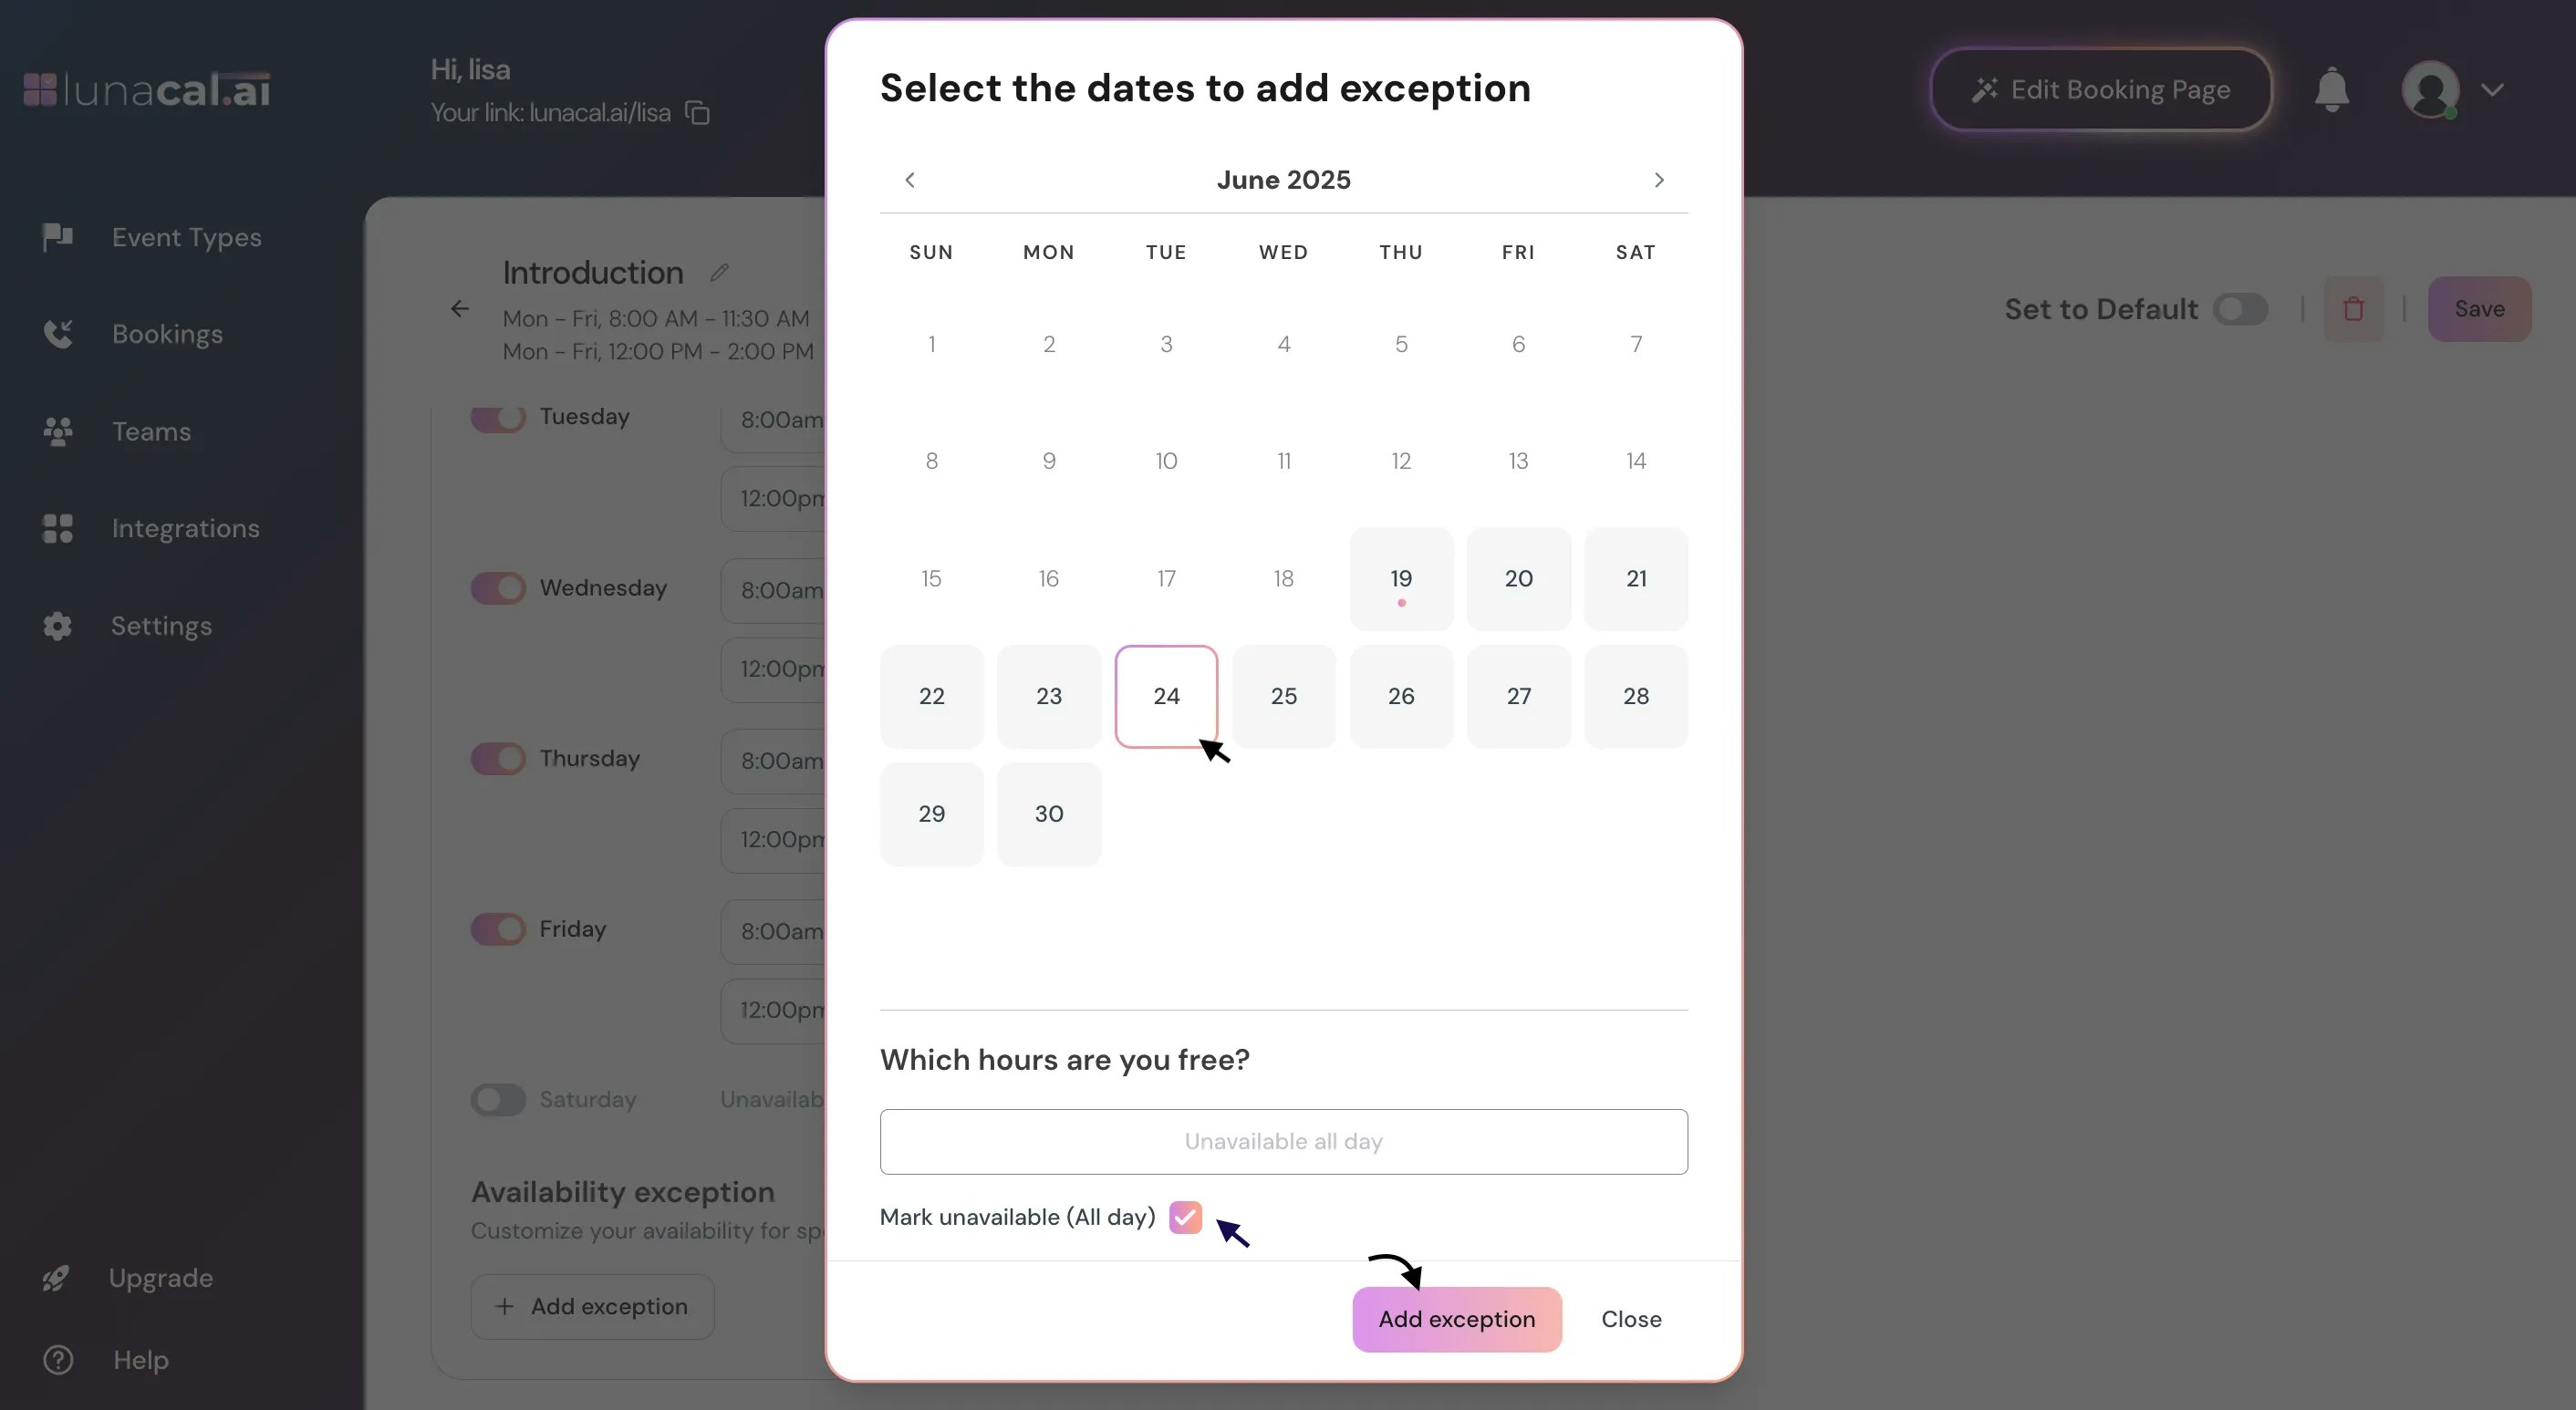
Availability Exception : This lets you block specific dates or times when you’re unavailable, even if those fall within your regular working hours. It’s useful for holidays, breaks, or one-off days off. To add an exception, click Add Exception.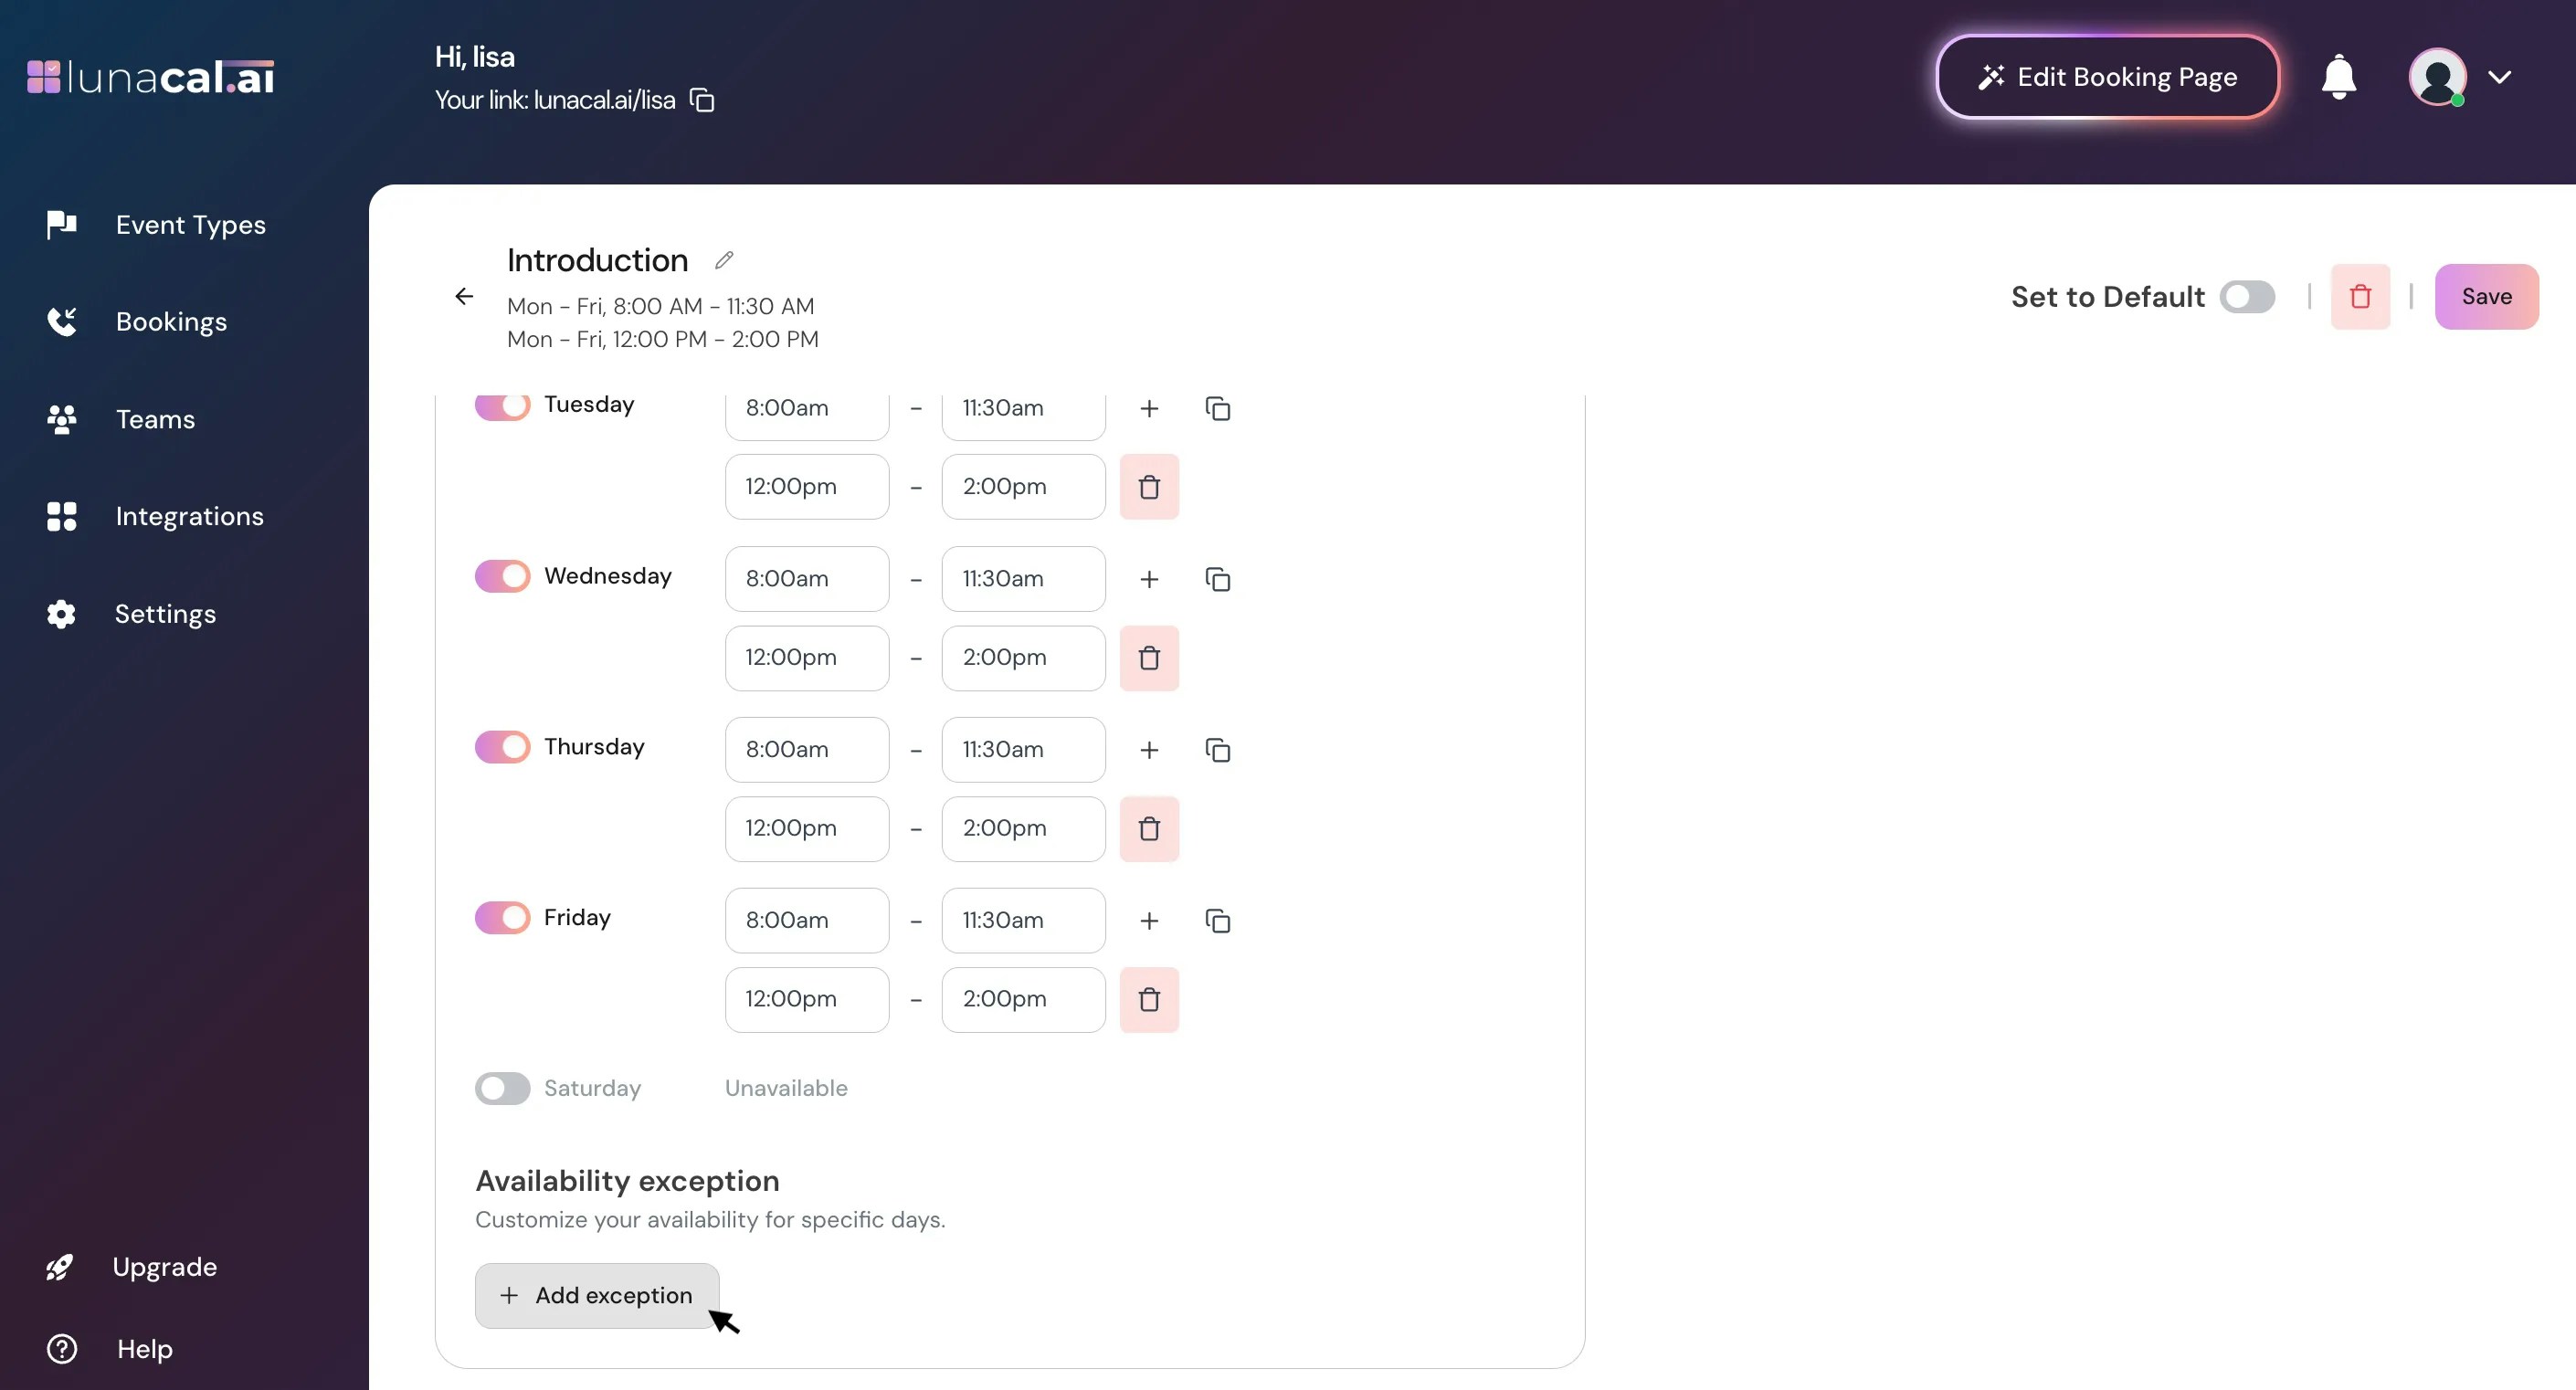
Step 8
A calendar view will appear where you can select specific dates and set the times you’re unavailable for that day.Example: If you’re unavailable the entire day, check the Mark Unavailable (All Day) option.
Step 10
Click “Save” to store your changes.
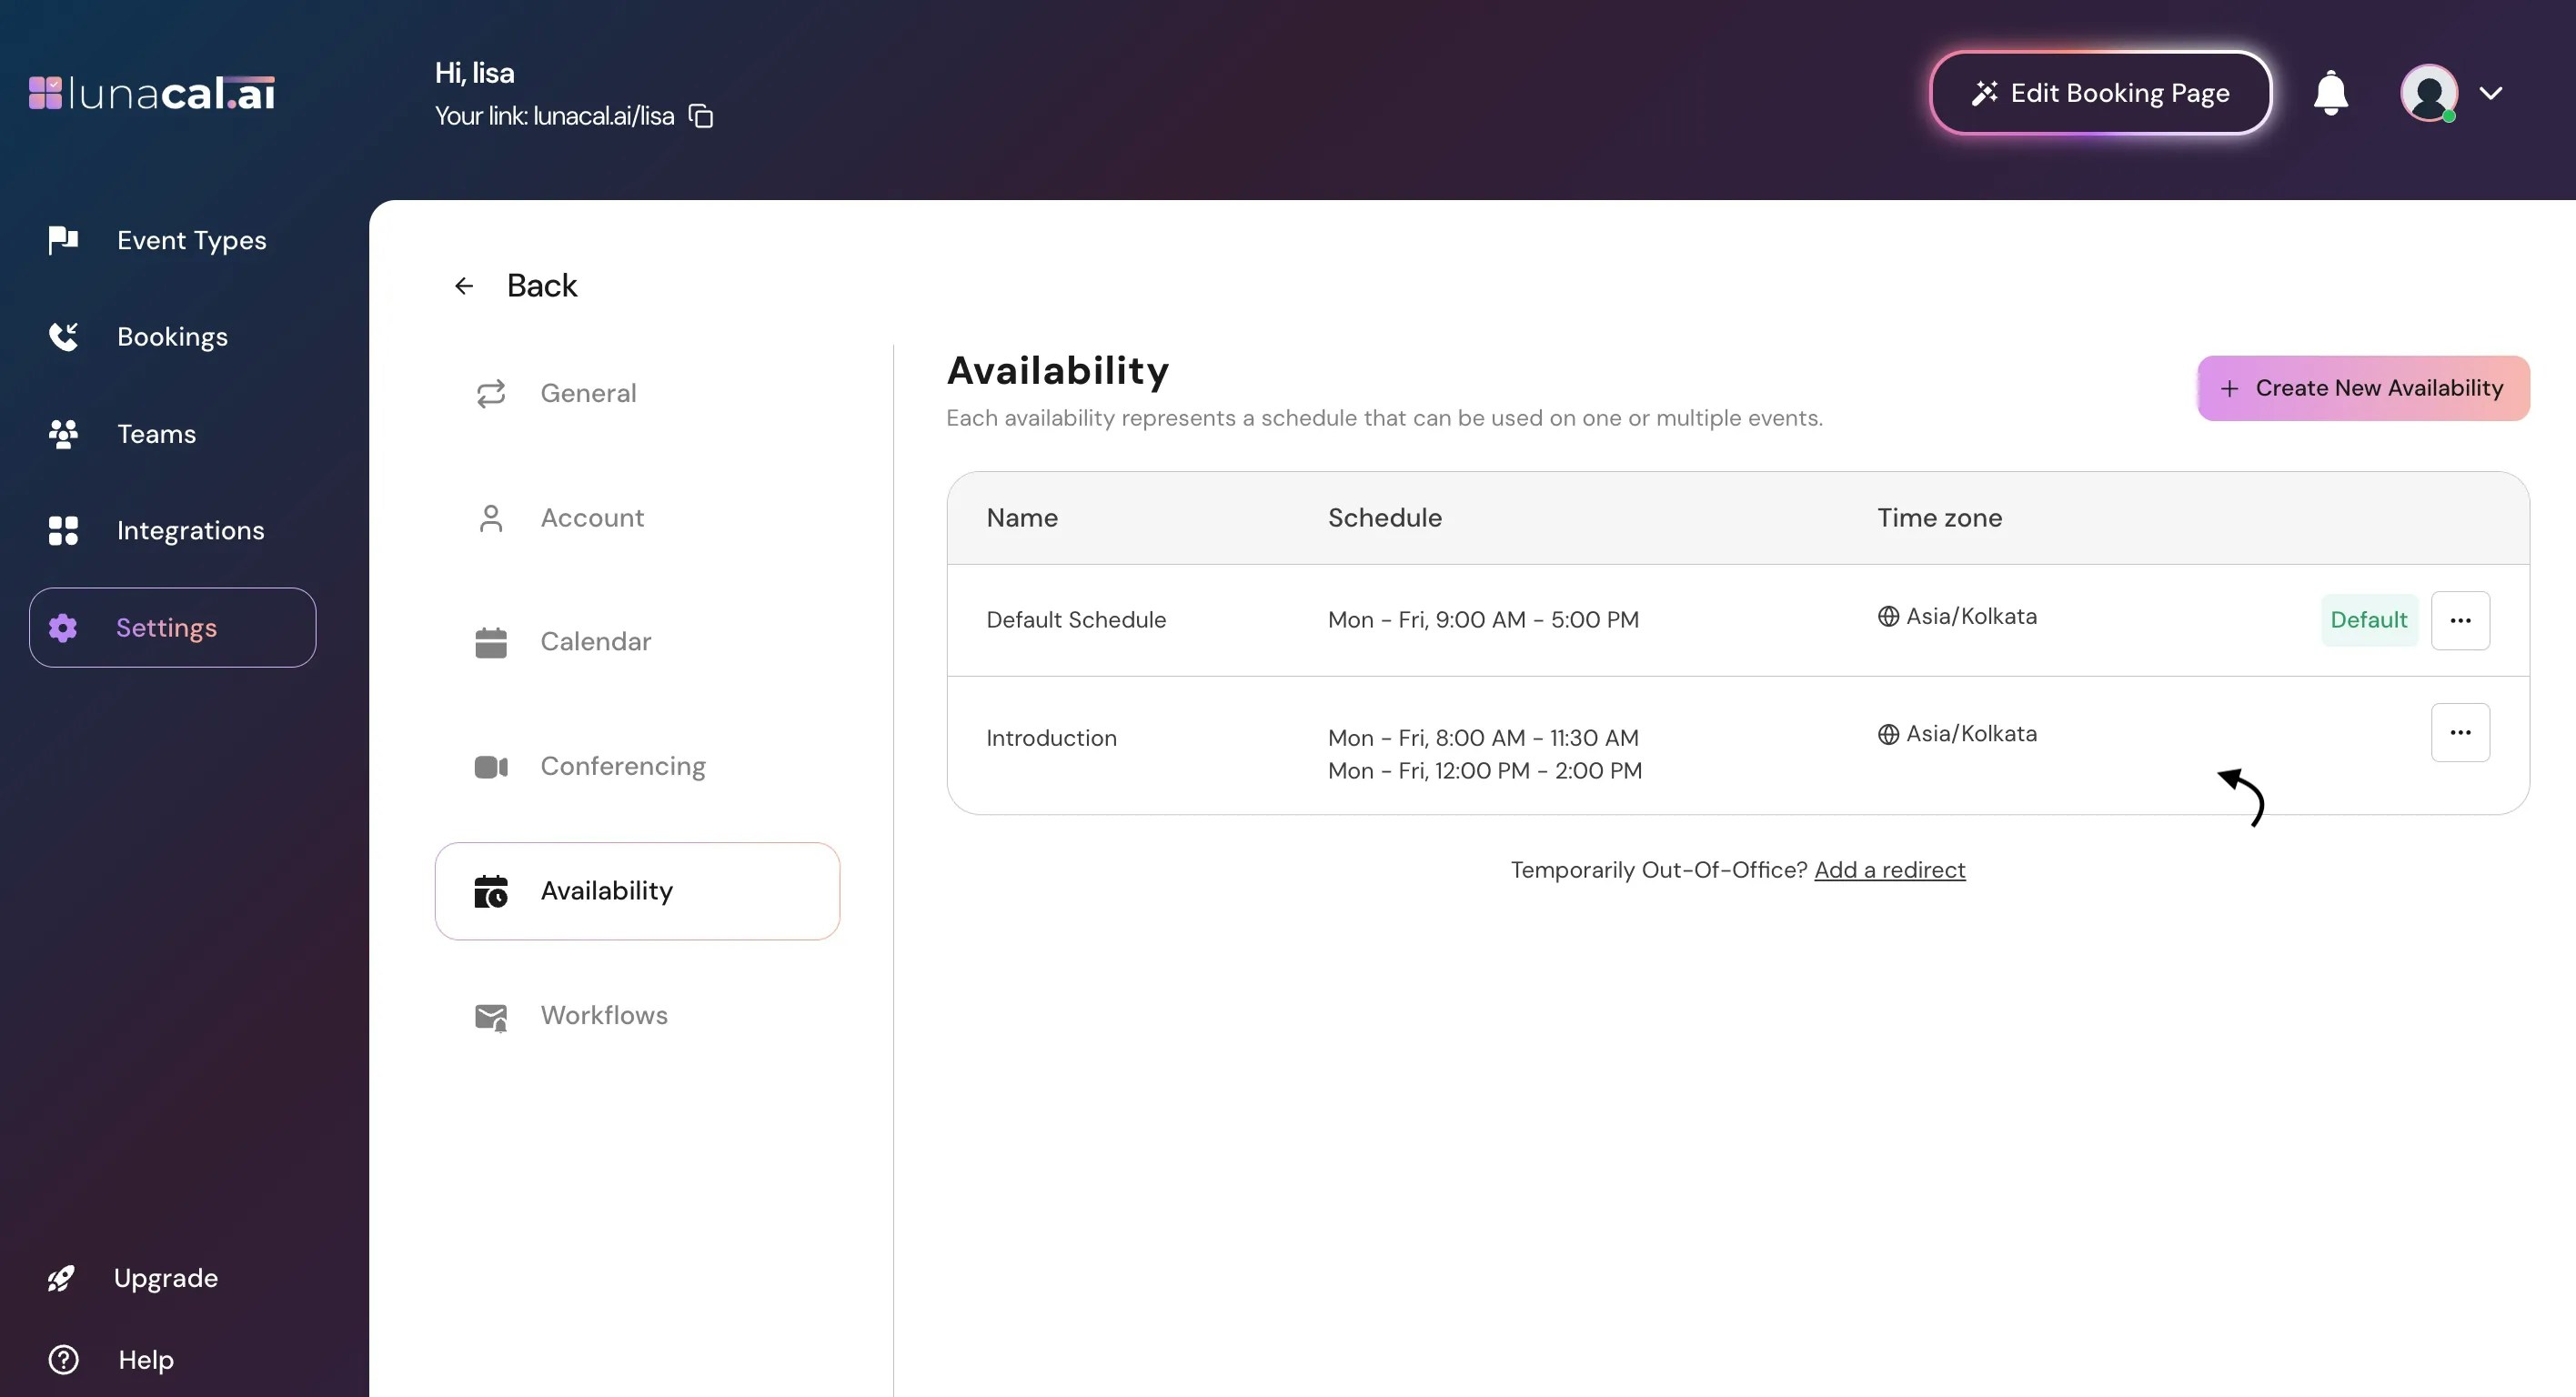
Step 11
Your availability configuration is now completed.On the Availability Dashboard, you’ll see all the availabilities you’ve set up.
Click the three dots (⋮) next to any availability to:
- Set as Default – Make it your default availability.
- Duplicate – Create a copy from an existing availability.
- Delete – Remove an availability you no longer need.
Step 12
You can also update availability settings directly from your Event Types.Go to the Event Types section, select the event you want, and adjust its availability as needed.
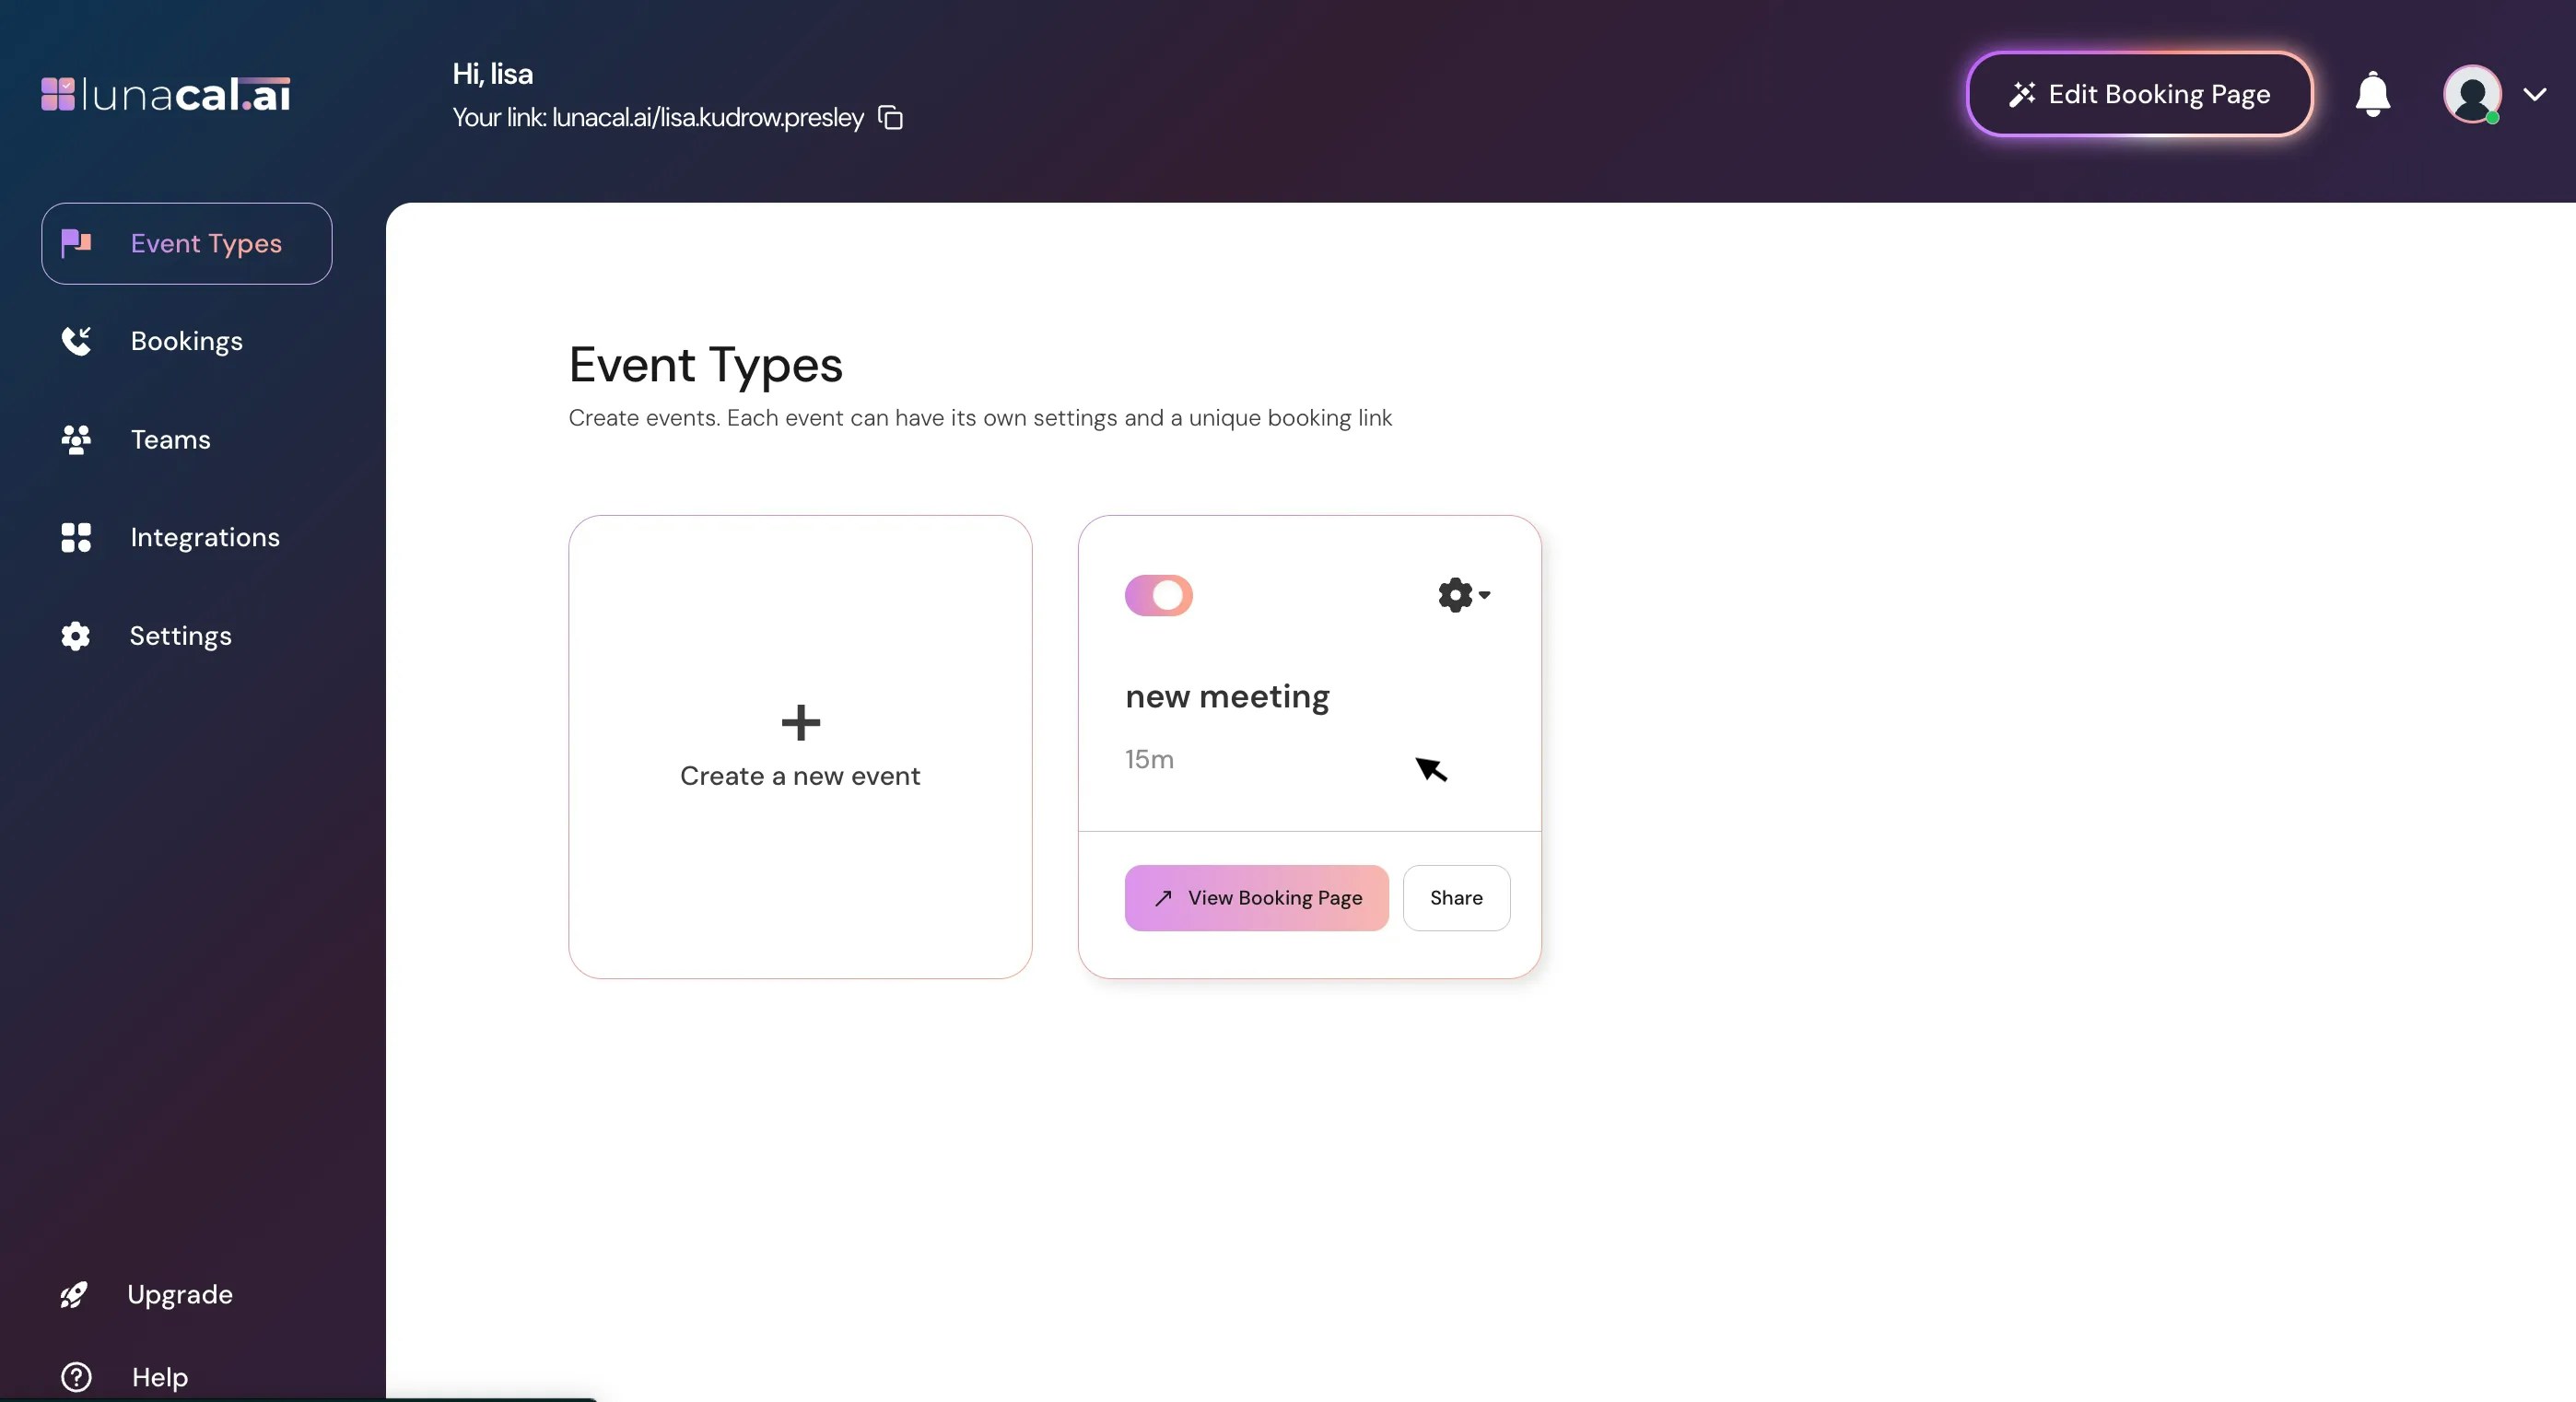
Step 13
Use the dropdown to select one of your saved availabilities — for example, “Introduction.”The selected availability will apply to the specific event type you’re configuring, so that event will follow the same working hours and rules.

Step 14
Review your settings and click “Save.”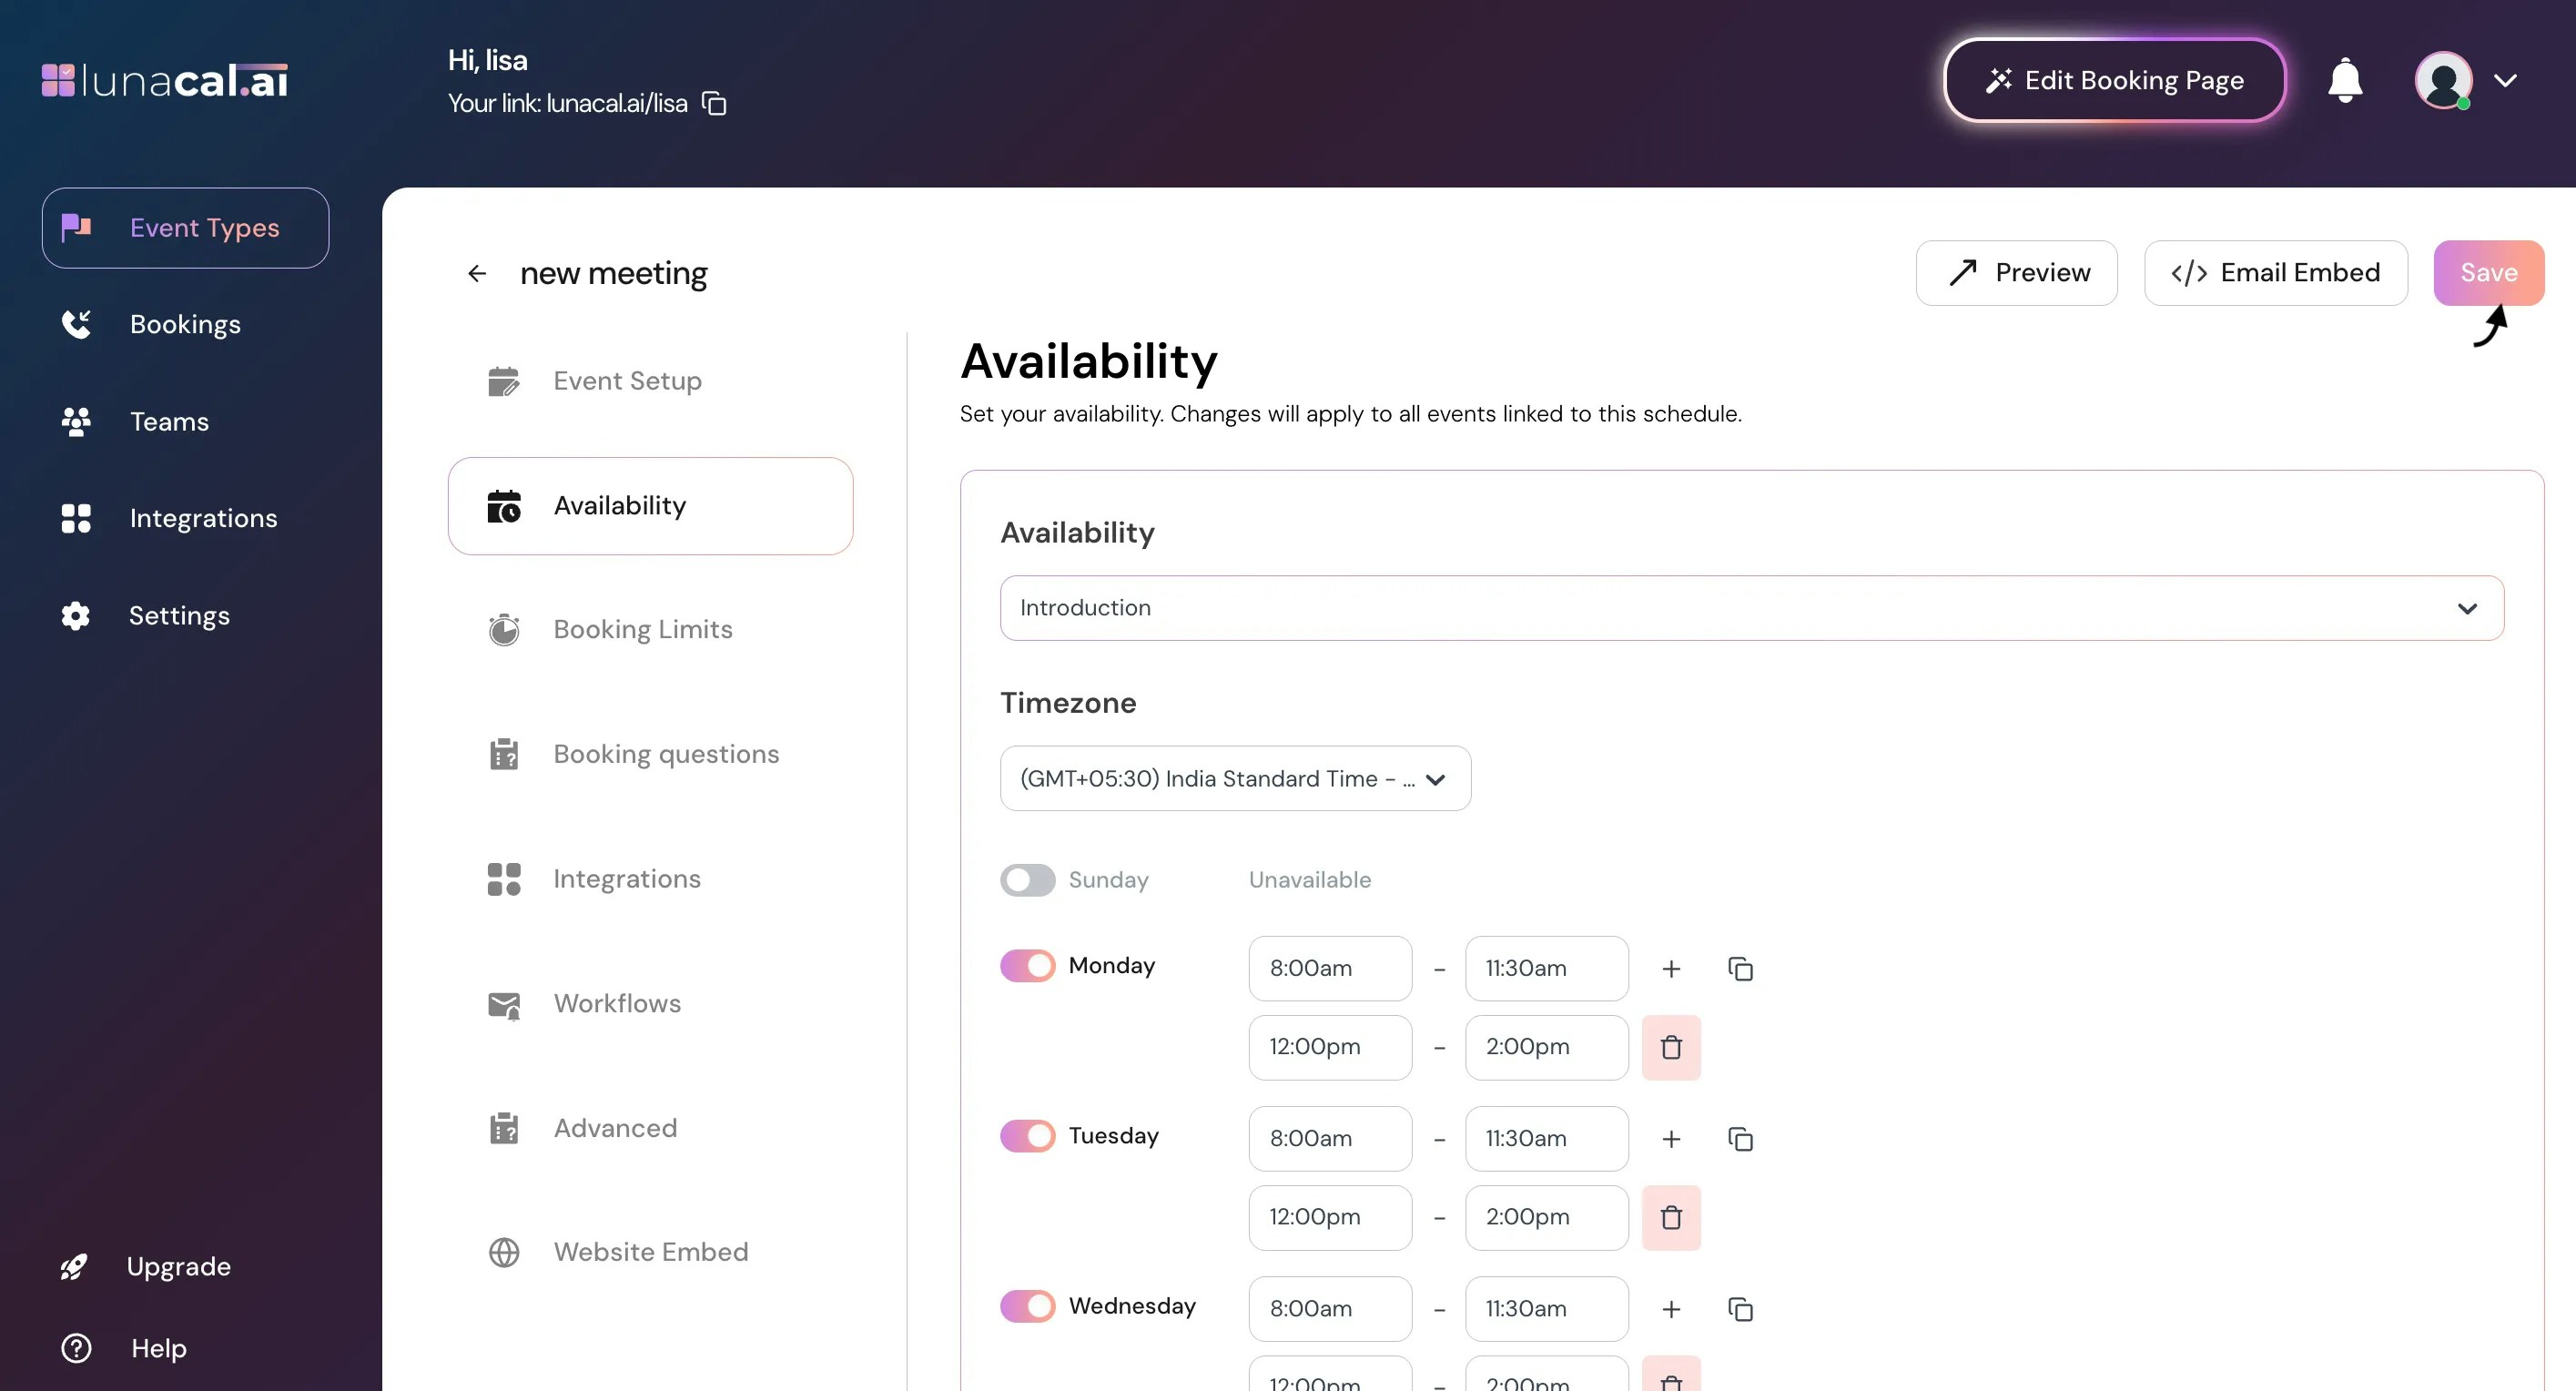
• Forgetting to click “Apply” before “Save”, which can discard your latest hour edits.
• Leaving a day toggled on with empty hours, which can hide availability or cause confusion.
• Forgetting to set an availability exception for holidays or one-off days off. If you skip this, attendees may still be able to book meetings on days you’re actually unavailable.
• Using “Mark Unavailable” on the wrong date when adding an exception.
• Not selecting your new availability in the event type dropdown, so the event still uses an old schedule. Good defaults to start with :
• Hours: 10:00 AM–6:00 PM, Mon–Fri; turn Sat–Sun off.
• Split day: add a 30-minute mid-day break to avoid back-to-backs.
• Exceptions: add known holidays and travel days for the next 60–90 days now.
• Event types: map “Introduction” to short meetings; use a separate availability for longer sessions.