Overview
lunacal allows you to accept payments using Stripe for paid events and bookings.The Stripe setup flow is almost identical to PayPal — the only difference is selecting Stripe as the payment method and entering your Stripe credentials. Once connected, attendees can pay securely using Stripe during booking.
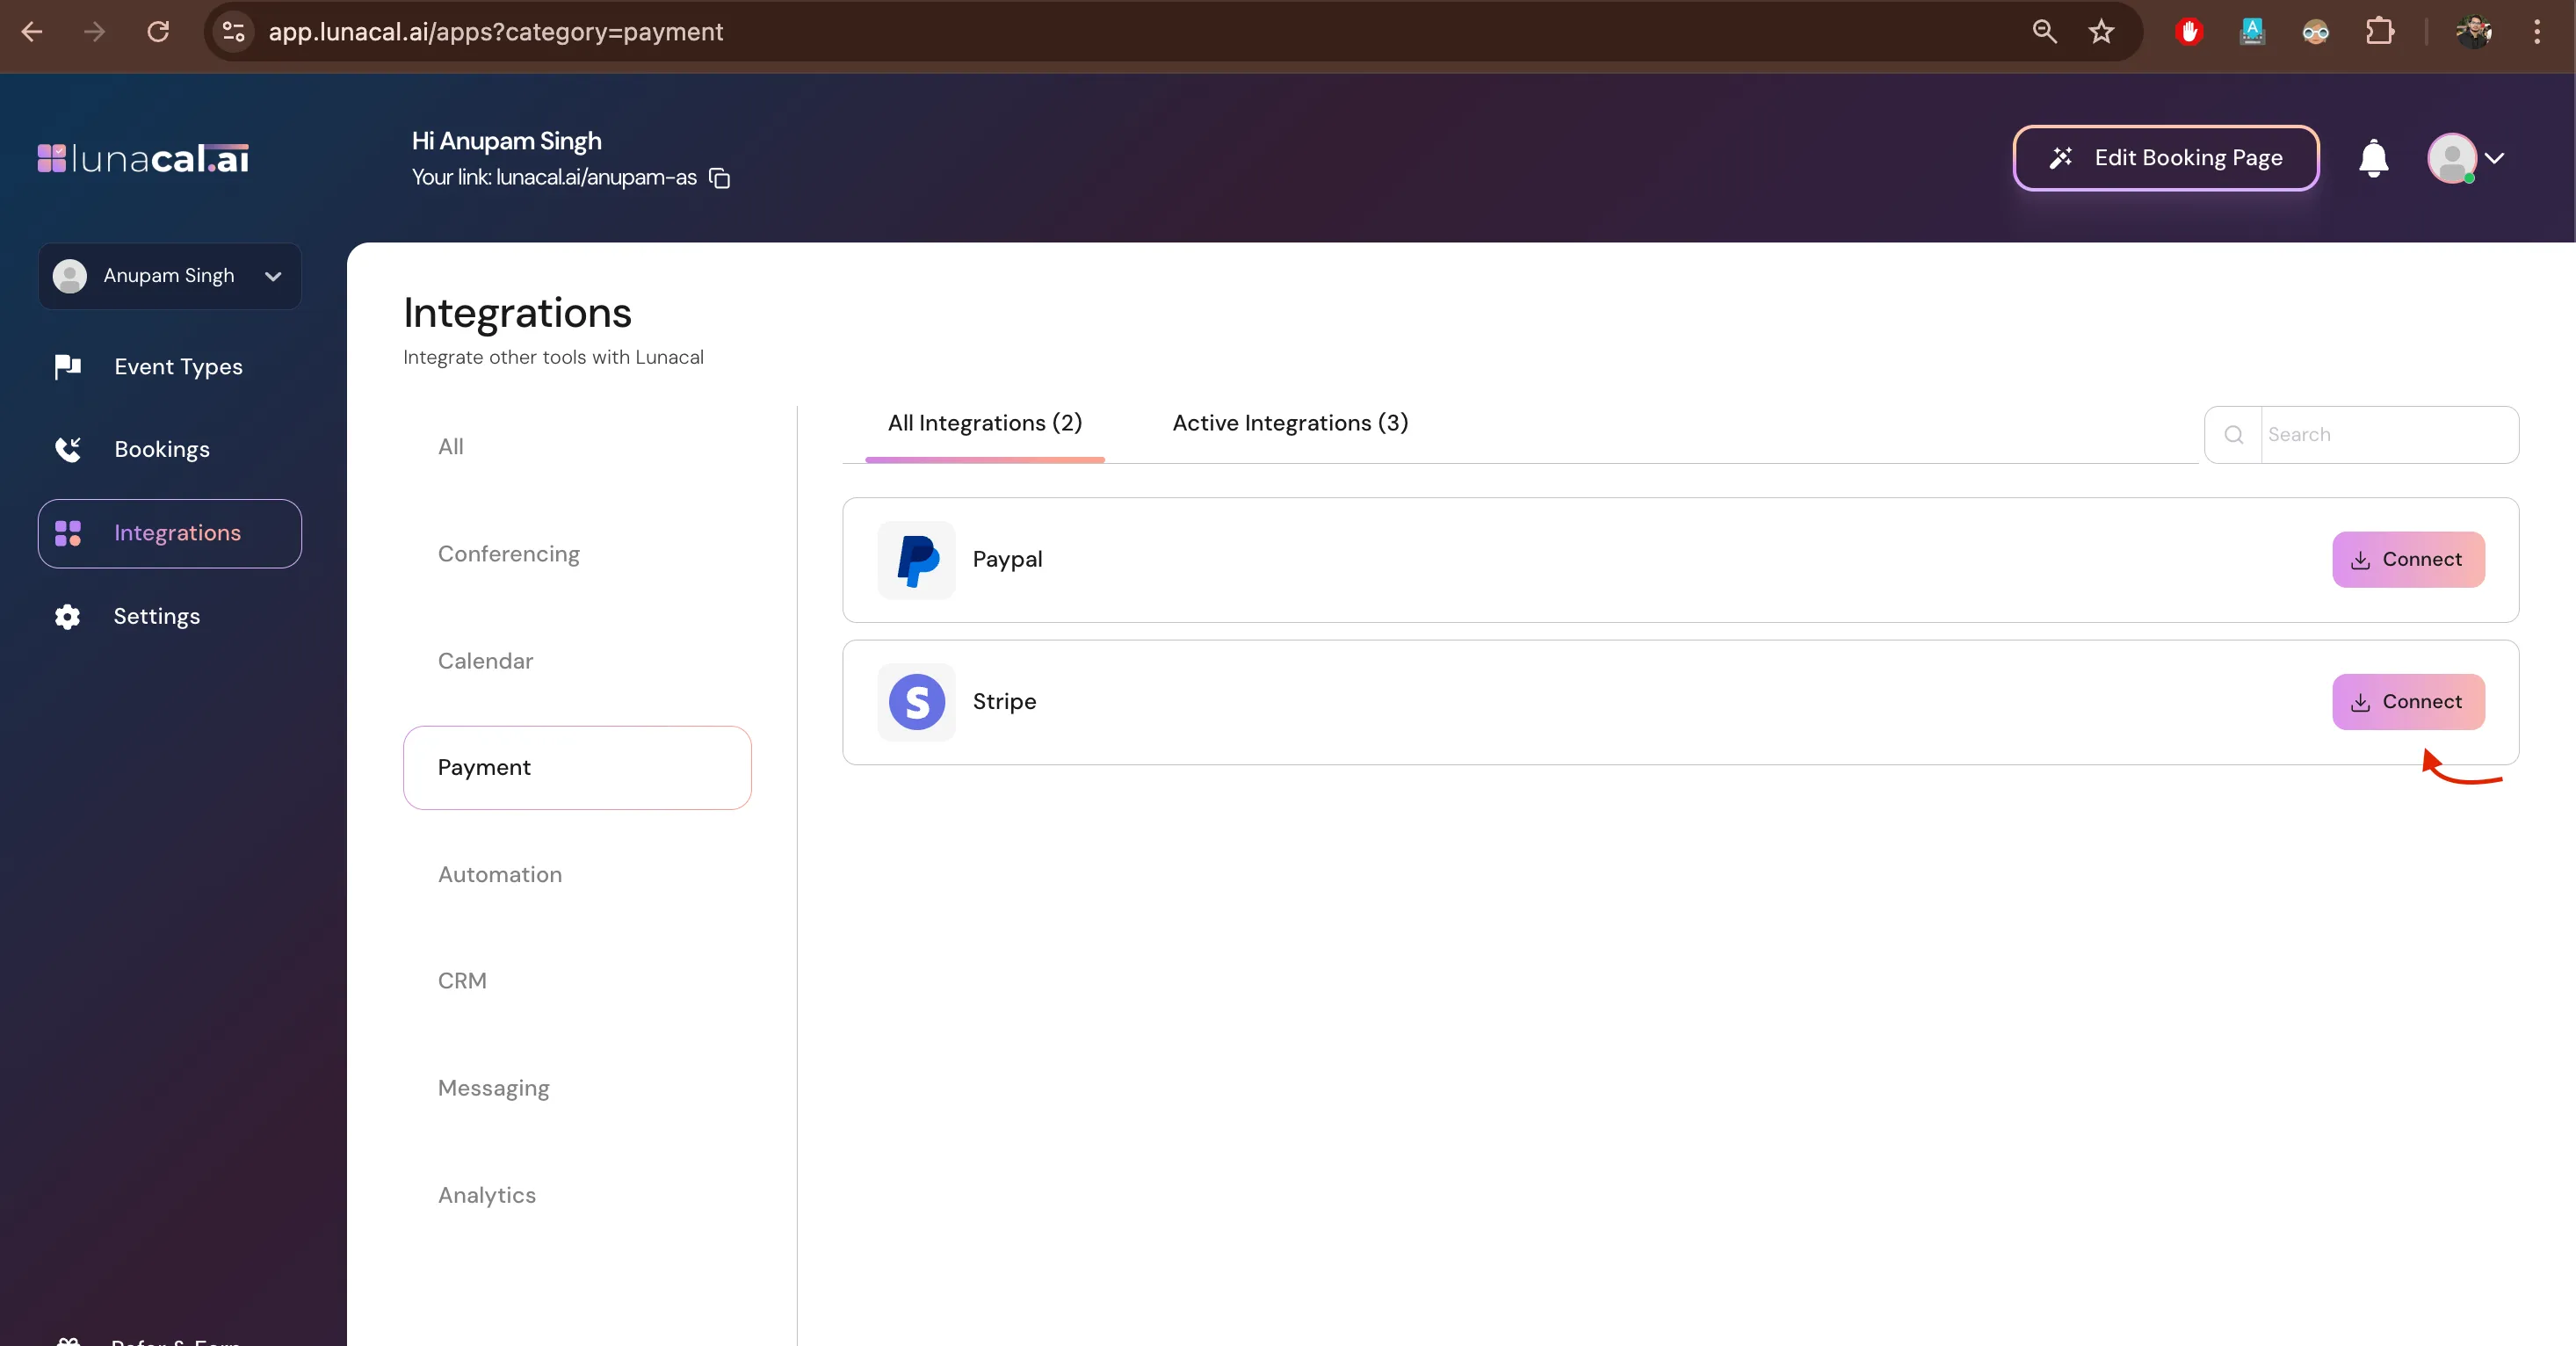
Step 1
- Go to Integrations → “Payment”, then click “connect” to start Stripe setup.
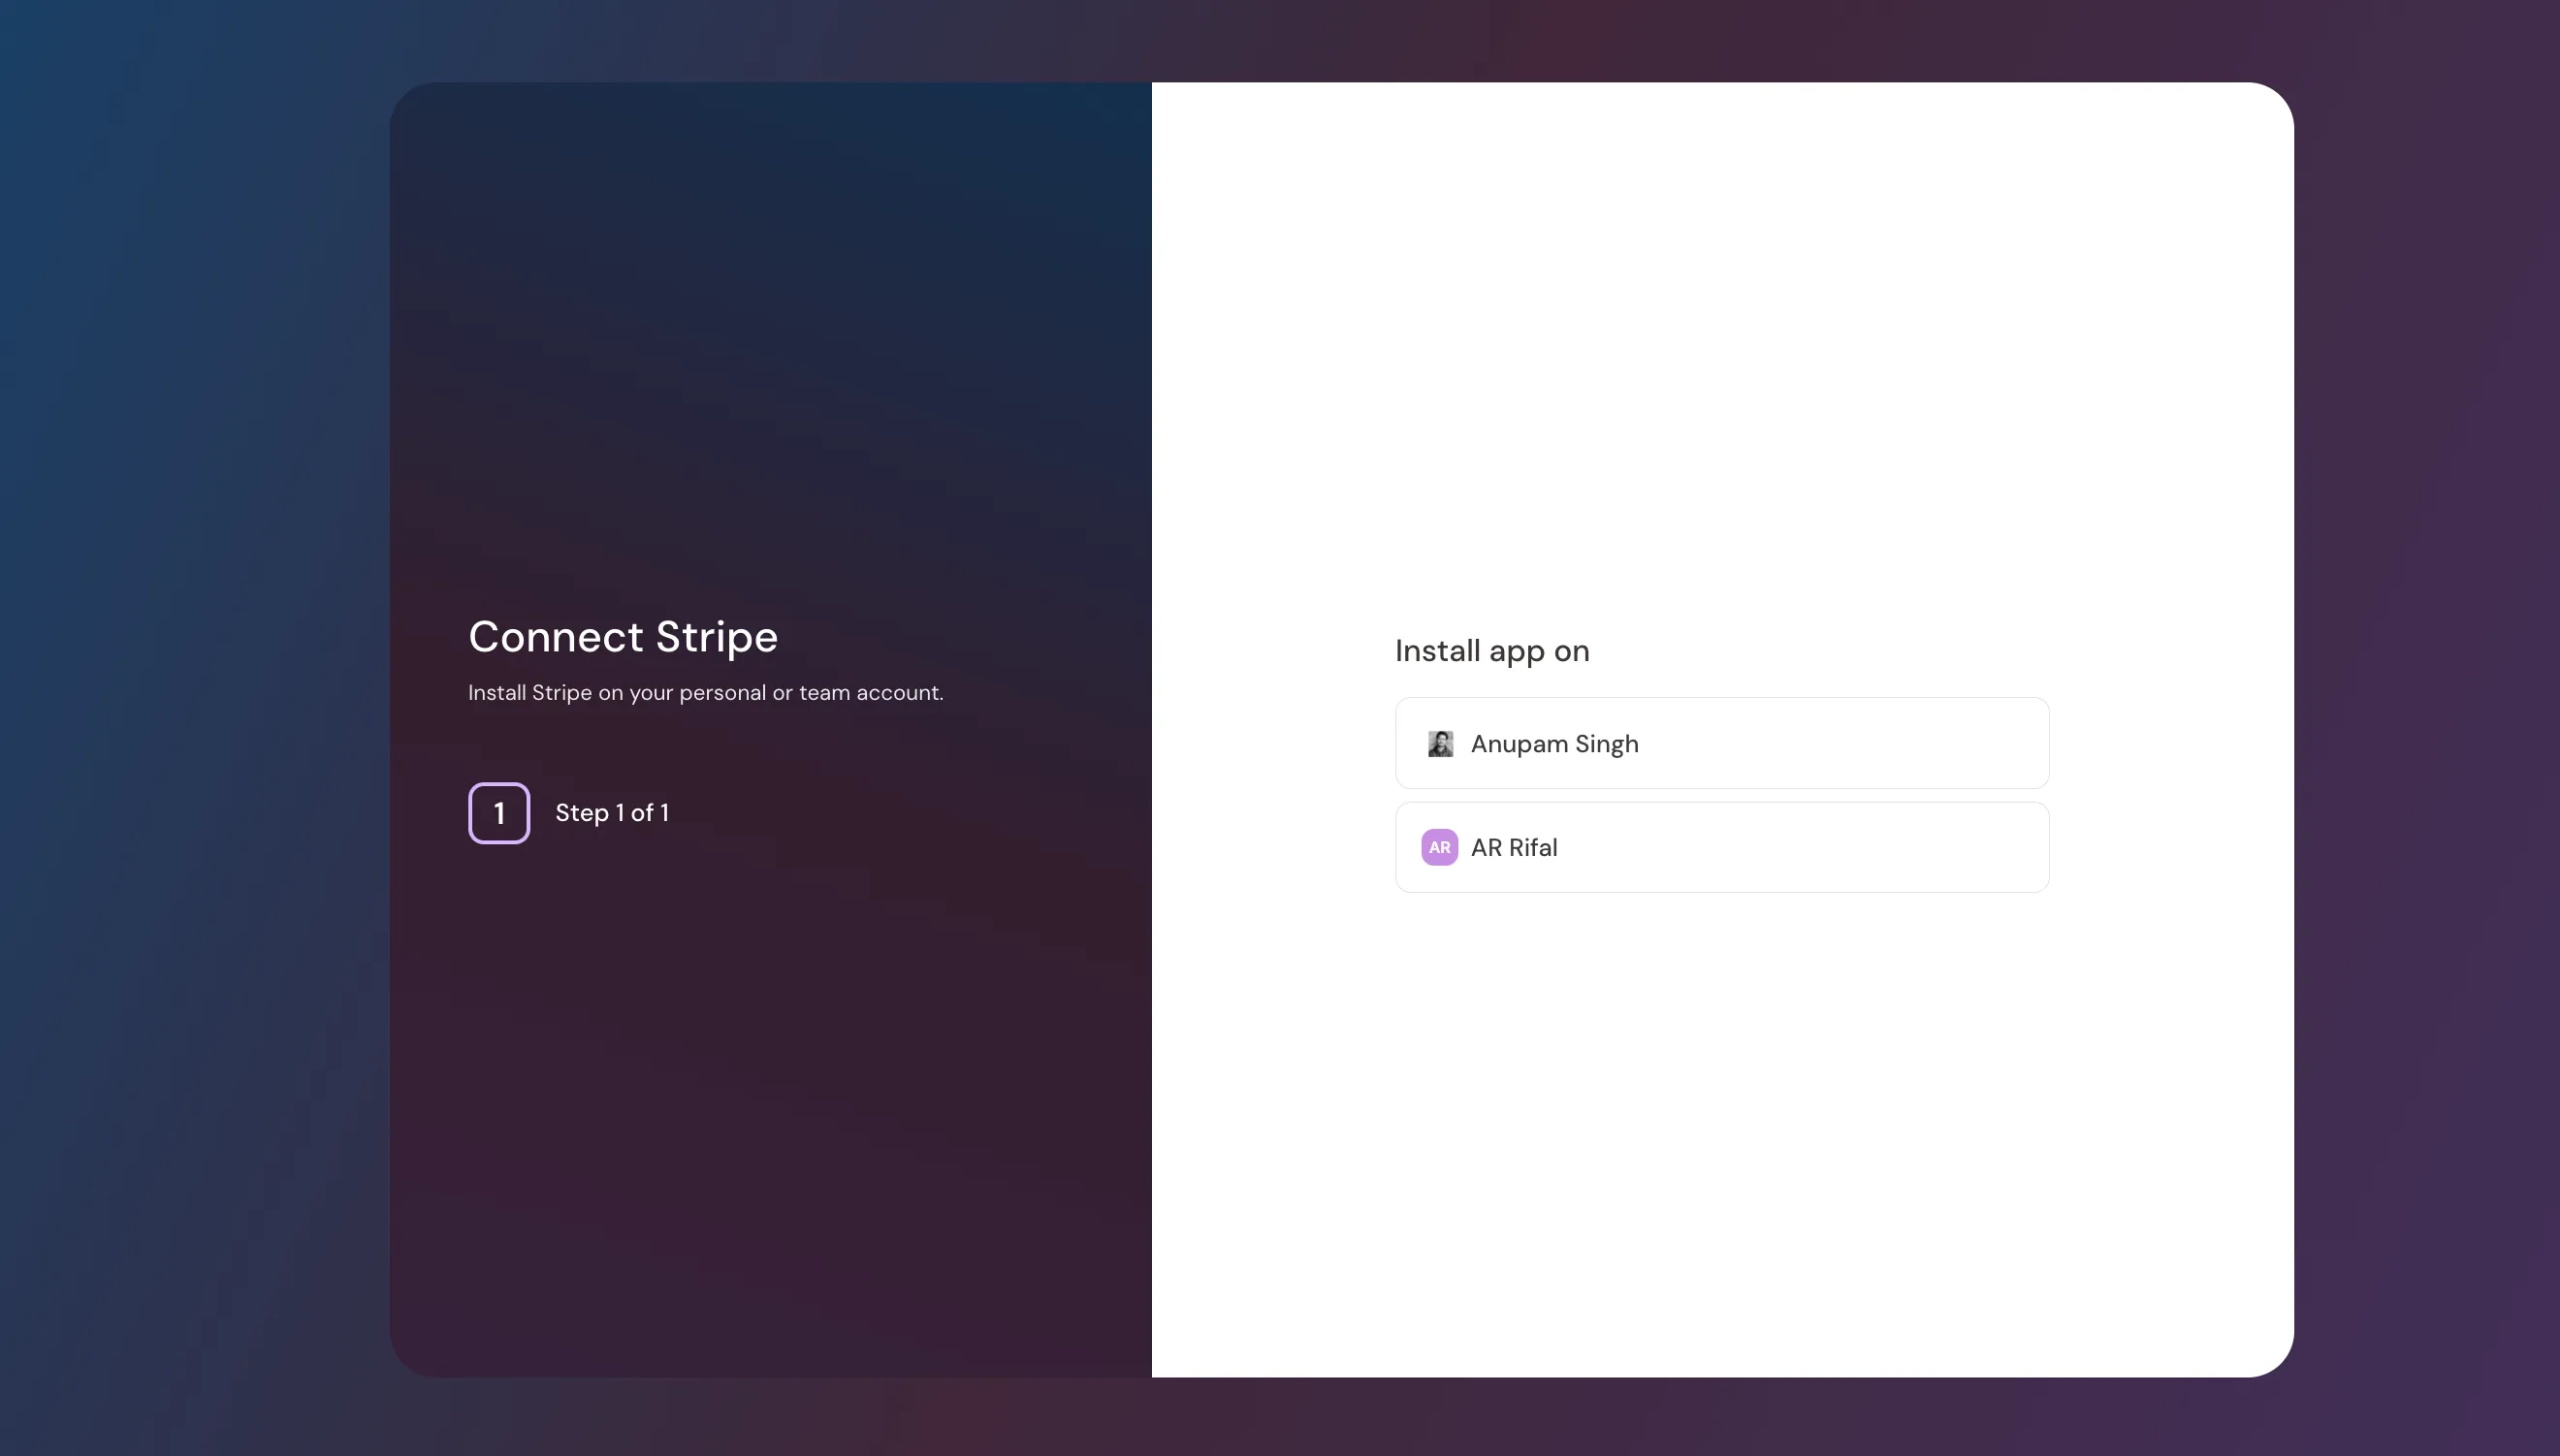
Step 2
- Choose where to install Stripe : a specific event or your teams.
Example: You run free intro calls but paid workshops. Install Stripe only on the “Workshop” event so intro calls stay free.
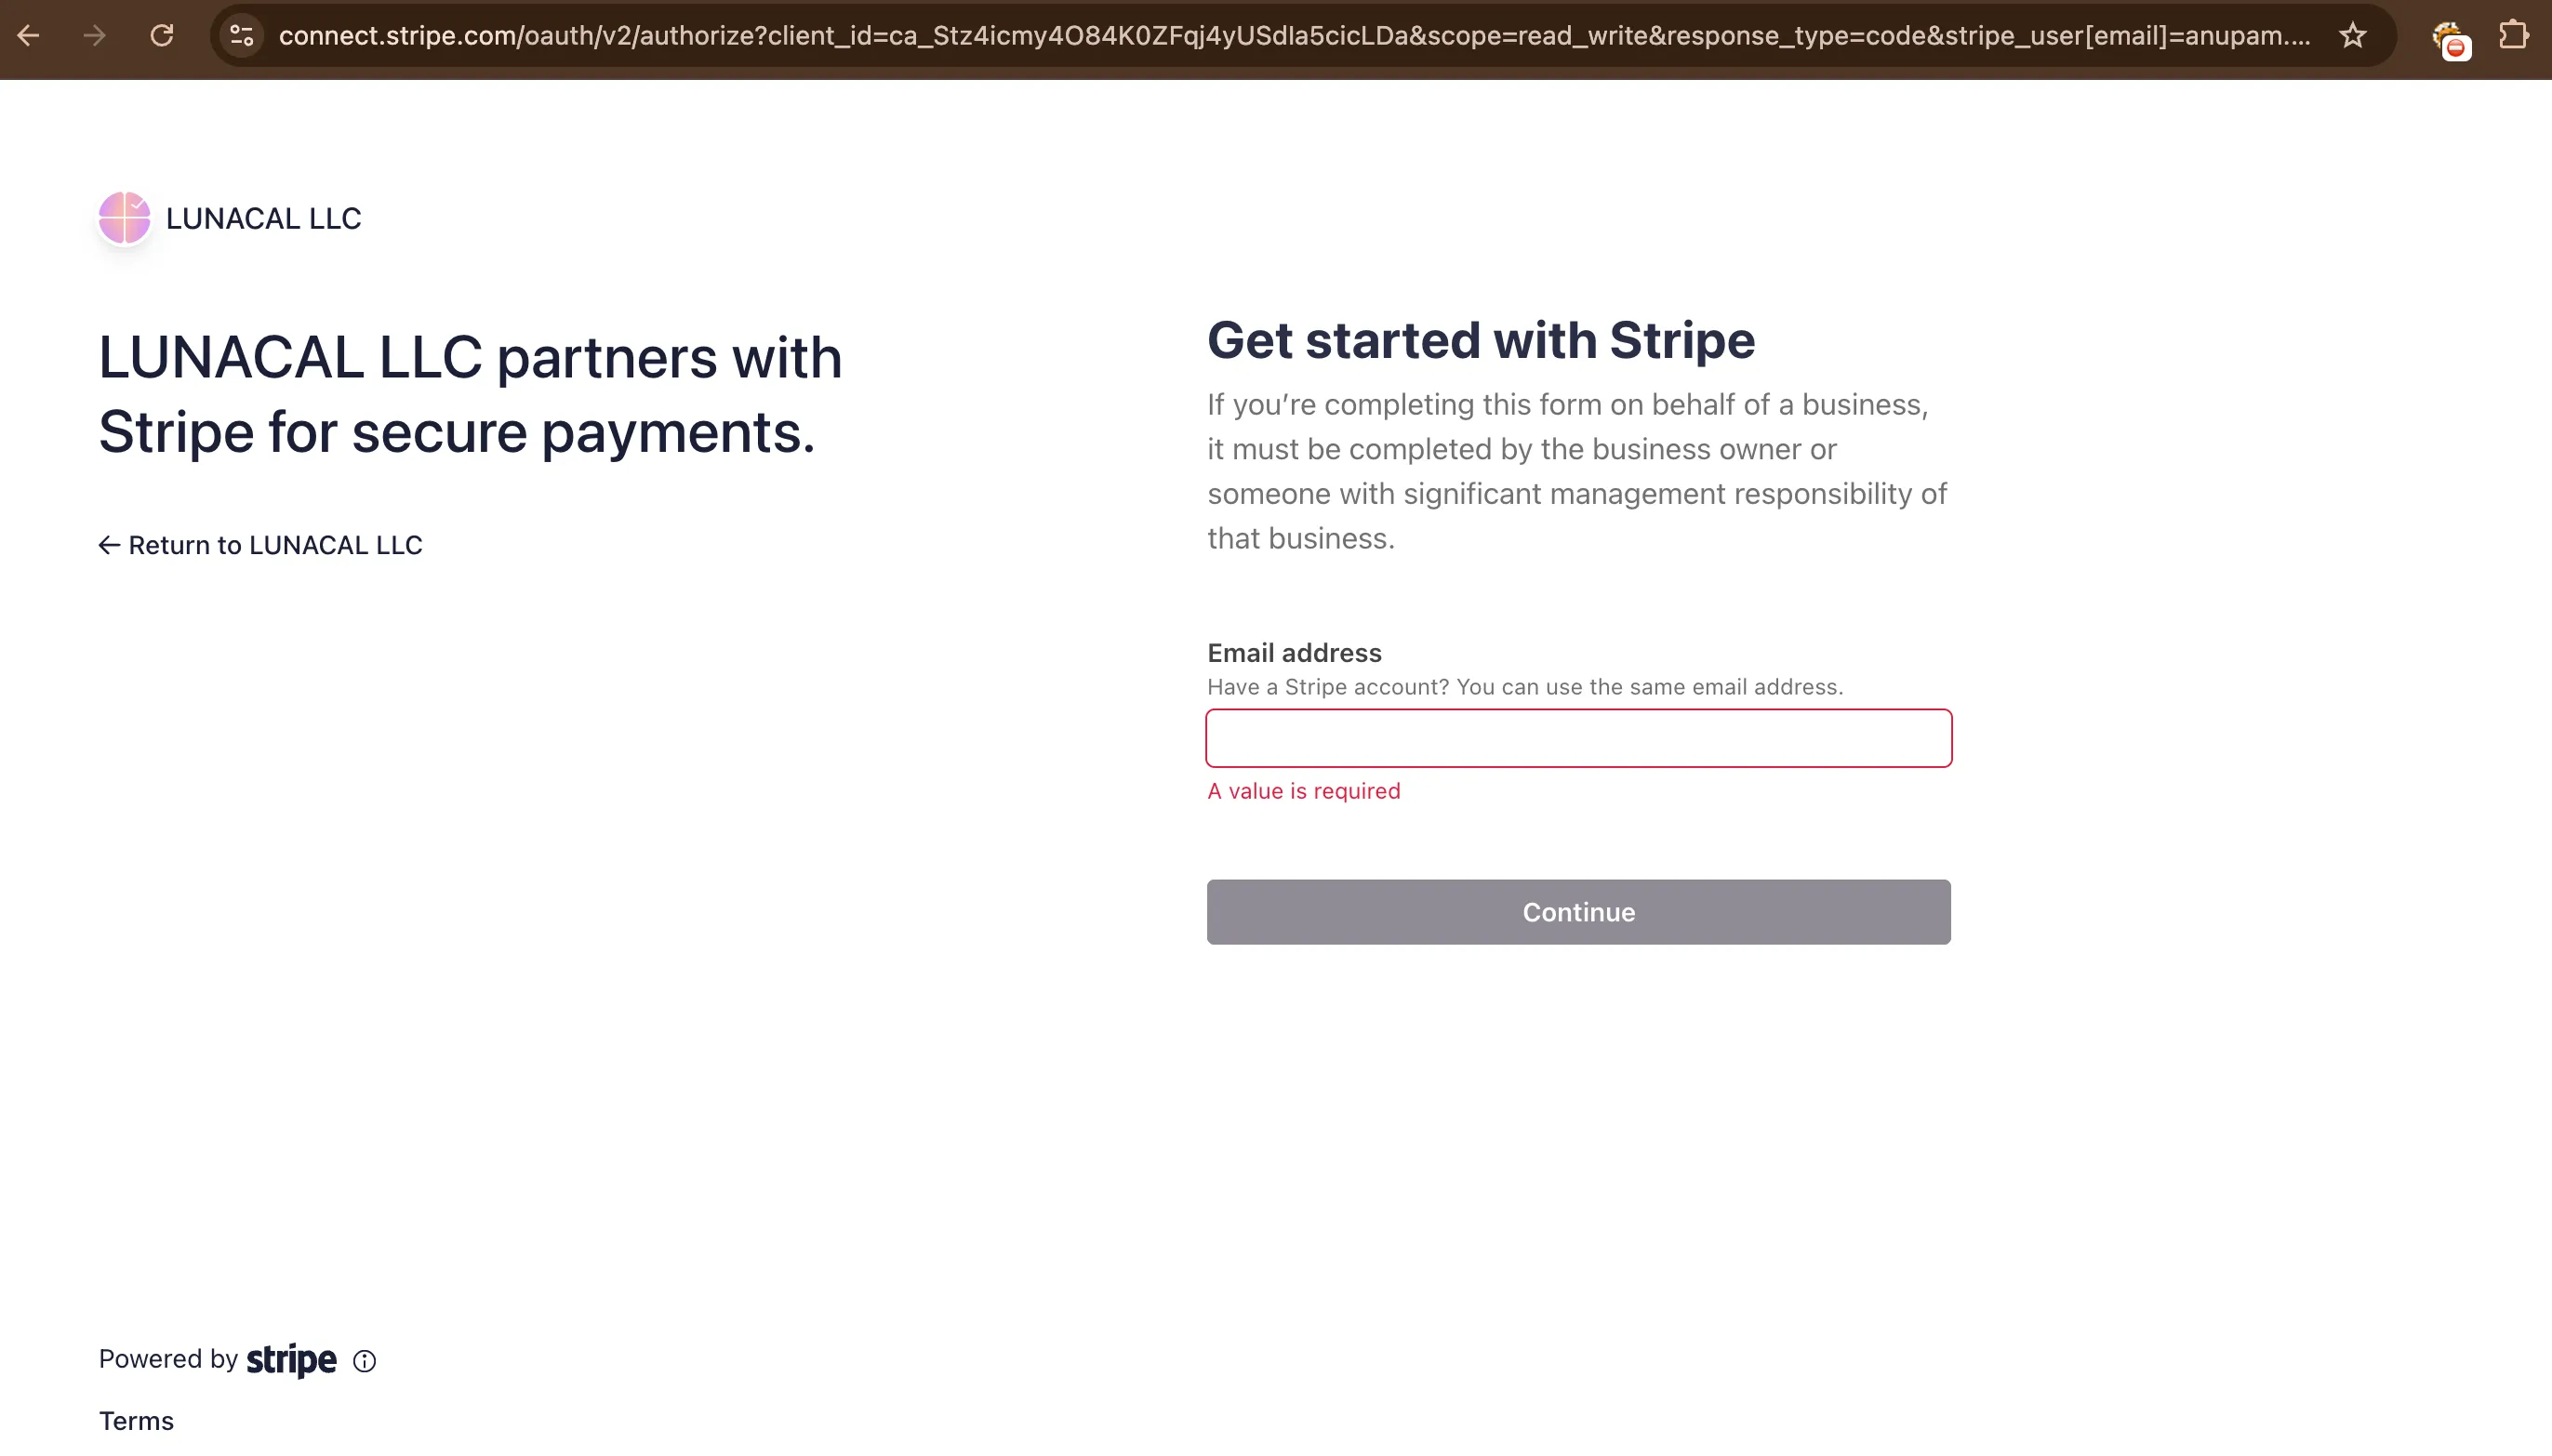
Step 3
- Enter your Stripe credentials
4. Enable Stripe for an Event
Choose Where Stripe Applies You can choose Stripe to specific events only This is useful if you want some events to remain free.
- Open the event you want to charge for
- Go to the Payments section
- Enable the payment toggle
- select stripe as payment method.
-
Set:
- Event price
- Currency
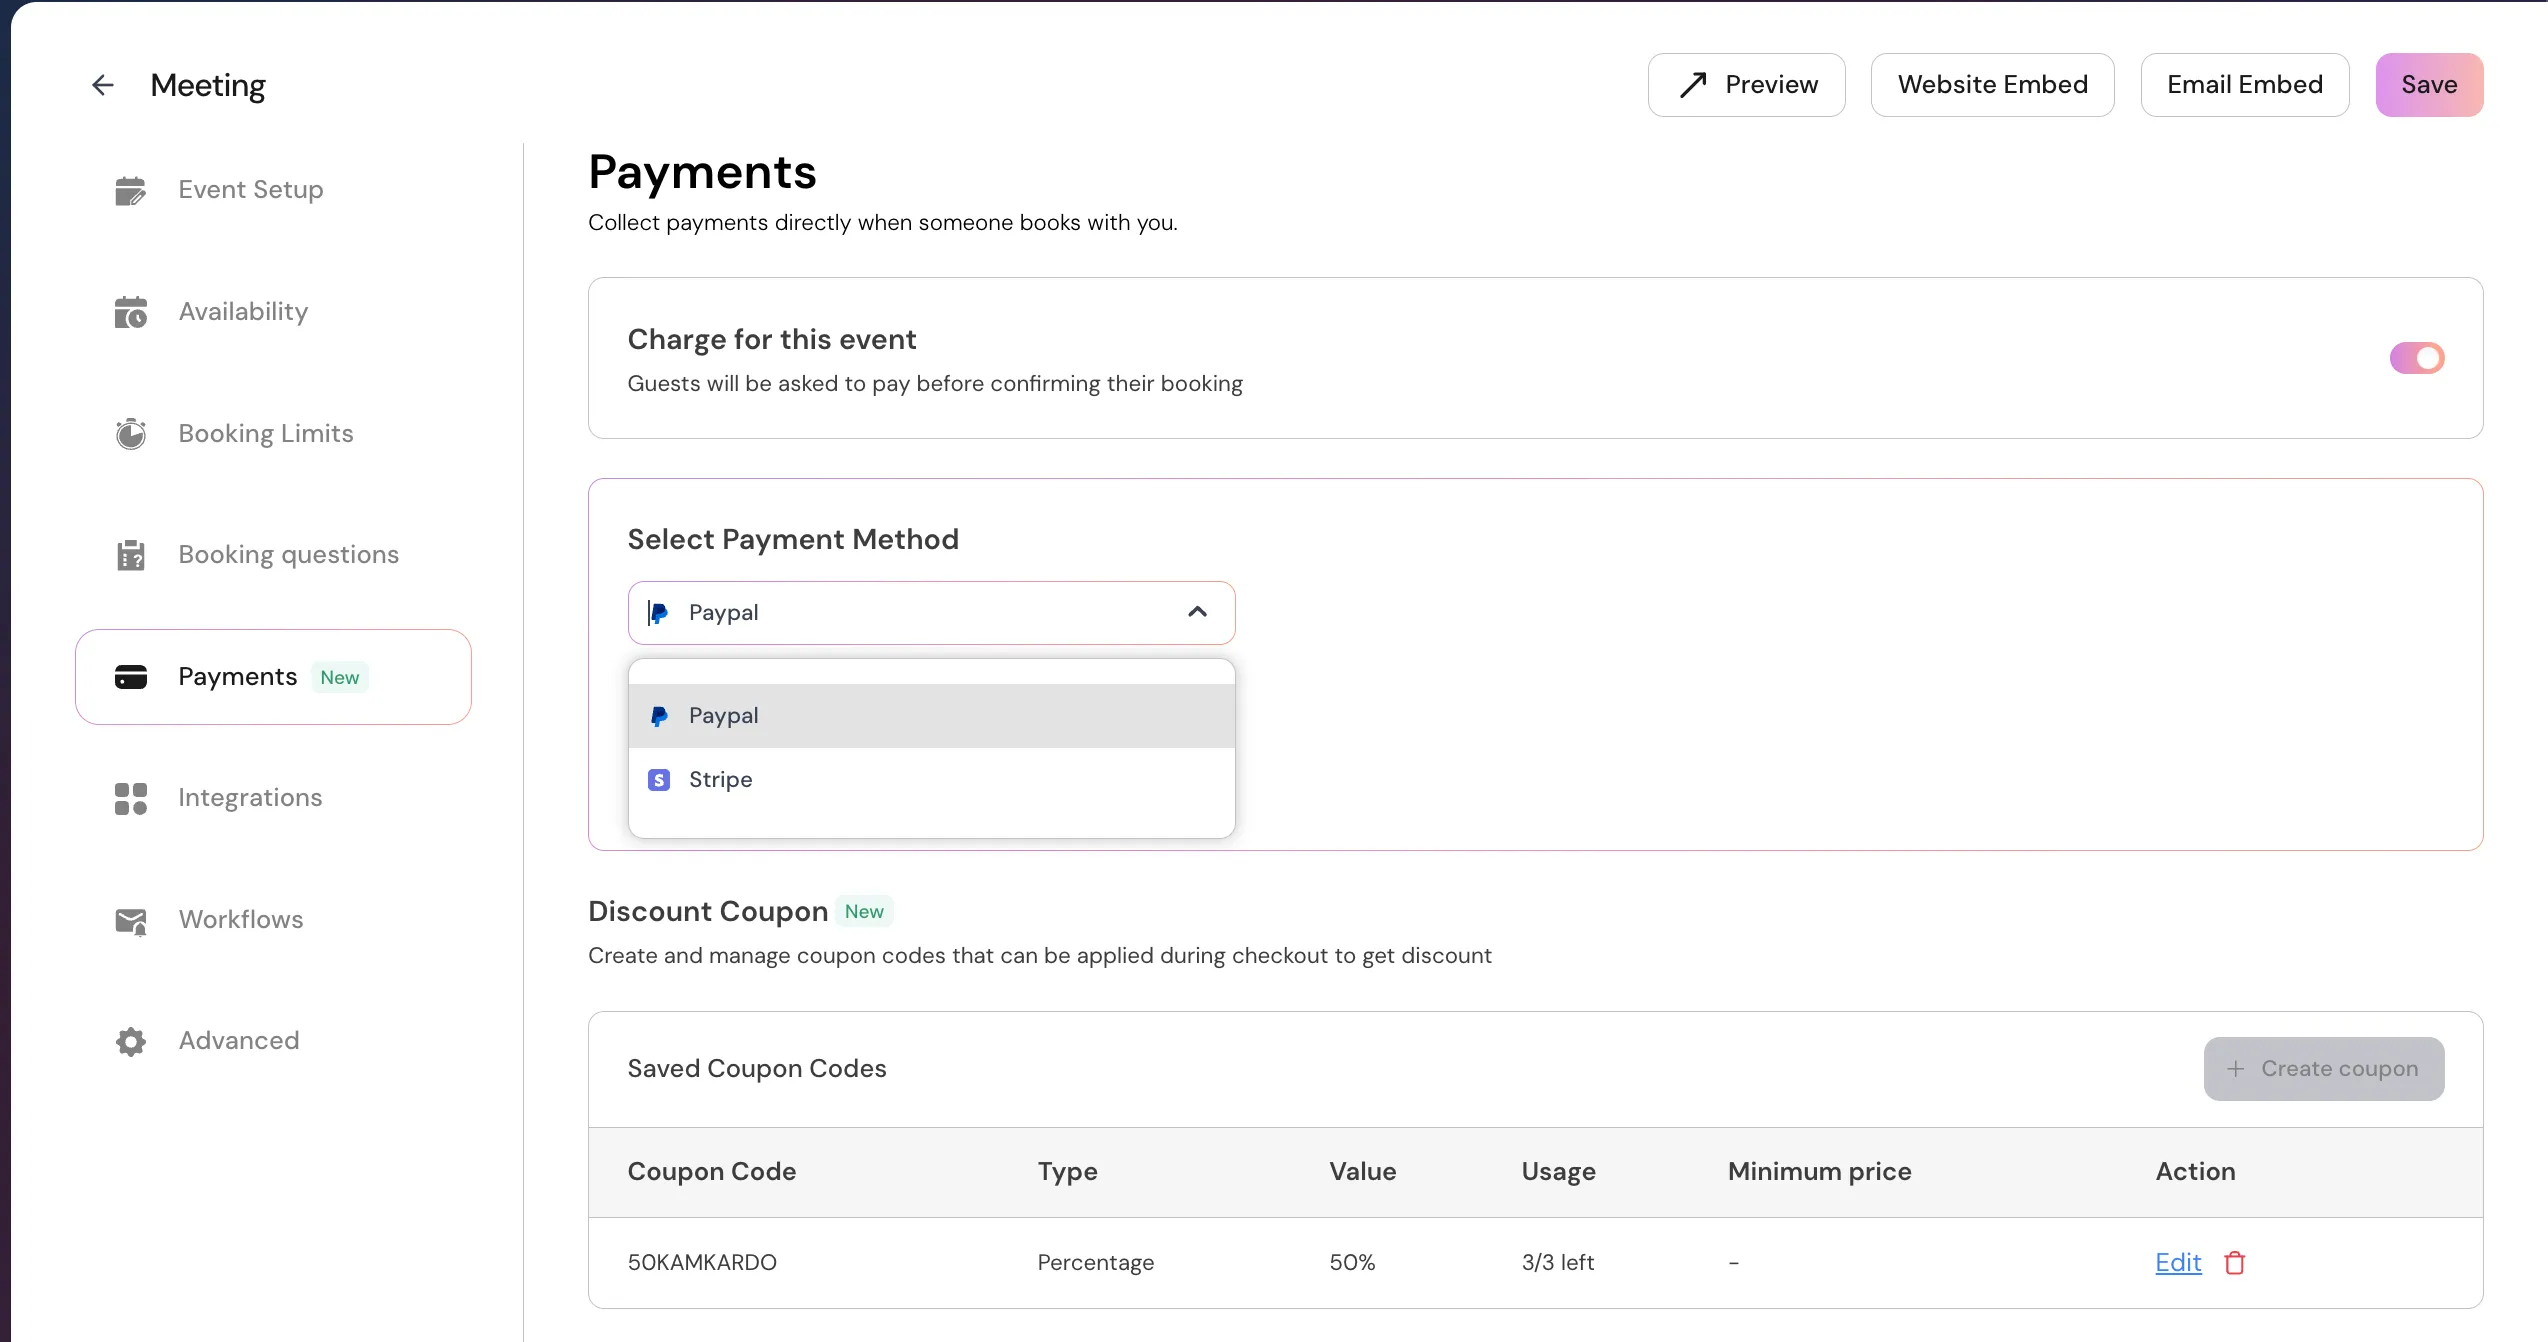
- Save the event
5. Confirm Your Setup
Once enabled:- Your booking page will display the price
- Attendees will be asked to pay via Stripe before confirming the booking
Common Issues & Tips
- Make sure you selected Stripe (not PayPal) in the payment dropdown
- Double-check your Stripe keys if payments fail
- Don’t forget to enable Stripe inside the event, even after connecting it
- Test the flow by making a test booking before sharing the link
What’s Next?
After setting up Stripe, you can:- Combine Stripe with coupons
- Use it with package bookings
- Enable payments for team or individual events